
Dairy-Free, Gluten-Free Pancakes (Flapjacks)
The first time I ever attempted pancakes on my own, armed with a hand-me-down griddle and a box of store-bought mix, the results were… less than stellar. They were dense, rubbery, and tasted vaguely of cardboard. Discouraged, I almost gave up entirely. But the yearning for fluffy, golden pancakes persisted, eventually leading me on a quest to master the art of the flapjack. This recipe is the culmination of that journey, a dairy-free and gluten-free version that delivers all the classic pancake flavor and texture without any of the compromises.
Recipe Overview
- Prep Time: 5 minutes
- Cook Time: 20 minutes
- Total Time: 25 minutes
- Servings: 4
- Yields: Approximately 12 pancakes
- Dietary Type: Dairy-Free, Gluten-Free
Ingredients
- 2 eggs
- ¼ cup agave nectar
- 1 tablespoon vanilla extract
- ½ cup water
- 1 ½ cups blanched almond flour
- ½ teaspoon celtic sea salt
- ½ teaspoon baking soda
- Grapeseed oil, for sauteing
Equipment Needed
- Blender
- Large skillet or griddle
- Spatula
- Measuring cups and spoons
Instructions
- Begin by combining the wet ingredients. In a blender, add the eggs, agave nectar, vanilla extract, and water.
- Blend these ingredients on high speed until the mixture is completely smooth and emulsified. This step is crucial for ensuring a consistent batter.
- Introduce the dry ingredients. To the blender, add the blanched almond flour, celtic sea salt, and baking soda.
- Blend again until all the dry ingredients are fully incorporated into the wet mixture. Be careful not to over-blend, as this can make the pancakes tough. Just blend until everything is combined.
- Prepare your skillet or griddle. Warm a small amount of grapeseed oil in a large skillet or on a griddle over medium heat. The pan should be hot enough that a drop of water sizzles and evaporates quickly, but not so hot that the oil smokes.
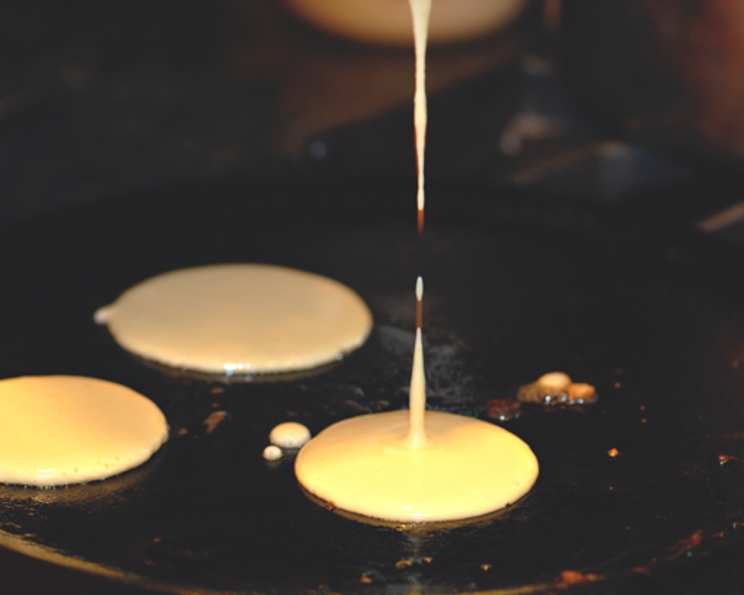
- Pour the pancake batter. Once the skillet is properly heated, pour approximately ¼ cup of pancake batter onto the skillet for each pancake. Leave enough space between pancakes so they don’t run together.
- Cook the first side. As the pancakes cook, small bubbles will begin to form on the surface. Once these bubbles start to open and the edges of the pancakes appear set, it’s time to flip them. This usually takes about 2-3 minutes per side, but cooking times can vary.
- Flip and cook the second side. Gently flip the pancakes over using a spatula. Cook the other side for another 2-3 minutes, or until golden brown and cooked through.
- Remove from heat and serve. Once the pancakes are cooked through, remove them from the skillet and place them on a plate.
- Repeat the process. Repeat the process with the remaining batter, adding more grapeseed oil to the skillet as needed to prevent sticking. It’s important to maintain a consistent heat level throughout the cooking process. You may need to adjust the heat slightly as you go.
Expert Tips & Tricks
- For extra fluffy pancakes: Let the batter rest for 5-10 minutes before cooking. This allows the almond flour to fully absorb the liquid, resulting in a lighter texture.
- Achieve even browning: Ensure your skillet is evenly heated before adding the batter. A hot spot can cause some areas to brown too quickly while others remain pale.
- Prevent sticking: Use a high-quality non-stick skillet or griddle, or be generous with the grapeseed oil.
- Add some flavor: Consider adding a pinch of cinnamon, nutmeg, or lemon zest to the batter for extra flavor.
- Make ahead: Cook the pancakes in advance and store them in the refrigerator. Reheat them in a toaster, microwave, or oven before serving.
- Thickening the Batter: If your batter seems too runny, add a tablespoon of almond flour at a time until desired consistency is reached.
- Keeping Warm: To keep cooked pancakes warm while cooking the remaining batter, place them on a baking sheet in a preheated oven at 200°F.
- Don’t overmix: Overmixing the batter will result in tough pancakes. Mix until just combined. It’s okay if there are a few lumps.
Serving & Storage Suggestions
Serve these dairy-free, gluten-free pancakes warm with your favorite toppings. Some excellent choices include fresh fruit (berries, bananas, sliced peaches), maple syrup, agave nectar, chocolate chips (dairy-free, of course!), chopped nuts, or a dollop of dairy-free whipped cream.
Leftover pancakes can be stored in an airtight container in the refrigerator for up to 3 days. To reheat, microwave for 20-30 seconds per pancake, toast them lightly, or warm them in a skillet over medium heat. For longer storage, you can freeze the pancakes. Place them in a single layer on a baking sheet, freeze for 1-2 hours, and then transfer them to a freezer-safe bag or container. Frozen pancakes can be stored for up to 2 months. Reheat them directly from frozen in a toaster or oven.
Nutritional Information
| Nutrient | Amount per Serving | % Daily Value |
|---|---|---|
| Calories | 280 kcal | 14% |
| Total Fat | 18g | 28% |
| Saturated Fat | 1.5g | 8% |
| Cholesterol | 110mg | 37% |
| Sodium | 300mg | 13% |
| Total Carbohydrate | 18g | 6% |
| Dietary Fiber | 3g | 12% |
| Sugars | 12g | – |
| Protein | 10g | 20% |
Note: Nutritional information is an estimate and may vary based on specific ingredients and portion sizes.
Variations & Substitutions
- Sweetness Adjustment: Adjust the amount of agave nectar to your liking. You can substitute it with honey (if not vegan), maple syrup, or coconut sugar.
- Spice It Up: Add a dash of cinnamon, nutmeg, or cardamom to the batter for a warm, comforting flavor.
- Nut-Free Option: While this recipe uses almond flour, sunflower seed flour or oat flour can be used. Keep in mind the flavor and texture will vary slightly.
- Fruity Pancakes: Fold in a handful of fresh or frozen berries into the batter before cooking.
- Chocolate Chip Pancakes: Add dairy-free chocolate chips to the batter for a decadent treat.
- Add a Tang: Adding a tablespoon of lemon juice will add a touch of tang while helping to activate the baking soda for fluffier pancakes.
- Savory Pancakes: Omit the agave nectar and vanilla extract. Add finely chopped herbs like chives, parsley, or dill, and a pinch of garlic powder. Serve with a dollop of dairy-free sour cream or yogurt.
FAQs (Frequently Asked Questions)
Q: Can I use a different type of flour?
A: Yes, you can substitute almond flour with other gluten-free flours like oat flour or a gluten-free blend. Keep in mind that the texture and flavor may vary.
Q: Are these pancakes suitable for vegans?
A: No, this recipe contains eggs. To make it vegan, you’ll need to use an egg replacement like flax eggs or a commercial egg replacer.
Q: How do I prevent the pancakes from sticking to the pan?
A: Ensure your skillet is properly preheated and use a generous amount of grapeseed oil or another cooking oil with a high smoke point. A non-stick skillet is also recommended.
Q: Can I make the batter ahead of time?
A: Yes, you can prepare the batter up to 24 hours in advance and store it in the refrigerator. However, keep in mind that the baking soda may lose some of its potency over time, so the pancakes may not be as fluffy.
Q: My pancakes are burning on the outside but still raw on the inside. What am I doing wrong?
A: Your skillet is likely too hot. Reduce the heat to medium-low and cook the pancakes for a longer period. You can also try using a thicker batter.
Final Thoughts
These dairy-free, gluten-free pancakes are a testament to the fact that dietary restrictions don’t have to mean sacrificing flavor or enjoyment. With a few simple ingredient swaps, you can create a batch of fluffy, golden pancakes that everyone will love. So go ahead, gather your ingredients, and get ready to whip up a delicious and satisfying breakfast (or brunch!). Don’t be afraid to experiment with different toppings and variations to create your own signature flapjack masterpiece. And most importantly, share your creations with loved ones and enjoy the simple pleasure of a homemade breakfast. I encourage you to leave a comment with your experience or any variations you tried!