
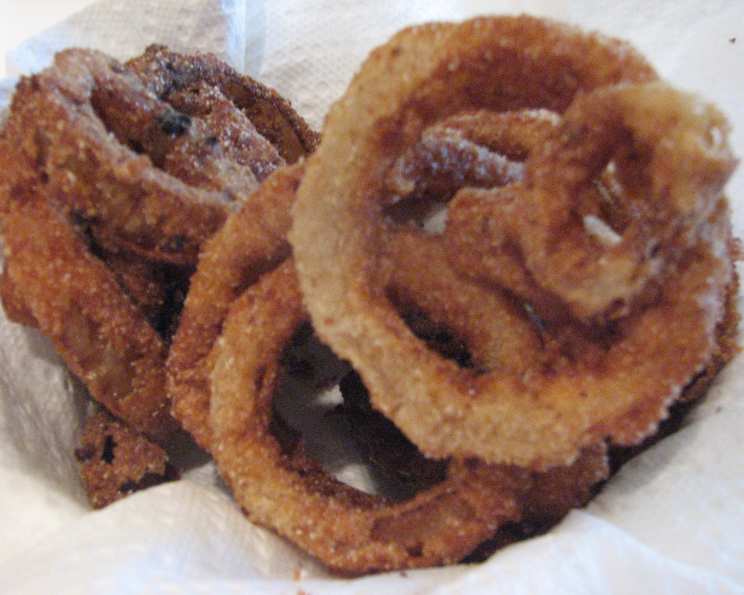
Dairy Queen Onion Rings: A Crispy Nostalgia Trip
There’s something undeniably comforting about the simple pleasure of a perfectly fried onion ring. For me, it’s more than just a snack; it’s a time machine. I remember summer evenings spent at the local Dairy Queen, the air thick with humidity and the promise of a sweet treat to come. But before the Blizzard, there were the onion rings – those golden-brown circles of crispy goodness, slightly salty, slightly sweet, and utterly irresistible. They were the perfect salty counterpoint to the impending sugary indulgence, and even now, the first bite transports me right back to those carefree summer days.
Recipe Overview
- Prep Time: 20 minutes
- Cook Time: 25 minutes
- Total Time: 45 minutes
- Servings: 4-6
- Yield: About 30-40 rings
- Dietary Type: Not specified (Contains Dairy)
Ingredients
- 2 Vidalia onions or 2 Walla Walla onions
- 2 cups flour
- 2 cups fine cracker crumbs
- 2 cups white cornmeal
- 2 cups buttermilk
- 1 cup water
- 4 cups Crisco (or other vegetable shortening for frying)
Equipment Needed
- Large bowl
- Deep fryer or large, heavy-bottomed pot
- Slotted spoon or spider
- Paper towels
- Tongs
Instructions
- Begin by preparing the onions. Slice them into 1/2-inch thick rings. Ensure you only use the larger rings for best results; the very small rings tend to burn too easily. Discard the tiny inner rings or save them for another use, like adding to soups or omelets.
- In a large bowl, prepare the buttermilk wash by combining the buttermilk and water. Whisk until evenly mixed.
- Set up your breading station. You’ll need three separate bowls: one filled with the flour, one with the buttermilk wash, and the last one with a mixture of the fine cracker crumbs and white cornmeal.
- Now for the fun part: breading the onion rings. Take each onion ring one at a time. First, thoroughly coat it in flour, ensuring all surfaces are covered. Shake off any excess flour.
- Next, dip the floured ring into the buttermilk wash, making sure it’s fully submerged. Allow the excess to drip off slightly.
- Finally, dredge the wet ring in the cracker crumb and cornmeal mixture, pressing gently to ensure the coating adheres well. This is what gives the onion rings their signature crispy texture.
- Heat the Crisco (or your chosen frying oil) in a deep fryer or large, heavy-bottomed pot to 350°F (175°C). Use a thermometer to monitor the temperature, as maintaining the correct temperature is crucial for perfectly cooked onion rings.
- Carefully drop the breaded onion rings into the hot oil, working in batches to avoid overcrowding the fryer. Overcrowding will lower the oil temperature and result in soggy onion rings.
- Fry the onion rings until they are golden brown, which should take approximately 3-4 minutes per batch. Use a slotted spoon or spider to turn them occasionally for even browning.
- Once the onion rings are beautifully golden brown, remove them from the oil using the slotted spoon or spider.
- Place the fried onion rings on a plate lined with paper towels to drain off any excess oil.
Expert Tips & Tricks
- Onion Variety Matters: Using Vidalia or Walla Walla onions is recommended because they are sweeter and less pungent than other varieties. The sweetness caramelizes beautifully during frying.
- Crispy Coating Secret: The combination of cracker crumbs and cornmeal creates a superior crispy texture compared to using just one or the other. Don’t skip the cracker crumbs!
- Temperature is Key: Maintaining a consistent oil temperature is essential for perfectly cooked onion rings. If the oil is too hot, the outside will burn before the inside is cooked. If it’s not hot enough, the onion rings will absorb too much oil and become greasy.
- Prevent Soggy Rings: Don’t overcrowd the fryer. Work in batches to maintain the oil temperature. Also, ensure the onion rings are thoroughly drained on paper towels after frying.
- Add Flavor to the Flour: For an extra layer of flavor, consider adding a teaspoon of garlic powder, onion powder, or paprika to the flour mixture.
- Spice it Up: A pinch of cayenne pepper in the cornmeal mixture can add a subtle kick to the onion rings.
Serving & Storage Suggestions
Serve the Dairy Queen onion rings immediately while they are hot and crispy. They are best enjoyed fresh. Consider serving them with your favorite dipping sauces, such as ketchup, ranch dressing, honey mustard, or BBQ sauce.
Leftover onion rings can be stored in an airtight container in the refrigerator for up to 2 days. However, they will lose some of their crispness. To reheat, spread them out on a baking sheet and bake in a preheated oven at 350°F (175°C) for about 5-10 minutes, or until heated through. You can also reheat them in an air fryer for a few minutes to help restore some of the crispness. Microwaving is not recommended as it will make them soggy.
Nutritional Information
| Nutrient | Amount per Serving | % Daily Value |
|---|---|---|
| Calories | 3110.2 kcal | N/A |
| Calories from Fat | 2507 g | 81% |
| Total Fat | 278.6 g | 428% |
| Saturated Fat | 84.6 g | 423% |
| Cholesterol | 6.5 mg | 2% |
| Sodium | 205.4 mg | 8% |
| Total Carbohydrate | 141.4 g | 47% |
| Dietary Fiber | 9.2 g | 36% |
| Sugars | 11.7 g | 46% |
| Protein | 21.3 g | 42% |
Note: Nutritional information is an estimate and may vary based on specific ingredients and cooking methods.
Variations & Substitutions
- Gluten-Free Onion Rings: Substitute the flour and cracker crumbs with gluten-free alternatives. Use a gluten-free all-purpose flour blend and gluten-free breadcrumbs.
- Dairy-Free Onion Rings: Replace the buttermilk with a mixture of non-dairy milk (such as almond, soy, or oat milk) and a tablespoon of lemon juice or vinegar. Let it sit for a few minutes to curdle slightly, mimicking the tanginess of buttermilk.
- Spicy Onion Rings: Add a pinch of cayenne pepper or a dash of hot sauce to the buttermilk wash for a spicy kick.
- Herb-Infused Onion Rings: Mix dried herbs like oregano, thyme, or rosemary into the flour or cracker crumb mixture for an aromatic twist.
- Beer-Battered Onion Rings: Substitute the buttermilk wash with beer for a richer flavor and a slightly different texture.
FAQs (Frequently Asked Questions)
Q: Can I use regular yellow onions instead of Vidalia or Walla Walla?
A: While you can use yellow onions, the Vidalia and Walla Walla varieties are preferred because they have a sweeter, milder flavor that caramelizes beautifully when fried. Regular yellow onions can be more pungent.
Q: How do I prevent the breading from falling off during frying?
A: Make sure to thoroughly coat the onion rings in each step of the breading process – flour, buttermilk, and cracker crumb mixture. Press gently to ensure the coating adheres well, and don’t overcrowd the fryer.
Q: Can I prepare the onion rings ahead of time?
A: You can bread the onion rings ahead of time and store them in the refrigerator for up to a few hours before frying. However, it’s best to fry them right before serving for optimal crispness.
Q: What’s the best oil for frying onion rings?
A: Vegetable shortening (like Crisco) or other neutral-flavored oils with a high smoke point, such as canola or peanut oil, are good choices for frying. Avoid using olive oil, as it has a lower smoke point and can impart a strong flavor.
Q: How do I keep the fried onion rings crispy?
A: Ensure the oil is hot enough before adding the onion rings. Don’t overcrowd the fryer, and drain the fried onion rings on paper towels to remove excess oil. Serve immediately for the best crispness.
Final Thoughts
Now that you’re armed with the secrets to crafting these nostalgic delights, it’s time to head into the kitchen. Whether you’re recreating cherished childhood memories or simply seeking a satisfying snack, these Dairy Queen-inspired onion rings are sure to be a hit. Experiment with different dipping sauces, share them with friends and family, and most importantly, have fun! Don’t be afraid to tweak the recipe to your liking and make it your own. And who knows, maybe these onion rings will become a beloved memory for someone else in the future.