
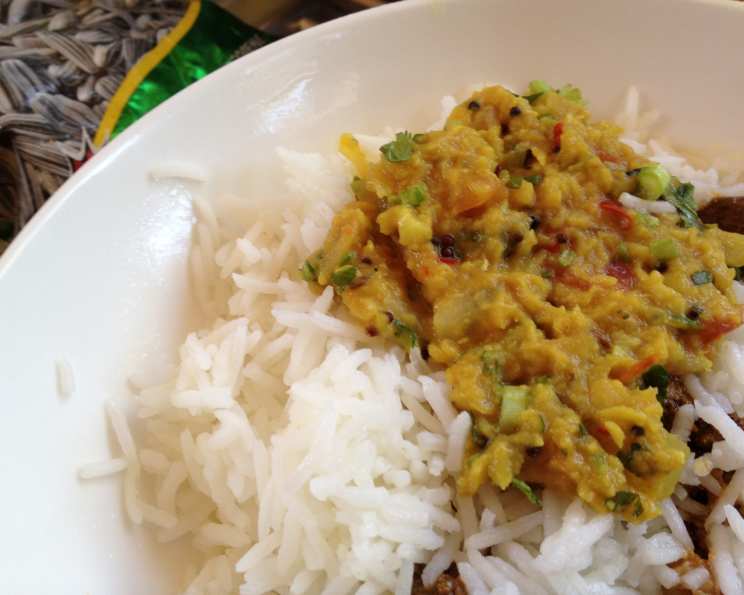
Dal – As We Like It!!
The aroma of simmering dal is the first thing I remember from my grandmother’s kitchen. She’d always have a pot bubbling away on the stove, a fragrant, comforting presence that filled the entire house. It wasn’t just food; it was a hug in a bowl, a symbol of warmth, family, and unconditional love. Each spoonful transported me back to those cozy afternoons, surrounded by the laughter and stories of loved ones. That’s why, even now, making dal feels like reconnecting with my roots, a delicious journey into the heart of my heritage.
Recipe Overview
- Prep Time: 20 minutes
- Cook Time: 55 minutes
- Total Time: 1 hour 15 minutes
- Servings: 4
- Dietary Type: Vegetarian, Gluten-Free
Ingredients
- 1 cup split red gram (masoor dal), washed and soaked in 3 cups water for an hour
- 1 onion, sliced
- 1 large tomatoes, chopped
- 3 cloves garlic, chopped
- ½ inch gingerroot, peeled and minced
- 2 green chilies, deseeded and slit
- ¼ teaspoon turmeric powder
- ¼ teaspoon salt
- ½ teaspoon oil
- 1 tablespoon oil
- 1 pinch asafoetida powder
- ⅔ teaspoon mustard seeds
- ½ teaspoon cumin seed
- 2 sprigs curry leaves
- 1 chicken stock cube or 1 vegetable stock cube (for vegetarian option)
- ½ onion, sliced
- 2 cloves garlic, minced
- 1 small tomato, chopped
- ¼ teaspoon chili powder
- ¼ teaspoon garam masala powder
- ¼ teaspoon cumin powder
- ¼ teaspoon coriander powder
- 3 tablespoons chopped coriander leaves (to garnish)
- 2 teaspoons lime juice
Equipment Needed
- Pressure cooker or large pot
- Kadai (wok) or large skillet
- Cutting board
- Knife
- Measuring cups and spoons
Instructions
- Boil the dal: In a pressure cooker or a regular vessel, combine the split red gram with the water it soaked in. Add the sliced onion, chopped tomatoes, chopped garlic, minced gingerroot, slit green chilies, turmeric powder, and salt.
- Pressure cook (optional): If using a pressure cooker, cook until the dal is tender. In most pressure cookers, this will take about 1 whistle.
- Simmer (if not pressure cooking): If using a regular pot, bring the mixture to a boil, then reduce the heat to low, cover, and simmer for about 45-55 minutes, or until the dal is completely cooked and soft. Stir occasionally to prevent sticking.
- Prepare the tempering: While the dal is cooking, prepare the ingredients for the tempering. Slice the remaining onion, mince the remaining garlic, and chop the remaining tomato.
- Heat the oil: Once the dal is cooked, heat 1 tablespoon of oil in a kadai or skillet over medium heat.
- Add aromatics: Add the asafoetida powder, mustard seeds, cumin seeds, and curry leaves in quick succession. Be careful as the mustard seeds will splutter.
- Sauté garlic and onion: As soon as the mustard seeds start to splutter, add the minced garlic. Sauté for a few seconds until fragrant, then add the sliced onions. Fry until the onions are light golden brown.
- Incorporate stock cube: Crumble in the chicken stock cube (or vegetable stock cube for a vegetarian option) and sauté briefly, allowing the flavors to meld.
- Add tomatoes and spices: When you can smell the aromatics, add the chopped tomato and cook for a few minutes until softened. Then, add the chili powder, garam masala powder, cumin powder, and coriander powder. Sauté for another minute, stirring constantly to prevent burning.
- Combine dal and tempering: Pour the cooked dal into the kadai with the tempering. Stir well to combine.
- Simmer and adjust seasoning: Bring the dal to a simmer and let it cook for about 5-10 minutes, allowing the flavors to meld together. Taste and adjust the seasoning as needed. You may want to add a little more salt if necessary.
- Add lime juice: Stir in the lime juice, one teaspoon at a time. Taste and add more if desired. You may use slightly more than 2 teaspoons, depending on your taste preferences.
- Garnish and serve: Garnish generously with chopped coriander leaves and serve hot over rice.
Expert Tips & Tricks
- Soaking the dal: Soaking the dal for at least an hour helps it cook faster and more evenly.
- Consistency: If the dal is too thick, add a little hot water to adjust the consistency. If it’s too thin, simmer uncovered for a few more minutes to reduce the liquid.
- Spice Level: Adjust the amount of green chilies and chili powder to your preferred level of spiciness.
- Stock Cube Tip: If you don’t have stock cubes, you can use a small amount of vegetable broth or water with a pinch of bouillon powder.
- Tempering variations: Feel free to experiment with the tempering by adding ingredients like dried red chilies or hing (asafoetida) for different flavor profiles.
Serving & Storage Suggestions
Dal is best served hot over a bed of freshly cooked rice. It also pairs well with roti, naan, or other Indian breads. For a complete meal, consider serving it with a dry meat or vegetable dish, such as tandoori chicken or aloo gobi.
Storage: Leftover dal can be stored in an airtight container in the refrigerator for up to 3-4 days. It can also be frozen for up to 2-3 months. Thaw overnight in the refrigerator before reheating.
Reheating: Reheat the dal in a saucepan over medium heat, stirring occasionally, until heated through. You may need to add a little water if it has thickened during storage. Alternatively, you can microwave it in a microwave-safe dish.
Nutritional Information
| Nutrient | Amount per Serving | % Daily Value |
|---|---|---|
| Calories | 250 kcal | 13% |
| Total Fat | 8g | 10% |
| Saturated Fat | 2g | 10% |
| Cholesterol | 5mg | 2% |
| Sodium | 600mg | 26% |
| Total Carbohydrate | 35g | 13% |
| Dietary Fiber | 10g | 36% |
| Sugars | 5g | N/A |
| Protein | 12g | 24% |
Note: Nutritional information is an estimate and may vary depending on specific ingredients and portion sizes.
Variations & Substitutions
- Vegan Dal: Ensure you use a vegetable stock cube instead of chicken stock.
- Creamy Dal: Add a splash of coconut milk or cream at the end for a richer, creamier texture.
- Different Lentils: While this recipe uses split red gram (masoor dal), you can experiment with other types of lentils, such as toor dal (split pigeon peas) or chana dal (split chickpeas). Cooking times may vary.
- Vegetable Additions: Add other vegetables like spinach, carrots, or peas to the dal for added nutrients and flavor. Add them along with the tomatoes in step 9.
FAQs (Frequently Asked Questions)
Q: Can I make this dal without a pressure cooker?
A: Yes, you can cook it in a regular pot on the stovetop. Just ensure you simmer it for a longer time until the dal is completely soft and cooked through.
Q: What if I don’t have curry leaves?
A: While curry leaves add a unique flavor, you can omit them if they are not available. The dal will still be delicious.
Q: Can I make this dal ahead of time?
A: Absolutely! Dal is a great make-ahead dish. The flavors actually develop and deepen over time. Just store it in the refrigerator and reheat when ready to serve.
Q: How can I make this spicier?
A: Add more green chilies, increase the amount of chili powder, or add a pinch of cayenne pepper to the tempering.
Q: My dal is too watery. How can I thicken it?
A: Simmer the dal uncovered for a few more minutes, stirring occasionally, until some of the liquid evaporates. You can also mash some of the dal against the side of the pot to thicken it.
Final Thoughts
I encourage you to try this dal recipe and make it your own. Don’t be afraid to adjust the spices and ingredients to suit your personal preferences. Cooking is all about experimentation and creating something that you truly enjoy. I’d love to hear your feedback and see your creations! This dal is more than just a meal; it’s an experience. Pair it with some warm naan and a side of raita for a truly satisfying and comforting feast. Happy cooking!