
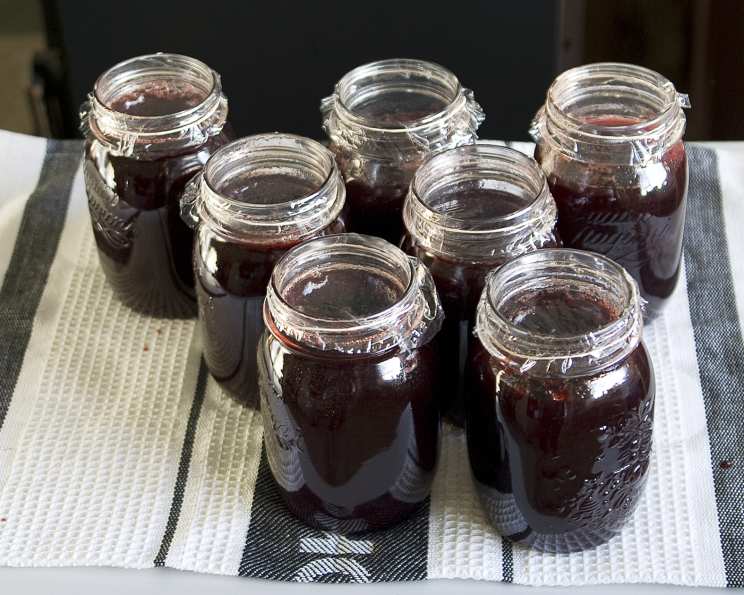
Damson Plum Jam: A Taste of Autumn’s Bounty
My grandmother, a woman of unwavering traditions, always had a pot of Damson plum jam simmering on her stove come late September. The air in her kitchen, already thick with the scent of woodsmoke and dried herbs, would take on a new, intoxicating fragrance – a sweet, slightly tart aroma that promised cozy afternoons and warm scones slathered with deep purple goodness. Watching her carefully ladle the molten jam into sterilized jars was a ritual, a passing down of a culinary legacy that I now cherish. The deep ruby hue of the jam, catching the sunlight streaming through the window, was like liquid jewels.
Recipe Overview
- Prep Time: 30 minutes
- Cook Time: 1 hour
- Total Time: 1 hour 30 minutes
- Yields: 7-8 250ml jars
- Serves: 112-128
- Dietary Type: Vegetarian, Gluten-Free, Dairy-Free
Ingredients
- 1 ½ kg Damson plums (approximately 2 liters)
- 2 – 3 cups water (adjust depending on desired consistency)
- 4 – 6 cups sugar (adjust depending on desired sweetness and tartness)
Equipment Needed
- Large, heavy-bottomed pot or preserving pan
- Wooden spoon or heat-resistant spatula
- Canning kettle with rack
- Sterilized jars with lids and rings
- Jar lifter
- Candy thermometer (optional)
- Food mill (optional, for removing pits)
Instructions
-
Begin by washing and sorting the Damson plums. Remove any stems, leaves, or bruised fruit.
-
In your large pot, combine the plums and the water. Start with the lower amount of water (2 cups) and add more if the plums seem too dry during cooking.
-
Bring the mixture to a boil over medium-high heat, stirring constantly to prevent sticking and scorching.
-
Once boiling, reduce the heat to medium and cook for approximately 15 minutes, continuing to stir frequently. The plums will begin to soften and release their juices.
-
Remove the pot from the heat and allow the plum mixture to cool slightly until it is manageable to handle. You can also cool completely at this stage if you prefer.
-
This is the trickiest part: removing the pits. Traditionally, this involves carefully fishing them out of the hot pulp with a spoon or fork. However, to avoid burns, I recommend using a food mill. Pass the cooled plum mixture through the food mill, which will separate the pulp from the pits. Then, discard the pits. Important: If you do not use a food mill and need to remove pits manually, take extreme care to avoid splattering the boiling hot jam. Use a long-handled spoon and exercise patience.
-
Return the plum pulp to the pot.
-
While the plum pulp is cooling, prepare your canning jars. Place the jars in a canning kettle and cover them with water, ensuring the water level is at least one inch above the tops of the jars.
-
Bring the water to a boil and boil the jars for 10 minutes to sterilize them. This is crucial for ensuring the jam seals properly and prevents spoilage.
-
Carefully remove the sterilized jars from the boiling water using a jar lifter and place them on a clean towel-lined surface.
-
Now, return the pot of plum pulp to the stove and bring it back to a rolling boil over medium-high heat.
-
Add the sugar to the boiling plums, stirring constantly until the sugar is completely dissolved. The amount of sugar you use will depend on your preference for sweetness and tartness. Start with the lower amount (4 cups) and add more if you prefer a sweeter jam. Remember, the more sugar you use, the firmer the jam will be.
-
Continue to boil the jam, stirring frequently, until it reaches the jam stage, which typically takes around 20 minutes.
-
Test for the gelling point using one of the following methods:
- Temperature Test: Use a candy thermometer to monitor the temperature of the jam. The gelling point varies with altitude. At sea level to 1,000 feet, the jam should reach 104°C/220°F. Between 1,001 feet and 2,000 feet, it should reach 103°C/218°F.
- Sheet or Spoon Test: Dip a cool metal spoon into the boiling jam mixture. Raise the spoon about 12 inches above the pan and turn it so the liquid runs off the side. The jam is done when the syrup forms two drops that flow together and sheet or hang off the edge of the spoon. This is my preferred method.
-
As the jam cooks, keep an eye out for any pits you may have missed and remove them with a spoon.
-
Once the jam has reached the gelling point, remove the pot from the heat.
-
Stir the jam and skim off any foam that has formed on the surface for about 5 minutes. This helps to create a clearer, more attractive final product.
-
Carefully pour the hot jam into the hot, sterilized jars, leaving about 1/4 inch of headspace at the top.
-
Wipe the rims of the jars with a clean, damp cloth to remove any spills or drips.
-
Place the sterilized lids on the jars and screw on the rings fingertip-tight.
-
Process the jars in a boiling water bath for 5 minutes. This ensures a proper seal and prevents spoilage.
-
Remove the jars from the boiling water bath using a jar lifter and place them on a towel-lined surface to cool.
-
Listen for a “popping” sound as the jars cool, which indicates that they have sealed properly.
-
Let the jars cool completely before storing. Check the seals by pressing down on the center of each lid. If the lid doesn’t flex, it’s sealed. If it flexes, the jar is not sealed and should be reprocessed with a new lid or stored in the refrigerator and used within a few weeks.
Expert Tips & Tricks
- Don’t overcrowd the pot: Use a pot that is large enough to allow the jam to boil vigorously without overflowing.
- Use a heavy-bottomed pot: This will help to prevent the jam from scorching.
- Stir frequently: Regular stirring is essential to prevent sticking and ensure even cooking.
- Adjust the sugar to your taste: Taste the jam as it cooks and add more sugar if needed.
- Be patient: Making jam takes time, so don’t rush the process.
- For a smoother jam: Use an immersion blender to puree the cooked plums before adding the sugar.
Serving & Storage Suggestions
Damson plum jam is delicious served on toast, scones, muffins, or crackers. It also makes a wonderful accompaniment to cheese or grilled meats. Unopened jars of jam can be stored in a cool, dark place for up to a year. Once opened, store the jam in the refrigerator and use it within a few weeks.
Nutritional Information
(Estimated, per tablespoon serving, values may vary based on sugar content)
| Nutrient | Amount per Serving | % Daily Value |
|---|---|---|
| Calories | 50 kcal | 3% |
| Total Fat | 0g | 0% |
| Saturated Fat | 0g | 0% |
| Cholesterol | 0mg | 0% |
| Sodium | 0mg | 0% |
| Total Carbohydrate | 13g | 5% |
| Dietary Fiber | 0g | 0% |
| Sugars | 12g | – |
| Protein | 0g | 0% |
Variations & Substitutions
- Spice it up: Add a pinch of cinnamon, cloves, or nutmeg to the jam for a warm, spiced flavor.
- Add citrus: Zest and juice of a lemon or orange can brighten the flavor of the jam.
- Combine with other fruits: Mix Damson plums with other fruits, such as apples or pears, for a unique flavor combination.
- Make a Damson plum butter: Cook the jam for a longer period of time until it thickens into a smooth, spreadable butter.
FAQs (Frequently Asked Questions)
Q: Can I use frozen Damson plums?
A: Yes, you can use frozen Damson plums. Thaw them completely before using and drain off any excess liquid.
Q: How do I know if my jam has set properly?
A: Use the temperature test or the sheet/spoon test described in the instructions. The jam should form a soft gel when cooled.
Q: My jam is too runny. What can I do?
A: If your jam is too runny, you can cook it for a longer period of time to evaporate more of the liquid. You can also add a small amount of pectin to help it set.
Q: Can I use a different type of sugar?
A: Yes, you can use a different type of sugar, such as brown sugar or honey. However, this will affect the flavor and color of the jam.
Q: How long will the jam last?
A: Unopened jars of jam can be stored in a cool, dark place for up to a year. Once opened, store the jam in the refrigerator and use it within a few weeks.
Final Thoughts
Making Damson plum jam is a labor of love, but the reward is well worth the effort. The deep, rich flavor and beautiful color of this homemade jam will transport you to an autumn orchard with every bite. Don’t be intimidated by the process – with a little patience and attention to detail, you can create a truly special treat that your family and friends will cherish. Share your creations, ask questions, and most importantly, enjoy the process of preserving this taste of autumn’s bounty.