
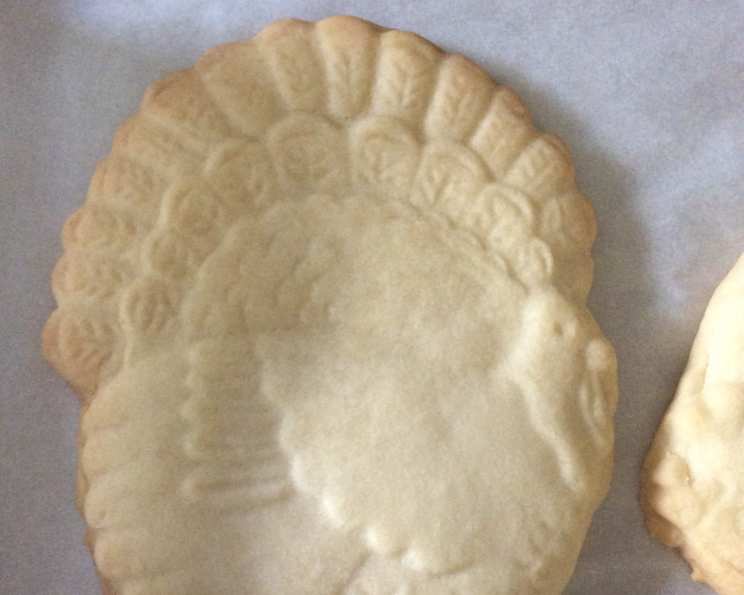
Crafting Classic Shortbread with a Danescook Cookie Mold
The first time I saw a Danescook cookie mold, it was like stepping into a fairy tale. My grandmother, a woman whose hands seemed to be permanently dusted with flour, pulled out a ceramic mold depicting a whimsical teddy bear. She told me it had been passed down through generations, a cherished tool for making cookies that were not just delicious, but miniature works of art. The sweet aroma of butter and vanilla filled her kitchen as we pressed the dough into the mold, the detailed design promising a cookie that was as beautiful as it was tasty. To this day, the scent of shortbread baking instantly transports me back to that cozy kitchen, filled with warmth, love, and the magic of tradition.
Recipe Overview
- Prep Time: 15 minutes
- Cook Time: 30-35 minutes
- Total Time: 50 minutes
- Yields: 4 cookies
- Serves: 4
- Dietary Type: Vegetarian
Ingredients
- 1 cup butter (softened)
- 2/3 cup confectioner’s sugar
- 2 teaspoons vanilla extract
- 2 1/4 cups flour (1/4 cup set aside)
- 1/8 teaspoon salt
- Vegetable pan spray (for the mold)
Equipment Needed
- Medium mixing bowl
- Danescook cookie mold (or similar detailed cookie mold)
- Vegetable pan spray
- Fork
- Oven
- Cooling rack
- Knife
Instructions
-
Preheat your oven to 325°F (160°C). Make sure the oven rack is positioned in the center.
-
In a medium mixing bowl, cream together the softened butter and confectioner’s sugar until the mixture is light and fluffy. This step is crucial for creating a tender shortbread. Use an electric mixer for best results, creaming the ingredients for 2-3 minutes.
-
Add the vanilla extract to the butter and sugar mixture and blend until well combined. The vanilla enhances the buttery flavor of the shortbread.
-
Gradually add 2 cups of the flour to the bowl along with the salt. Mix until a smooth dough forms. Be careful not to overmix, as this can develop the gluten in the flour and result in a tough cookie.
-
Assess the dough’s consistency. If the dough feels sticky, gradually add the remaining 1/4 cup of flour, a little at a time, until the dough is soft but no longer sticky. Remember, shortbread dough should be pliable and easy to handle.
-
Prepare your Danescook cookie mold by lightly spraying it with vegetable pan spray. This will help prevent the dough from sticking and ensure that the intricate design is preserved.
-
Generously flour the inside of the mold, ensuring that every crevice is coated. Then, shake out any excess flour. This step is vital for releasing the shortbread cleanly from the mold after baking.
-
Take a portion of the dough and firmly press it into the mold, working it in with your fingers to fill all the details. Make sure the dough is evenly distributed and compacted within the mold. The evenness is key to uniform baking.
-
Once the mold is filled, use a fork to gently prick the surface of the dough. This prevents the shortbread from puffing up unevenly during baking and helps maintain the detailed design.
-
Place the mold directly onto the oven rack or on a cookie sheet for easier handling.
-
Bake for 30-35 minutes, or until the shortbread is lightly golden brown around the edges. Keep a close eye on it, as baking times can vary depending on your oven. The center should be firm to the touch.
-
Remove the mold from the oven and let the shortbread cool in the mold for 15 minutes. This allows the shortbread to firm up slightly, making it easier to release from the mold without breaking.
-
After cooling, carefully loosen the edges of the shortbread from the mold using the tip of a knife. Gently flip the mold over onto a cooling rack to release the shortbread. If it doesn’t release easily, try tapping the mold gently on the counter.
-
Allow the shortbread to cool completely on the cooling rack before serving or storing.
Expert Tips & Tricks
- Creaming the butter and sugar: Ensure the butter is properly softened but not melted. Properly creamed butter and sugar will result in a lighter, more tender shortbread.
- Don’t overmix: Overmixing the dough after adding the flour develops the gluten, resulting in a tougher cookie. Mix just until the ingredients are combined.
- Chilling the dough: For even sharper detail in your molded cookies, consider chilling the dough for 30 minutes before pressing it into the mold. This will make the dough firmer and less likely to spread during baking.
- Mold variations: If you don’t have a Danescook mold, you can use other decorative cookie molds or simply shape the dough into rounds or squares.
- Flavor infusions: Add a touch of citrus zest (lemon, orange) or a pinch of ground spices (cinnamon, cardamom) to the dough for a unique flavor twist.
- Preventing sticking: If you’re having trouble releasing the shortbread from the mold, try freezing the mold for 10-15 minutes before unmolding.
Serving & Storage Suggestions
Serve your classic shortbread cookies with a cup of hot tea or coffee for a comforting treat. They also make a beautiful addition to a dessert platter or a thoughtful homemade gift.
Store the cooled shortbread in an airtight container at room temperature for up to 5 days. For longer storage, you can freeze the cookies for up to 2 months. To freeze, arrange the cookies in a single layer on a baking sheet and freeze until solid. Then, transfer them to a freezer-safe container or bag. Thaw at room temperature before serving.
Nutritional Information
| Nutrient | Amount per Serving | % Daily Value |
|---|---|---|
| Calories | 798 kcal | N/A |
| Calories from Fat | 420 kcal | N/A |
| Total Fat | 46.7 g | 71% |
| Saturated Fat | 29.3 g | 146% |
| Cholesterol | 122 mg | 40% |
| Sodium | 401.1 mg | 16% |
| Total Carbohydrate | 87.3 g | 29% |
| Dietary Fiber | 1.9 g | 7% |
| Sugars | 33.8 g | N/A |
| Protein | 7.8 g | 15% |
Note: Percent Daily Values are based on a 2000 calorie diet.
Variations & Substitutions
- Gluten-Free Shortbread: Substitute the all-purpose flour with a gluten-free blend designed for baking. You may need to adjust the liquid slightly to achieve the right consistency.
- Vegan Shortbread: Replace the butter with a vegan butter alternative. Ensure the confectioner’s sugar is also vegan-friendly (some brands may use bone char in processing).
- Chocolate Shortbread: Add 2-3 tablespoons of unsweetened cocoa powder to the dry ingredients for a rich, chocolatey flavor.
- Nutty Shortbread: Incorporate 1/2 cup of finely ground nuts (almonds, pecans, walnuts) into the dough for added texture and flavor.
FAQs (Frequently Asked Questions)
Q: Can I use regular granulated sugar instead of confectioner’s sugar?
A: While you can, confectioner’s sugar (also known as powdered sugar) is preferred in shortbread as it contributes to a more tender and delicate texture. Granulated sugar may result in a slightly grittier cookie.
Q: My shortbread is spreading too much in the oven. What am I doing wrong?
A: This can happen if the butter is too warm or if the dough is overmixed. Make sure your butter is softened but still cool, and avoid overmixing the dough after adding the flour. Chilling the dough before baking can also help prevent spreading.
Q: How do I prevent the shortbread from sticking to the mold?
A: Thoroughly spray the mold with vegetable pan spray and dust it with flour, ensuring every crevice is coated. Shake out any excess flour before pressing in the dough.
Q: Can I make the dough ahead of time?
A: Yes! The dough can be made ahead of time and stored in the refrigerator for up to 2 days. Wrap it tightly in plastic wrap to prevent it from drying out. Let it soften slightly at room temperature before pressing it into the mold.
Q: My shortbread is browning too quickly. What should I do?
A: If your shortbread is browning too quickly, tent it loosely with aluminum foil during the last 10-15 minutes of baking. This will help to prevent the surface from burning while the inside continues to bake.
Final Thoughts
There’s something truly special about creating these classic shortbread cookies. With their delicate texture, buttery flavor, and intricate designs, they’re a treat for both the eyes and the palate. Whether you’re using a cherished family heirloom like a Danescook cookie mold or experimenting with your own creative variations, I encourage you to give this recipe a try. Embrace the process, savor the aroma, and share these delightful cookies with loved ones. I’d love to hear about your experiences and any creative twists you add to make this recipe your own!