
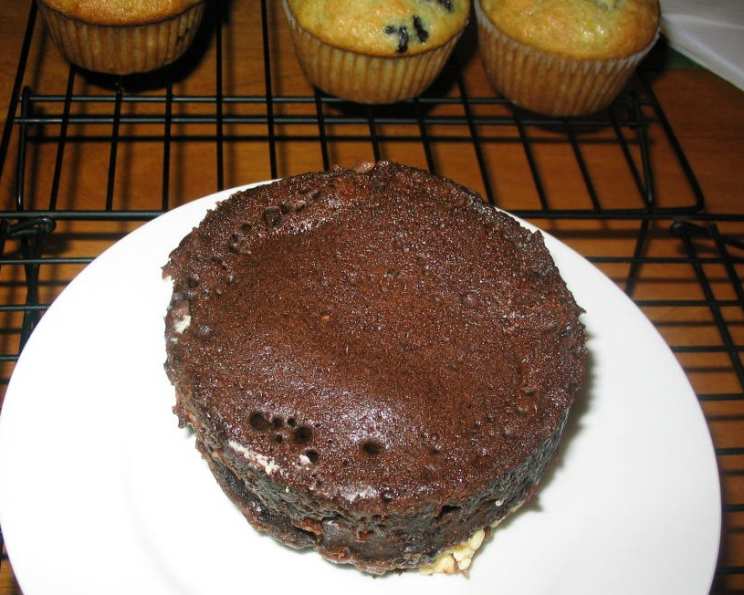
Dangerous Mug Cake: Your 5-Minute Chocolate Fix
The first time I encountered a mug cake, it was a bleary-eyed college night. My roommate, fueled by late-night study sessions and an insatiable sweet tooth, pulled a ceramic mug from the cupboard and started furiously mixing ingredients. The microwave hummed, a chocolatey aroma filled the air, and moments later, she was devouring a steaming, decadent dessert straight from the mug. I was skeptical, but one bite and I was a convert. The sheer speed and convenience of having a warm, comforting cake ready in minutes? Absolutely dangerous, in the best possible way!
Recipe Overview
- Prep Time: 2 minutes
- Cook Time: 3 minutes
- Total Time: 5 minutes
- Servings: 1
- Yield: 1 mug cake
- Dietary Type: Not specified
Ingredients
- 4 tablespoons all-purpose flour
- 1/2 teaspoon baking powder
- 1/8 teaspoon salt
- 4 tablespoons sugar
- 2 tablespoons baking cocoa
- 1 large egg
- 3 tablespoons milk
- 2 tablespoons oil (vegetable, canola, or melted butter/margarine)
- 3 tablespoons chocolate chips (optional)
- 1/8 teaspoon vanilla extract
Equipment Needed
- One (1) microwave-safe coffee mug (approximately 12-16 ounce capacity)
- Measuring spoons and cups
- Small mixing spoon or fork
- Cooking spray (optional)
Instructions
- Begin by lightly spraying the inside of your coffee mug with cooking spray (this helps prevent the cake from sticking). This step is optional, but recommended.
- In the mug, combine all the dry ingredients: flour, baking powder, salt, sugar, and baking cocoa. Mix thoroughly with a small spoon or fork until well combined and no lumps of cocoa remain.
- Add the egg to the mug and mix very thoroughly, ensuring it’s fully incorporated with the dry ingredients. You want a smooth, consistent mixture at this stage.
- Pour in the milk and oil (or melted butter/margarine) and continue to mix until the batter is smooth and well combined. Scrape down the sides of the mug to ensure everything is properly mixed.
- If desired, add the chocolate chips and vanilla extract. Gently fold them into the batter until evenly distributed.
- Place the mug in the microwave and cook for 3 minutes on high power (1000 watts). Cooking times may vary slightly depending on your microwave’s wattage.
- The cake will rise dramatically over the top of the mug during cooking – don’t be alarmed, this is normal!
- Allow the mug cake to cool for a minute or two before enjoying. You can eat it directly from the mug or carefully tip it out onto a plate.
- Top with a scoop of vanilla ice cream, whipped cream, or your favorite toppings for an extra decadent treat.
Expert Tips & Tricks
- Microwave Wattage Matters: Microwaves vary in power. If your mug cake is undercooked after 3 minutes, add an additional 15-30 seconds of cooking time. If it’s overcooked and dry, reduce the initial cooking time slightly.
- Flour Power: The type of flour you use can affect the texture. All-purpose flour works well, but cake flour can result in an even softer, more tender mug cake.
- Cocoa Considerations: For a richer, more intense chocolate flavor, use Dutch-processed cocoa powder.
- Oil Options: While vegetable or canola oil works perfectly, melted butter or margarine will add a subtle buttery flavor to the cake. Experiment and see which you prefer.
- Ingredient Temperature: Using room temperature ingredients (especially the egg and milk) can help the batter come together more smoothly.
- Gift Giving: Combine all the dry ingredients in a snack-sized zip-lock bag. Place the bag in a mug along with a printed copy of the recipe for a thoughtful and convenient gift. Be sure the mug is microwave-safe and holds at least 1 1/2 cups.
- Doneness Check: If you’re unsure if the cake is cooked through, insert a toothpick into the center. If it comes out clean or with just a few moist crumbs, it’s ready.
Serving & Storage Suggestions
Serve your dangerous mug cake warm, ideally immediately after cooking for the best texture and flavor. It pairs beautifully with a scoop of vanilla ice cream, a dollop of whipped cream, fresh berries, a dusting of powdered sugar, or a drizzle of chocolate sauce.
While best enjoyed immediately, leftover mug cake can be stored in the refrigerator for up to 24 hours. However, the texture will change and it will become denser. To reheat, microwave for 15-20 seconds. Due to its small size, freezing is not generally recommended.
Nutritional Information
Note: Nutritional information is an estimate and can vary based on specific ingredients and serving sizes.
| Nutrient | Amount per Serving | % Daily Value |
|---|---|---|
| Calories | 550 kcal | 28% |
| Total Fat | 25g | 38% |
| Saturated Fat | 8g | 40% |
| Cholesterol | 85mg | 28% |
| Sodium | 300mg | 13% |
| Total Carbohydrate | 70g | 23% |
| Dietary Fiber | 3g | 12% |
| Sugars | 40g | N/A |
| Protein | 8g | 16% |
Variations & Substitutions
- Gluten-Free Mug Cake: Substitute the all-purpose flour with a gluten-free all-purpose blend. Ensure the blend contains xanthan gum or guar gum for proper binding.
- Dairy-Free Mug Cake: Replace the milk with your favorite non-dairy milk alternative, such as almond milk, soy milk, or oat milk. Use a dairy-free margarine or vegetable oil.
- Vegan Mug Cake: In addition to the dairy-free substitutions, replace the egg with a flax egg (1 tablespoon ground flaxseed mixed with 3 tablespoons water, let sit for 5 minutes to thicken).
- Peanut Butter Chocolate Mug Cake: Add 1-2 tablespoons of peanut butter to the batter along with the chocolate chips.
- Mocha Mug Cake: Add 1 teaspoon of instant coffee granules to the dry ingredients for a coffee-infused chocolate cake.
- Spice It Up: Add a pinch of cinnamon, nutmeg, or cardamom to the dry ingredients for a warm, spiced flavor.
- Extract Experimentation: Substitute the vanilla extract with almond extract, peppermint extract, or orange extract for unique flavor profiles.
FAQs (Frequently Asked Questions)
Q: Can I use self-rising flour instead of all-purpose flour and baking powder?
A: While you can, it’s not recommended unless you omit the baking powder from the recipe. Self-rising flour already contains baking powder and salt, so using it without adjustments could lead to a cake that rises too much or tastes overly salty.
Q: My mug cake overflows in the microwave. What am I doing wrong?
A: This usually indicates that your mug is too small, or you’ve added too much batter. Also, ensure your microwave isn’t set to a higher power level than needed. Try a larger mug or reduce the cooking time slightly.
Q: Can I make this mug cake in the oven?
A: While this recipe is specifically designed for the microwave, you could try baking it in a small oven-safe ramekin at 350°F (175°C) for approximately 15-20 minutes, or until a toothpick inserted into the center comes out clean.
Q: My mug cake is dry and rubbery. How can I prevent this?
A: Overcooking is the most common cause of a dry mug cake. Reduce the cooking time and make sure not to exceed the recommended time. Also, ensure you’re using enough liquid in the batter.
Q: Can I add other mix-ins besides chocolate chips?
A: Absolutely! Get creative and add chopped nuts, dried fruit, sprinkles, or even a spoonful of jam to the batter. Just be mindful not to add too many mix-ins, as it can affect the cake’s texture and cooking time.
Final Thoughts
This “Dangerous Mug Cake” recipe is more than just a quick dessert; it’s an invitation to indulge in a moment of pure, unadulterated chocolate bliss. The simplicity of the preparation combined with the instant gratification makes it a perfect treat for those late-night cravings or when you simply need a little pick-me-up. Don’t hesitate to experiment with different variations and toppings to create your own signature mug cake masterpiece. I encourage you to try this recipe and experience the joy of a warm, delicious cake ready in minutes. And don’t forget to share your creations and feedback – I’d love to hear about your mug cake adventures!