
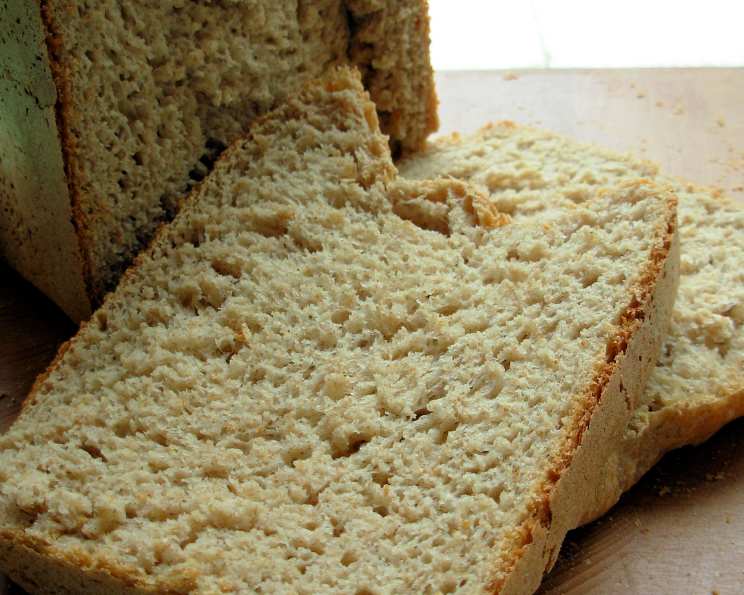
Danish Beer Bread (Øllebrød Abm)
The smell of dark bread baking always takes me back to my Oma’s kitchen. I remember her meticulously weighing out rye flour, the molasses thick and clinging to the spoon, and the yeasty scent mingling with the faint aroma of hops from the open bottle of beer. It wasn’t just bread; it was a piece of Denmark, a tradition kneaded with love and passed down through generations. Even though I didn’t always appreciate the strong, slightly bitter taste as a child, now I relish the complexity and heartiness of this traditional Danish beer bread.
Recipe Overview
- Prep Time: 15 minutes
- Cook Time: 3 hours 10 minutes
- Total Time: 3 hours 25 minutes
- Yields: 1 loaf
- Dietary Type: Vegetarian
Ingredients
- ¾ teaspoon active dry yeast (½ teaspoon for smaller loaf)
- 2 ⅔ cups bread flour (1 ¾ cups for smaller loaf)
- ¾ cup rye flour (½ cup for smaller loaf)
- ¾ teaspoon salt (½ teaspoon for smaller loaf)
- 3 tablespoons molasses (2 tablespoons for smaller loaf)
- ¾ cup water (½ cup for smaller loaf)
- ⅓ cup beer (¼ cup for smaller loaf) – Use a dark beer like a stout or porter for the most authentic flavor. A lighter lager will also work, but the flavor will be less pronounced.
Equipment Needed
- Bread Machine
Instructions
- Add all ingredients to your bread machine in the order recommended by the manufacturer. Most bread machines recommend adding the liquid ingredients first, followed by the dry ingredients, and finally the yeast. Check your bread machine’s manual for the correct order.
- Process on the basic bread cycle. This cycle typically includes kneading, proofing, and baking. The total time for the basic cycle is usually around 3 hours, but this can vary depending on your bread machine model.
- Once the cycle is complete, carefully remove the bread from the machine. Use oven mitts, as the bread and the bread pan will be very hot.
- Let the bread cool completely on a wire rack before slicing. This is crucial for preventing a gummy texture. Allowing the bread to cool completely allows the internal structure to set.
Expert Tips & Tricks
- Beer Selection: The type of beer you use will greatly affect the final flavor of the bread. A dark stout or porter will impart a rich, malty flavor, while a lighter lager will result in a milder, more subtle beer flavor. Experiment with different beers to find your favorite combination.
- Molasses Matters: Don’t skimp on the molasses! It adds sweetness, moisture, and a beautiful dark color to the bread. Blackstrap molasses will provide the most intense flavor, but regular molasses works well too.
- Proofing the Yeast: Although not strictly necessary for most modern active dry yeasts, if you’re unsure about the yeast’s viability, proof it by dissolving it in a small amount of warm water (taken from the ¾ cup) with a pinch of sugar. If it foams up after 5-10 minutes, it’s good to go.
- Dough Consistency: Keep an eye on the dough during the kneading process. If it seems too dry, add a tablespoon of water at a time until it forms a smooth, slightly sticky ball. If it’s too wet, add a tablespoon of flour at a time.
- Enhance the Crust: For a shinier crust, brush the top of the dough with a beaten egg or milk before baking.
- For a Deeper Flavor: For a more complex flavor profile, consider adding a tablespoon of caraway seeds or fennel seeds to the dough.
Serving & Storage Suggestions
This Danish Beer Bread is best served sliced thinly alongside savory dishes. It’s a fantastic accompaniment to soups, stews, and hearty salads. It truly shines when used for open-faced sandwiches (smørrebrød). Spread with butter and top with thinly sliced roast beef, strong cheeses like Havarti or Danish Blue, or even just a simple layer of liver pate.
To store, wrap the cooled bread tightly in plastic wrap or place it in an airtight container. It will keep at room temperature for up to 3 days, in the refrigerator for up to a week, or in the freezer for up to 2 months. To reheat, wrap a slice of bread in foil and warm it in a preheated oven at 350°F (175°C) for about 5-10 minutes, or until heated through. You can also toast it for a crispier texture. Frozen bread should be thawed completely before reheating.
Nutritional Information
| Nutrient | Amount per Serving | % Daily Value* |
|---|---|---|
| Calories | 1698.2 kcal | N/A |
| Calories from Fat | 42 g | 3% |
| Total Fat | 4.7 g | 7% |
| Saturated Fat | 0.7 g | 3% |
| Cholesterol | 0 mg | 0% |
| Sodium | 1784.5 mg | 74% |
| Total Carbohydrate | 361 g | 120% |
| Dietary Fiber | 18.8 g | 75% |
| Sugars | 35 g | 140% |
| Protein | 44.3 g | 88% |
Note: Percent Daily Values are based on a 2,000 calorie diet. Your daily values may be higher or lower depending on your calorie needs.
Variations & Substitutions
- Gluten-Free Option: Substitute the bread flour and rye flour with a gluten-free bread flour blend. You may need to adjust the amount of liquid to achieve the correct dough consistency. Adding a teaspoon of xanthan gum can help improve the texture of gluten-free bread.
- Sweet and Savory: Add a handful of raisins or dried cranberries for a touch of sweetness. This pairs well with the malty flavor of the beer and molasses.
- Spice It Up: Incorporate a pinch of ground cloves, cardamom, or ginger for a warm, aromatic twist.
- Seed Sensations: Sprinkle sesame seeds, poppy seeds, or sunflower seeds on top of the dough before baking for added texture and flavor.
- Different Beer: Experiment with different types of beer! A smoked porter, a coffee stout, or even a rye beer will each contribute unique notes to the final product.
FAQs (Frequently Asked Questions)
Q: Can I make this bread without a bread machine?
A: While this recipe is specifically designed for a bread machine, you can adapt it for oven baking. You will need to knead the dough by hand or with a stand mixer, allow it to rise twice, and then bake it in a preheated oven at 375°F (190°C) for about 30-40 minutes.
Q: My bread is too dense. What did I do wrong?
A: Several factors can contribute to dense bread, including using expired yeast, not enough liquid, or over-kneading the dough. Ensure your yeast is active, measure your liquids accurately, and avoid over-processing the dough in the bread machine.
Q: Can I use instant yeast instead of active dry yeast?
A: Yes, you can substitute instant yeast for active dry yeast. Use the same amount and add it directly to the dry ingredients without proofing.
Q: My bread machine has a light and dark crust setting. Which one should I use?
A: For Danish Beer Bread, using the medium or dark crust setting is recommended to enhance the rich color and flavor.
Q: Can I freeze the bread?
A: Yes, this bread freezes very well. Wrap it tightly in plastic wrap and then in foil before freezing. Thaw completely before slicing and serving.
Final Thoughts
Don’t be intimidated by the slightly unusual combination of ingredients. This Danish Beer Bread is surprisingly simple to make and incredibly rewarding. The aroma that fills your kitchen as it bakes is worth the effort alone. I urge you to try this recipe and experience the taste of tradition. Pair it with a hearty bowl of soup on a cold evening or serve it as part of a smørrebrød spread for a truly authentic Danish experience. And please, share your baking adventures and variations with me – I’d love to hear about your own family’s take on this classic!