
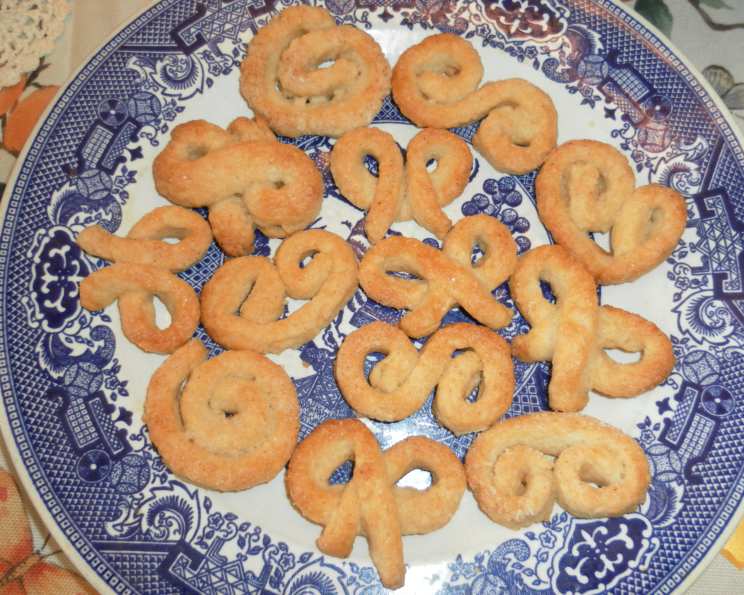
Danish Knots (Kringler) Light Flaky Baked Whipped Cream Cookies
The scent of cardamom and warm butter always transports me back to my grandmother’s kitchen. Though she wasn’t Danish, she had a well-worn cookbook filled with recipes from around the world, and these Kringler, or Danish Knots, were a particular favorite. I remember sitting at her counter, mesmerized as she deftly shaped the delicate dough into those signature figure eights, the promise of a buttery, melt-in-your-mouth treat hanging in the air. This recipe is my homage to those cherished memories, a little piece of her warmth passed on through generations.
Recipe Overview
- Prep Time: 20 minutes
- Cook Time: 12-16 minutes
- Total Time: 32-36 minutes
- Yields: 5 dozen
- Dietary Type: Not specified
Ingredients
- 2 1⁄4 cups all-purpose flour
- 1 tablespoon granulated sugar
- 1 teaspoon baking powder
- 1⁄2 cup firm butter (do not use margarine)
- 1 cup heavy whipping cream, chilled
- Crushed loaf sugar, for sprinkling (or granulated sugar)
Equipment Needed
- Large mixing bowl
- Small mixing bowl
- Electric mixer (optional, for whipping cream)
- Fork
- Rolling pin
- Knife or pastry cutter
- Baking sheets
- Parchment paper
- Airtight container for storage
Instructions
- In a large mixing bowl, sift together the all-purpose flour, granulated sugar, and baking powder. This ensures the baking powder is evenly distributed, leading to a more consistent rise.
- Cut in the firm butter into the flour mixture. The goal is to create small, pea-sized pieces of butter distributed throughout the flour. You can use a pastry blender, two knives, or even your fingertips. The butter should be cold, but allowing it to slightly soften at room temperature while you gather your ingredients can make this step easier. However, be sure it remains mostly firm. You’re looking for a texture resembling coarse crumbs, about the size of rice kernels.
- In a separate small bowl, whip the heavy whipping cream until soft peaks form. This is crucial for the tender texture of the cookies. You want the cream to be thick enough to hold its shape briefly, like the consistency of whipped cream you’d use to top a slice of pie. Avoid over-whipping, as this can make the cream grainy. Chilled cream whips best.
- Mix in the whipped cream with a fork into the flour and butter mixture. Gently knead lightly with your fingertips until the mixture comes together to form a ball. Avoid overworking the dough, as this can develop the gluten and result in tougher cookies.
- Divide the dough into four equal portions. On a lightly floured surface, roll out one portion of the dough at a time into a 6×4 inch rectangle, keeping the remaining dough chilled. This helps maintain the butter’s solidity, preventing the cookies from spreading too much during baking.
- Sprinkle the crushed loaf sugar (or granulated sugar) evenly over the dough rectangle. Gently press the sugar into the dough so it adheres well.
- Using a sharp knife or pastry cutter, cut the dough rectangle into 6 strips, each approximately ¼ inch wide.
- Form the strips into figure eights or loose knots, resembling pretzels. This is where the “kringler” shape comes in. Be creative and have fun with it!
- Place the shaped cookies onto ungreased baking sheets lined with parchment paper. Parchment paper prevents sticking and makes cleanup easier.
- Important Note for Shaping: When making pretzel shapes, carefully press the dough down where the strips overlap to ensure the same thickness as the sides of the cookie. This promotes even baking. If the overlapped areas are too thick, they will remain raw while the rest of the cookie overcooks and browns.
- Bake in a preheated oven at 400°F (200°C) for approximately 12 minutes, or until the cookies are lightly golden brown. Be sure to monitor the cookies closely as oven temperatures can vary. My oven requires about 16 minutes to achieve a lightly golden color all over. Watch closely as they burn easily.
- Once baked, remove the cookies from the oven and let them cool completely on the baking sheets before transferring them to an airtight container.
Expert Tips & Tricks
- Cold is key: Keeping all ingredients cold, especially the butter and cream, is crucial for a flaky texture. If you find the dough becoming too soft while working with it, pop it back into the refrigerator for a few minutes.
- Don’t overwork the dough: Overmixing develops the gluten in the flour, resulting in a tougher cookie. Handle the dough gently and mix only until it comes together.
- Sugar variations: While the recipe calls for crushed loaf sugar, granulated sugar works just as well. For an extra touch of flavor, try using coarse sugar or sanding sugar.
- Baking time adjustments: Oven temperatures can vary significantly. Keep a close eye on the cookies while they are baking and adjust the baking time accordingly. Look for a light golden brown color as an indicator of doneness.
- Flavor Enhancements: A pinch of cardamom or vanilla extract added to the dough can elevate the flavor profile.
Serving & Storage Suggestions
These Danish Knots are best enjoyed fresh, when their flaky texture is at its peak. Serve them with a cup of coffee or tea for a delightful afternoon treat. They also make a lovely addition to a dessert platter.
Store the cooled cookies in an airtight container at room temperature for up to 3-4 days. To maintain their crispness, avoid storing them in a humid environment. While refrigeration isn’t recommended as it can dry them out, you can freeze the baked cookies for up to 2 months. Thaw them at room temperature before serving. To refresh slightly stale cookies, you can warm them in a low oven (around 300°F/150°C) for a few minutes.
Nutritional Information
| Nutrient | Amount per Serving | % Daily Value (approximate) |
|---|---|---|
| Calories | 542 kcal | N/A |
| Calories from Fat | 329 kcal | N/A |
| Total Fat | 36.6 g | 56% |
| Saturated Fat | 22.7 g | 113% |
| Cholesterol | 114 mg | 38% |
| Sodium | 253.9 mg | 10% |
| Total Carbohydrate | 47 g | 15% |
| Dietary Fiber | 1.5 g | 6% |
| Sugars | 2.7 g | 10% |
| Protein | 7 g | 13% |
Note: Nutritional information is an estimate and may vary based on specific ingredients and preparation methods.
Variations & Substitutions
- Gluten-Free: Substitute the all-purpose flour with a gluten-free blend. Be sure to use a blend that contains xanthan gum for binding. The texture may be slightly different, but still delicious.
- Dairy-Free: While the original recipe relies heavily on dairy, you could experiment with a plant-based butter alternative and coconut cream (the thick part from a refrigerated can) instead of heavy cream. The flavor and texture will differ, but it’s worth a try for those with dietary restrictions.
- Spiced Kringler: Add a teaspoon of ground cardamom, cinnamon, or nutmeg to the flour mixture for a warm, aromatic twist.
- Citrus Zest: A teaspoon of lemon or orange zest added to the dough can brighten the flavor.
- Chocolate Drizzle: Once the cookies are cooled, drizzle them with melted chocolate for an extra indulgent treat.
- Nuts: Sprinkle chopped nuts over the cookies before baking for added texture and flavor.
FAQs (Frequently Asked Questions)
Q: Can I make the dough ahead of time?
A: Yes, you can prepare the dough a day in advance. Wrap it tightly in plastic wrap and store it in the refrigerator. Let it sit at room temperature for about 15-20 minutes before rolling it out.
Q: My cookies are spreading too much. What am I doing wrong?
A: The most common cause of spreading is butter that is too soft. Make sure your butter and cream are well chilled. Also, avoid overmixing the dough.
Q: Can I use margarine instead of butter?
A: No, margarine is not recommended. Butter is essential for the flaky texture and rich flavor of these cookies. Margarine contains more water and will not produce the same results.
Q: How do I store these cookies to keep them fresh?
A: Store cooled cookies in an airtight container at room temperature. This will help maintain their crispness and prevent them from drying out.
Q: Can I freeze the dough?
A: Yes, you can freeze the unbaked dough. Wrap it tightly in plastic wrap and then in a freezer bag. Thaw it in the refrigerator overnight before rolling it out.
Final Thoughts
These Danish Knots are more than just cookies; they’re a little piece of culinary history, a testament to the simple pleasures of baking. I encourage you to try this recipe, to experience the delicate, buttery goodness for yourself. Don’t be afraid to experiment with flavors and shapes, and most importantly, share your creations with loved ones. Perhaps you’ll even create some cherished memories of your own, just like my grandmother did for me. Pair these delightful cookies with a strong cup of coffee or a glass of Vin Santo for the perfect afternoon indulgence. Happy baking!