
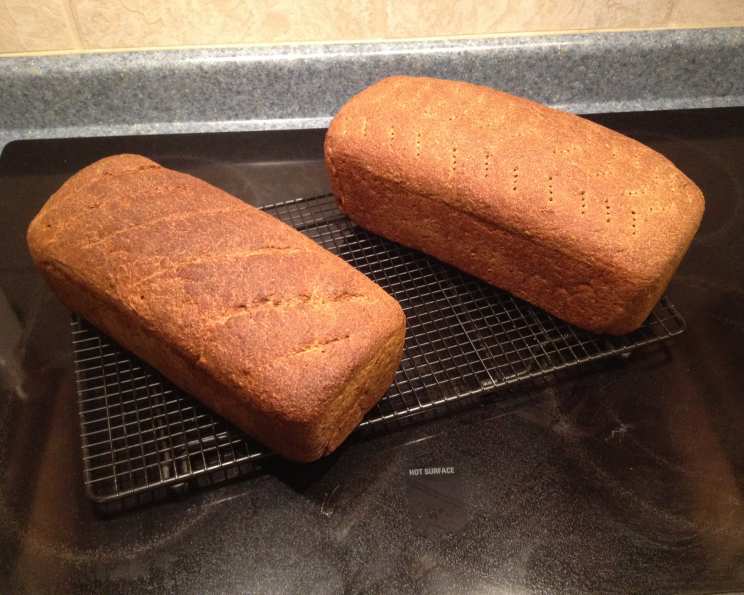
The Soul of Danish Rye: Baking Authentic Pumpernickel
The scent of dark, caramelized sugars and earthy rye flour…it instantly transports me back to Copenhagen. I remember wandering through Torvehallerne Market, the air thick with the aroma of freshly baked bread. The pumpernickel, dense and almost black, beckoned. Each slice, thinly cut and layered with pickled herring or creamy cheese, was an explosion of flavor – a testament to the simple yet profound artistry of Danish baking. Recreating that experience at home has become a cherished tradition, a way to bring a piece of Denmark to my own kitchen.
Recipe Overview
- Prep Time: 3 hours
- Cook Time: 1 hour 15 minutes
- Total Time: 4 hours 15 minutes
- Yield: 2 loaves
- Dietary Type: Vegetarian
Ingredients
- 12 ounces beer (or water)
- 4 cups water
- 1 1/3 tablespoons instant yeast
- 1 cup flax seed meal
- 1/2 cup molasses
- 3 tablespoons salt
- 1 cup rye flakes
- 10 cups wholemeal rye flour (1 kg)
- 10 cups white flour (approximate, 1 kg)
Equipment Needed
- Stand mixer (optional, but recommended)
- Large oiled bowl
- Two 3-liter loaf pans (or three smaller loaf pans)
- Oven
Instructions
-
Begin by warming the beer (or water) and water together until lukewarm. This gentle warmth is crucial for activating the yeast effectively.
-
In a large bowl or the bowl of your stand mixer, dissolve the instant yeast in the lukewarm liquid mixture. Allow it to sit for a few minutes until it starts to foam slightly, indicating that the yeast is active and ready to work its magic.
-
Add the remaining ingredients – flax seed meal, molasses, salt, rye flakes, wholemeal rye flour, and most of the white flour – to the bowl. It’s essential to add the flours gradually, holding back some of the white flour. The amount of white flour needed may vary slightly depending on the humidity and the specific type of rye flour used.
-
Using the dough hook attachment of your stand mixer (or your hands), knead the dough until it forms a slightly tacky but manageable mass. This process usually takes about 10 minutes in a stand mixer. If kneading by hand, continue for a few minutes longer to ensure the dough has the right consistency. The dough should be firm but not dry. Add the remaining white flour, little by little, if the dough seems too sticky.
-
Place the dough in a large oiled bowl. Turn the dough to coat it evenly with oil, which will prevent it from drying out during the rising process.
-
Cover the bowl tightly with plastic wrap or a damp kitchen towel and let it rise in a warm spot for 90 minutes. The warmth encourages the yeast to ferment and the dough to expand, developing its characteristic flavor and texture.
-
After the first rise, gently deflate the dough and divide it into two equal portions.
-
Form each portion into a loaf and place them into prepared loaf pans. I recommend using 3-liter loaf pans for the best results. If you don’t have 3-liter pans, you can use three smaller pans instead.
-
Cover the loaf pans with plastic wrap or a damp kitchen towel and let the loaves rise again for 60 minutes. This second rise is crucial for achieving a light and airy texture.
-
Preheat your oven to 350°F (175°C).
-
Bake the loaves for 75 minutes, or until they are deeply brown and sound hollow when tapped on the bottom. The long baking time is necessary to cook the dense dough thoroughly.
-
Once baked, remove the loaves from the oven and let them cool in the pans for about 10 minutes before transferring them to a wire rack to cool completely.
Expert Tips & Tricks
- Embrace the Darkness: Don’t be afraid of a dark crust. It’s a sign of a well-baked pumpernickel and contributes significantly to the bread’s flavor.
- The Molasses Magic: Molasses is key for the color, moisture, and depth of flavor. Don’t skimp on it!
- Yeast Activation: Ensure your yeast is fresh and active. A sluggish yeast can result in a dense, under-risen loaf. Proof it in a small amount of warm water with a pinch of sugar before adding it to the other ingredients.
- Cooling is Crucial: Resist the urge to slice the bread while it’s still warm. Allow it to cool completely, preferably overnight, before slicing. This will prevent it from becoming gummy and will make it easier to slice thinly.
Serving & Storage Suggestions
Danish pumpernickel is best enjoyed thinly sliced. It’s the perfect base for open-faced sandwiches (smørrebrød) with toppings like pickled herring, smoked salmon, roast beef, or various cheeses. Try it with a dollop of horseradish cream or a sprinkle of fresh dill.
Store the cooled loaves wrapped tightly in plastic wrap or in an airtight container at room temperature for up to 5 days. For longer storage, you can freeze the bread for up to 3 months. To freeze, slice the bread before wrapping it tightly. This makes it easy to thaw only the slices you need.
To reheat frozen slices, toast them lightly or warm them in a low oven.
Nutritional Information
| Nutrient | Amount per Serving | % Daily Value |
|---|---|---|
| Calories | 1460.5 kcal | N/A |
| Total Fat | 15.2 g | 23% |
| Saturated Fat | 1.55 g | 8% |
| Cholesterol | 0 mg | 0% |
| Sodium | 5275.3 mg | 220% |
| Total Carbohydrate | 282.85 g | 94% |
| Dietary Fiber | 17.15 g | 69% |
| Sugars | 24.65 g | N/A |
| Protein | 39.45 g | 79% |
Note: Nutritional information is an estimate and may vary based on specific ingredients and portion sizes.
Variations & Substitutions
- Gluten-Reduced Option: While a completely gluten-free pumpernickel is difficult to achieve without significantly altering the flavor and texture, you can reduce the gluten content by substituting a portion of the white flour with a gluten-free flour blend. Start by replacing 2-3 cups of the white flour and adjust as needed.
- Spice It Up: Add a teaspoon of caraway seeds or fennel seeds to the dough for a more aromatic flavor.
- Sweet and Nutty: Incorporate a handful of chopped walnuts or pecans into the dough for added texture and flavor.
- Coffee Kick: Substitute some of the water with strong brewed coffee for a deeper, richer flavor profile.
FAQs (Frequently Asked Questions)
Q: Why is my pumpernickel so dense?
A: Several factors can contribute to a dense pumpernickel, including insufficient yeast activity, not enough rising time, or too much flour. Make sure your yeast is fresh, allow the dough to rise fully, and avoid adding too much flour during kneading.
Q: Can I make this recipe without a stand mixer?
A: Yes, you can certainly make this recipe by hand. Kneading the dough by hand will require more effort and time, but it’s definitely achievable.
Q: How do I know when the pumpernickel is done baking?
A: The pumpernickel is done when it’s deeply brown and sounds hollow when tapped on the bottom. A digital thermometer inserted into the center of the loaf should read around 200-210°F (93-99°C).
Q: Can I freeze pumpernickel bread?
A: Absolutely! Pumpernickel freezes very well. Slice the bread before freezing for easy thawing. Wrap it tightly in plastic wrap and then in a freezer bag to prevent freezer burn.
Q: What can I use instead of molasses?
A: If you don’t have molasses, you can substitute it with brown sugar or dark corn syrup, although the flavor will be slightly different.
Final Thoughts
Baking Danish pumpernickel is more than just following a recipe; it’s about embracing a tradition, connecting with a culture, and creating something truly special with your own hands. Don’t be intimidated by the long baking time – the reward of that first flavorful slice is well worth the wait. So, gather your ingredients, preheat your oven, and embark on this delicious journey to the heart of Danish rye. And when you’ve perfected your loaf, I’d love to hear about your experience and see your creations! Skål!