
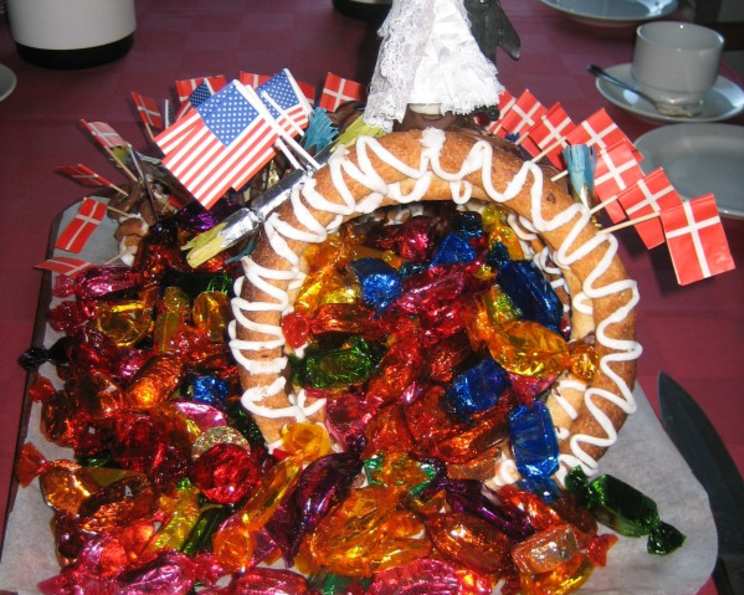
Kransekage: The Majestic Danish Wedding Tower
The first time I saw a Kransekage, it was at my dear friend Astrid’s wedding in Copenhagen. The tower, adorned with tiny Danish flags and delicate chocolate hearts, seemed to defy gravity, rising like a sweet, almond-scented monument to love. The clinking of forks against the rings, as guests shared pieces of the confection, created a joyful symphony. The taste, a delightful chewiness with a subtle almond bitterness balanced by the sweetness of the icing, was unlike anything I’d ever experienced. I knew then that I had to learn the secrets of this magnificent creation.
Recipe Overview
- Prep Time: 1 hour (plus chilling time)
- Cook Time: 8-10 minutes per batch
- Total Time: Several hours (including chilling, icing, and assembly)
- Servings: 8
- Yield: 1 tower
- Dietary Type: Gluten-Free (if using gluten-free almond paste/marzipan)
Ingredients
- 14 ounces marzipan (Odense brand recommended) or almond paste (400g)
- 3/4 cup (180g) granulated sugar
- 1 1/2 pasteurized liquid egg whites (80g)
Icing:
- 2 cups (250g) powdered sugar
- 1 pasteurized liquid egg white
- 1 tablespoon white vinegar
Decoration:
- 12 ounces bittersweet chocolate or semi-sweet chocolate chips
- Box of 25 small Danish flags (1-1 ½ inch size)
- Platter-sized paper doilies
Equipment Needed
- Stand mixer
- Baking sheets
- Parchment paper
- Rolling pin
- Compass (optional, for drawing circle guides)
- Decorator bags or Ziploc bags
- Small piping tips
- Double boiler or microwave-safe bowl
- Serving platter
Instructions
- Combine the Dough: In the bowl of a stand mixer, combine the marzipan or almond paste and granulated sugar. Mix on medium speed until the mixture forms a large ball. This might take a few minutes, be patient.
- Add Egg Whites: Gradually add the pasteurized liquid egg whites, a little at a time, while the mixer is running on low speed.
- Check Dough Consistency: To test the dough, roll a small piece into a cigar shape, then form it into a ring. If the dough cracks easily, it needs a bit more egg white. Add the egg white carefully, a few drops at a time, until the dough is pliable. The dough should be dense and slightly sticky.
- Chill the Dough: Wrap the dough tightly in plastic wrap and refrigerate for at least 3-4 hours, or preferably overnight. This resting period is crucial for the dough to firm up and prevent excessive spreading during baking.
- Preheat the Oven: Preheat your oven to 400 degrees F (200 degrees C).
- Divide and Weigh the Dough: Divide the chilled dough into 8 pieces. For a more uniform tower, weigh each piece. A suggested weight distribution is: 10g, 20g, 30g, 40g, 50g, 60g, 70g, and 80g. Adjust the size if you are making more rings.
- Roll into Sticks: Roll each piece of dough into finger-thick sticks.
- Form Rings: Create rings of varying sizes. The first piece should be about 3.5 inches long when formed into a ring. The next should be 5 inches, then 6.5 inches, and so on, adding approximately 1.5 inches in length for each subsequent ring. Aim for at least 8 rings.
- Seal the Rings: Shape each stick into a ring, joining the ends with a tiny dab of egg white or water. Press gently at the top of the ring to create a slight peak, like a rooftop.
- Prepare Baking Sheets: Line baking sheets with floured parchment paper.
- Shape Uniform Rings (Optional): For perfectly round rings, use a compass to draw circles of varying sizes on the back of the parchment paper. Flip the paper over and place the rings on the circles, using the guide to shape them as evenly as possible.
- Bake the Rings: Place the baking sheets in the preheated oven and bake for 8-10 minutes, or until the rings are lightly golden brown on top. Be careful not to overbake, as this will make the rings dry and brittle.
- Cool Completely: Remove the baking sheets from the oven and let the rings cool completely on the baking sheets. They will firm up as they cool.
- Freeze for Later (Optional): If you’re making the Kransekage ahead of time, you can freeze the baked rings. Wrap them individually in freezer bags and store them in the freezer for up to 3 months. Defrost them overnight in the refrigerator before decorating and assembling.
- Prepare Chocolate Decorations: On the back of a piece of parchment paper, draw 24 small hearts, wedding rings, butterflies, or other themed shapes (no larger than 1 inch in diameter) using a medium to large marker.
- Melt the Chocolate: Melt the bittersweet or semi-sweet chocolate in a microwave or double boiler.
- Pipe the Chocolate: Transfer the melted chocolate to a decorator bag fitted with a small round tip.
- Trace the Designs: Carefully trace the patterns you drew on the parchment paper with the melted chocolate. Let the chocolate decorations cool completely and harden. Reserve a small amount of melted chocolate for attaching the decorations to the tower later.
- Make the Icing: Prepare the icing several hours before you plan to assemble the tower. In a bowl, combine the powdered sugar and egg white. Mix until you have a smooth, thick icing.
- Fill Icing Bag: Transfer the icing to a decorator bag or a Ziploc bag. If using a Ziploc bag, snip off a very tiny corner to create a small opening.
- Ice the Rings: Start with the largest ring. Pipe a criss-cross pattern of icing from the outside edge to the inside edge and back again, creating a zigzag pattern all the way around the ring.
- Assemble the Tower: While the icing is still wet on the largest ring, carefully place the next largest ring on top. The icing will act as glue and bind the rings together. Continue this process, working your way up to the smallest ring, until you have a tower.
- Harden the Icing: Allow the icing to harden completely, which usually takes about 40-60 minutes.
- Attach Chocolate Rings: Melt about 2/3 of the remaining chocolate. Pour into a zip lock bag, and carefully cut one corner, so a very small stream of chocolate comes out at the time. Make your chocolate designs on parchment paper or buy plain chocolate rings.
- Prepare the Platter: Place a paper doily on a serving platter.
- Secure the Rings: Place the largest ring on the doily. Add 3 small globs of the reserved melted chocolate to the top of the bottom ring. Carefully place the next largest ring on top, pressing gently to secure it. Repeat this process, adding chocolate globs between each ring, until the tower is fully assembled.
- Attach Decorations: Heat the last of the chocolate. Add a small glob of melted chocolate to the side of the bottom ring. Attach a chocolate design (heart, wedding ring, etc.) by gently pressing it into the chocolate glob and holding it for a few seconds. Continue moving up the rings, placing chocolate designs around the tower.
- Add Flags: Insert the small Danish flags in between the chocolate designs, spacing them evenly around the tower.
- Top with Bridal Figure: Place a bridal figurine on top of the tower.
- Serve and Enjoy! Your Kransekage is now ready to be served and enjoyed.
Expert Tips & Tricks
- Use high-quality marzipan or almond paste. This is the foundation of the Kransekage, so choose a product that you enjoy the flavor of. Odense brand is a popular choice.
- Don’t overmix the dough. Overmixing can develop the gluten in the almond flour, resulting in a tough Kransekage. Mix just until the ingredients are combined.
- Chill the dough thoroughly. Chilling the dough is essential for preventing spreading during baking.
- Bake the rings evenly. Rotate the baking sheets halfway through baking to ensure that the rings bake evenly.
- If your rings come out too crispy You can soften them by storing the finished tower in an airtight container for a day or two. The moisture from the icing will help soften the rings.
- Customize the Decorations: Instead of chocolate hearts and flags, you can use other decorations such as edible glitter, sprinkles, or fondant flowers to match the theme of your event.
Serving & Storage Suggestions
Serve the Kransekage immediately after assembly for the best texture. The rings will gradually soften over time. To serve, guests can break off pieces of the rings, starting from the bottom.
- Storage: Store leftover Kransekage in an airtight container at room temperature for up to 3 days. The rings will soften over time, but the flavor will still be delicious.
- Freezing: While you can freeze the baked rings before assembly, freezing the fully assembled Kransekage is not recommended, as the icing may become soggy.
Nutritional Information
| Nutrient | Amount per Serving | % Daily Value |
|---|---|---|
| Calories | 450 kcal | 23% |
| Total Fat | 20g | 31% |
| Saturated Fat | 8g | 40% |
| Cholesterol | 5mg | 2% |
| Sodium | 10mg | 0% |
| Total Carbohydrate | 60g | 20% |
| Dietary Fiber | 2g | 8% |
| Sugars | 50g | N/A |
| Protein | 8g | 16% |
Note: Nutritional information is an estimate and may vary based on specific ingredients and portion sizes.
Variations & Substitutions
- Gluten-Free: Ensure your marzipan or almond paste is gluten-free. Many brands are naturally gluten-free, but always check the label.
- Flavor Variations: Add a teaspoon of almond extract or lemon zest to the dough for a different flavor profile.
- Chocolate Glaze: Instead of chocolate decorations, you can dip the cooled rings in melted chocolate for a more decadent treat.
- Alternative Decorations: Decorate with candied fruit, edible flowers, or colored icing.
- Bassinet Variation: As mentioned, reverse the tower and decorate as a baby bassinet for a baby shower.
FAQs (Frequently Asked Questions)
Q: Can I make Kransekage ahead of time?
A: Yes! The baked rings can be made several days in advance and stored in an airtight container. You can also freeze them for longer storage. Assemble the tower on the day you plan to serve it.
Q: Why is my Kransekage dough cracking?
A: The dough is likely too dry. Add a few more drops of egg white, mixing well after each addition, until the dough is more pliable.
Q: How do I prevent the rings from spreading during baking?
A: Chilling the dough thoroughly and using parchment paper helps prevent spreading. Also, make sure your oven temperature is accurate.
Q: My icing is too thin. What can I do?
A: Gradually add more powdered sugar, a tablespoon at a time, until the icing reaches the desired consistency.
Q: Can I use store-bought icing?
A: While you can use store-bought icing in a pinch, homemade icing will give you the best results in terms of flavor and texture. It also acts as the glue that holds the tower together, so it’s essential to get it right.
Final Thoughts
Kransekage is more than just a dessert; it’s a symbol of celebration and togetherness. Its impressive height and intricate decorations make it a stunning centerpiece for any special occasion. Don’t be intimidated by its complexity – with a little patience and these detailed instructions, you can create your own magnificent Danish Wedding Tower and bring a touch of Scandinavian magic to your table. I encourage you to try this recipe, and I hope you enjoy the process of creating this beautiful and delicious confection as much as I do. Let me know how yours turns out! Skål!