
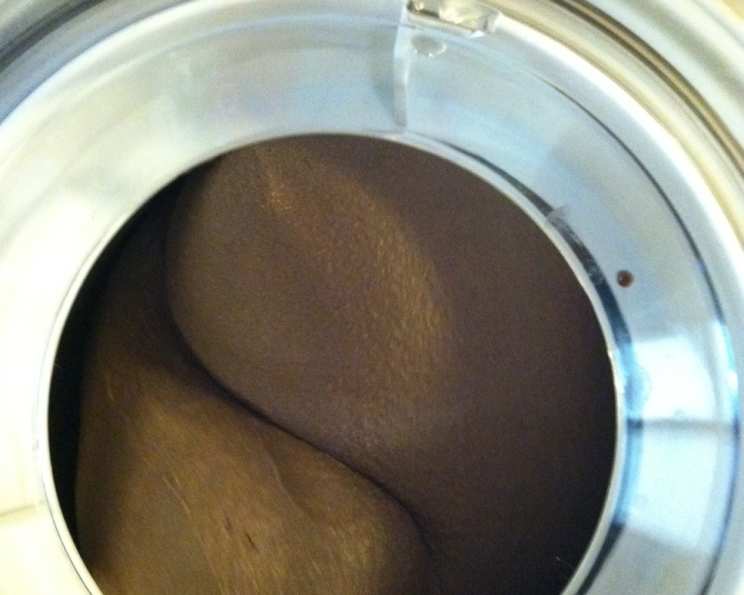
Decadent Dark Chocolate Ice Cream: A Culinary Journey
The first time I tasted truly exceptional dark chocolate ice cream, I was a wide-eyed child on vacation in Italy. The small gelateria, tucked away on a cobbled Roman street, was a symphony of vibrant colors and enticing aromas. But it was the cioccolato fondente, dark as night and intensely flavored, that stole my heart. That single spoonful transported me to a world of pure, unadulterated chocolate bliss, and I’ve been chasing that perfect dark chocolate experience ever since. This recipe comes incredibly close, bringing back that initial spark of joy with every bite.
Recipe Overview
- Prep Time: 20 minutes
- Cook Time: 10 minutes
- Chill Time: 4-8 hours (or overnight)
- Total Time: 4 hours 30 minutes (minimum)
- Yield: Approximately 5 cups
- Dietary Type: Not suitable for Vegan, Dairy-Free, or Gluten-Free diets.
Ingredients
- 2 cups whole milk
- ¾ cup granulated sugar, divided
- 4 large egg yolks
- ⅓ cup unsweetened Dutch-process cocoa powder
- 2-3 ounces bittersweet chocolate or semisweet chocolate, chopped
- 1 cup heavy cream
- 1 teaspoon pure vanilla extract
Equipment Needed
- Heavy saucepan
- Electric mixer
- Thermometer
- Plastic bowl with lid
- Ice cream maker
Instructions
-
In a heavy saucepan over medium heat, combine the whole milk and ½ cup of the granulated sugar. Stir constantly until the sugar is completely dissolved and the mixture reaches 175°F (80°C) on a thermometer. Take care not to scorch the milk; gentle, consistent stirring is key.
-
While the milk is heating, prepare the egg yolk mixture. In a separate bowl, using an electric mixer, beat the remaining ¼ cup of granulated sugar with the egg yolks until the mixture becomes pale yellow and noticeably thickens. This should take about 2 minutes. The pale color indicates proper aeration, which contributes to the ice cream’s creamy texture.
-
Add the unsweetened Dutch-process cocoa powder to the yolk mixture and beat until it is fully incorporated and the mixture is smooth. Sifting the cocoa powder beforehand can help prevent lumps.
-
Temper the egg yolks. Slowly and gradually beat ½ cup of the hot milk mixture from the saucepan into the yolk mixture. This crucial step prevents the yolks from scrambling when added to the hot milk. Adding the hot milk too quickly will result in a curdled mixture.
-
Pour the tempered yolk mixture back into the saucepan with the remaining hot milk. Stir constantly and cook over medium-low heat for 8 to 10 minutes, until the custard reaches 175°F (80°C) on a thermometer and coats the back of a spoon. The custard is ready when you can run your finger across the back of the spoon, and the line remains distinct without the custard running back together. It’s essential to maintain a low heat and stir continuously to prevent scorching and ensure a smooth, creamy custard.
-
Remove the saucepan from the heat and immediately strain the custard through a fine-mesh sieve into a clean plastic bowl with a lid. This step removes any accidentally cooked egg pieces and ensures a silky-smooth final product.
-
Add the chopped bittersweet chocolate or semisweet chocolate to the hot custard and stir constantly until the chocolate is completely melted and the mixture is smooth and homogenous. Ensure all the chocolate is fully incorporated to achieve an even chocolate flavor throughout the ice cream. Alternatively, finely grating the chocolate beforehand can speed up the melting process.
-
Whisk in the heavy cream and pure vanilla extract. The heavy cream adds richness and contributes to the ice cream’s luxurious texture, while the vanilla extract enhances the chocolate flavor.
-
Cool the custard to room temperature. This can be done quickly by placing the bowl in an ice bath, stirring occasionally.
-
Seal the container with the lid and refrigerate until the custard is thoroughly chilled, about 4 to 8 hours, or preferably overnight. Chilling the mixture completely is crucial for proper freezing in the ice cream maker. The colder the mixture, the finer the ice crystals will be, resulting in a smoother ice cream.
-
Pour the chilled custard into your ice cream maker and freeze according to the manufacturer’s instructions. The freezing time will vary depending on your machine. With a Cuisinart ice cream maker, it typically takes around 25 minutes.
Expert Tips & Tricks
- For an even richer flavor, consider using high-quality, single-origin dark chocolate with a cacao percentage of 70% or higher.
- If you don’t have Dutch-process cocoa powder, regular cocoa powder can be used, but the flavor will be slightly less intense.
- Adding a pinch of sea salt to the custard can enhance the chocolate flavor and balance the sweetness.
- If your custard develops small lumps during cooking, don’t panic! Simply strain it through a fine-mesh sieve to remove them.
- For a softer, scoopable ice cream, add a tablespoon or two of vodka or other neutral-flavored alcohol to the custard before churning. The alcohol lowers the freezing point, preventing the ice cream from becoming too hard.
- To prevent ice crystals from forming on the surface of the ice cream during storage, press a piece of plastic wrap directly onto the surface before sealing the container.
Serving & Storage Suggestions
Serve this decadent dark chocolate ice cream in chilled bowls or cones for an extra touch of elegance. It pairs beautifully with fresh berries, chocolate shavings, or a drizzle of chocolate sauce. For a more sophisticated dessert, serve it alongside a warm brownie or a slice of chocolate cake.
Store any leftover ice cream in an airtight container in the freezer. It will keep for up to 2 weeks, although the texture may degrade slightly over time. To soften the ice cream before serving, let it sit at room temperature for a few minutes or transfer it to the refrigerator for about 15-20 minutes. Avoid letting it melt completely, as this can affect the texture when it refreezes.
Nutritional Information
(Estimated per serving, based on 5 servings)
| Nutrient | Amount per Serving | % Daily Value |
|---|---|---|
| Calories | 399.4 kcal | N/A |
| Calories from Fat | 226 g | 57% |
| Total Fat | 25.2 g | 38% |
| Saturated Fat | 14.6 g | 72% |
| Cholesterol | 222.5 mg | 74% |
| Sodium | 68.2 mg | 2% |
| Total Carbohydrate | 40 g | 13% |
| Dietary Fiber | 1.9 g | 7% |
| Sugars | 35.2 g | N/A |
| Protein | 7.3 g | 14% |
Variations & Substitutions
- Mexican Chocolate Ice Cream: Add ½ teaspoon of ground cinnamon and a pinch of cayenne pepper to the custard for a warm, spicy kick.
- Mint Chocolate Chip Ice Cream: Add ½ teaspoon of peppermint extract and ½ cup of mini chocolate chips to the ice cream after churning.
- Espresso Chocolate Ice Cream: Add 1-2 tablespoons of instant espresso powder to the milk mixture for a coffee-infused flavor.
- Dairy-Free Option: While this recipe is heavily reliant on dairy, experimenting with full-fat coconut milk and vegan chocolate alternatives could yield a passable, though distinct, variation. The egg yolks would need to be replaced with a suitable vegan custard base. Be aware this will significantly change the flavor profile.
FAQs (Frequently Asked Questions)
Q: Why is it important to temper the egg yolks?
A: Tempering the egg yolks gradually raises their temperature, preventing them from scrambling when added to the hot milk. This ensures a smooth, creamy custard.
Q: Can I use a different type of chocolate?
A: Yes, you can experiment with different types of chocolate, such as milk chocolate or white chocolate, but keep in mind that the flavor and sweetness will change accordingly.
Q: How do I know when the custard is cooked enough?
A: The custard is ready when it reaches 175°F (80°C) on a thermometer and coats the back of a spoon. You should be able to draw a line across the back of the spoon with your finger, and the line should remain distinct.
Q: Can I make this ice cream without an ice cream maker?
A: While an ice cream maker is recommended for the best texture, you can make no-churn ice cream by pouring the chilled custard into a freezer-safe container and freezing for several hours, stirring every 30 minutes to break up ice crystals. The texture will be less smooth and creamy than ice cream made in an ice cream maker.
Q: How can I prevent ice crystals from forming in my ice cream?
A: To prevent ice crystals, ensure the custard is thoroughly chilled before churning, store the ice cream in an airtight container, and press a piece of plastic wrap directly onto the surface before sealing the container.
Final Thoughts
This dark chocolate ice cream recipe is a delightful journey into the world of rich, decadent flavors. Don’t be intimidated by the custard-making process; with a little patience and attention to detail, you’ll be rewarded with a homemade ice cream that rivals the best gelaterias. I encourage you to try this recipe and customize it to your liking with different chocolate percentages, add-ins, or flavorings. Share your creations and feedback; I’d love to hear about your chocolate ice cream adventures. This ice cream is perfect on its own, but also pairs incredibly well with a rich port wine or a shot of espresso for an after-dinner indulgence. Enjoy!