
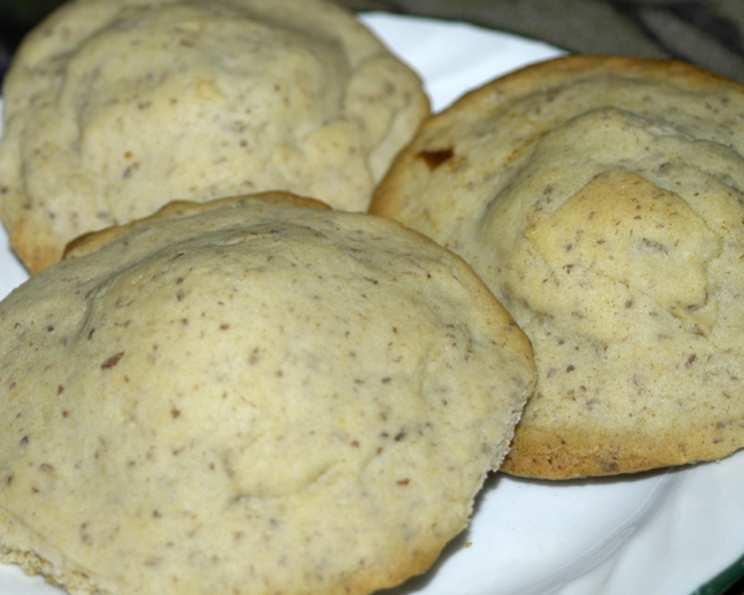
Date-Filled Cookies: A Taste of Nostalgia
My grandmother, bless her soul, wasn’t known for extravagant desserts. Her kitchen was a haven of simple pleasures, and among her repertoire, these date-filled cookies held a special place. They weren’t fancy, but biting into that soft, slightly chewy cookie with its sweet, nutty center always felt like a warm hug. The aroma alone, a comforting blend of butter, dates, and toasted nuts, instantly transported me back to her cozy kitchen, filled with laughter and love. Even though she’s no longer with us, baking these cookies keeps her memory alive, a sweet reminder of the simple joys in life.
Recipe Overview
- Prep Time: 30 minutes
- Cook Time: 10-12 minutes
- Total Time: 40-42 minutes
- Yields: About 2-3 dozen cookies
- Dietary Type: Not specified, contains gluten and dairy. Can be adapted.
Ingredients
For the Cookie Dough:
- 1/2 cup butter, softened
- 1 cup sugar
- 2 large eggs
- 1 tablespoon milk
- 2 teaspoons baking powder
- 2 cups flour
- 1 pinch salt
For the Date Filling:
- 1 cup chopped dates (Medjool or Deglet Noor work well)
- 1/2 cup water
- 3 teaspoons flour
- 1/2 cup sugar
- Chopped nuts, to taste (walnuts, pecans, or almonds are excellent choices)
Equipment Needed
- Mixing Bowls
- Electric Mixer (handheld or stand mixer)
- Measuring Cups and Spoons
- Saucepan
- Cookie Sheets
- Parchment Paper (optional, for lining cookie sheets)
- Rolling Pin
- Cookie Cutters or Round Cutter
- Cooling Rack
Instructions
-
Cream the Butter and Sugar: In a large mixing bowl, cream together the softened butter and 1 cup of sugar until light and fluffy. This is a crucial step, as it incorporates air into the dough, resulting in a tender cookie. Use an electric mixer for best results, scraping down the sides of the bowl occasionally to ensure everything is evenly combined.
-
Add the Eggs and Milk: Beat in the eggs, one at a time, mixing well after each addition. Then, stir in the milk. The mixture should be smooth and well-emulsified.
-
Combine Dry Ingredients: In a separate bowl, sift together the baking powder, flour, and salt. Sifting helps to aerate the flour and ensures that the baking powder is evenly distributed, leading to a lighter cookie.
-
Combine Wet and Dry Ingredients: Gradually add the dry ingredients to the creamed mixture, mixing on low speed until just combined. Be careful not to overmix, as this can develop the gluten in the flour and result in a tough cookie.
-
Refrigerate the Dough: Wrap the dough in plastic wrap and refrigerate for at least 30 minutes, or up to several hours. Chilling the dough helps to prevent the cookies from spreading too much during baking and also makes it easier to handle.
-
Prepare the Date Filling: While the dough is chilling, prepare the date filling. In a saucepan, combine the chopped dates, water, 3 teaspoons of flour, and 1/2 cup of sugar.
-
Cook the Filling: Cook the date filling over medium heat, stirring constantly, until the mixture thickens. This should take about 5-7 minutes. The filling is ready when it’s thick enough to mound on a spoon.
-
Add Nuts to Filling: Remove the filling from the heat and stir in the chopped nuts. Adjust the amount of nuts to your preference.
-
Roll Out the Dough: Preheat oven to 375°F (190°C). On a lightly floured surface, roll out the chilled dough to about 1/8-inch thickness.
-
Cut Out Cookie Rounds: Use cookie cutters or a round cutter to cut out circles of dough. You can use any shape you like, but circles are the most traditional for date-filled cookies.
-
Fill the Cookies: Place a spoonful of the date filling in the center of each cookie round.
-
Top and Seal: Place another cookie round on top of the filling, gently pressing the edges together to seal. You can use a fork to crimp the edges for a decorative touch and to ensure a good seal.
-
Bake the Cookies: Place the filled cookies on greased cookie sheets or cookie sheets lined with parchment paper. Bake for 10-12 minutes, or until lightly browned. Keep a close eye on them, as baking times can vary depending on your oven.
-
Cool the Cookies: Remove the cookies from the oven and let them cool on the baking sheets for a few minutes before transferring them to a cooling rack to cool completely.
Expert Tips & Tricks
- Softening Butter Quickly: If you forgot to take the butter out of the fridge, you can soften it quickly by microwaving it for a few seconds at a time, being careful not to melt it. Alternatively, you can place the butter in a resealable bag and pound it with a rolling pin.
- Preventing Cookies from Spreading: If your cookies tend to spread too much, make sure your butter is properly creamed with the sugar and that your oven is at the correct temperature. You can also try adding a tablespoon or two of flour to the dough.
- Making the Dough Ahead: The cookie dough can be made ahead of time and stored in the refrigerator for up to 2 days. Let it come to room temperature slightly before rolling it out.
- Freezing the Cookies: Baked date-filled cookies freeze well. Let them cool completely before freezing them in an airtight container.
- Flavor Boost: Add a teaspoon of vanilla extract or almond extract to the cookie dough for an extra layer of flavor. A pinch of cinnamon or nutmeg in the filling can also be delightful.
Serving & Storage Suggestions
Serve these date-filled cookies at room temperature with a glass of cold milk or a warm cup of coffee or tea. They are perfect for afternoon snacks, dessert, or holiday gatherings. Store leftover cookies in an airtight container at room temperature for up to 3-4 days. You can also freeze them for longer storage (up to 2-3 months). To reheat frozen cookies, simply thaw them at room temperature.
Nutritional Information
Please note that these values are estimates and can vary depending on specific ingredients and portion sizes.
| Nutrient | Amount per Serving (1 cookie) | % Daily Value* |
|---|---|---|
| Calories | 150 kcal | 8% |
| Total Fat | 7g | 11% |
| Saturated Fat | 4g | 20% |
| Cholesterol | 30mg | 10% |
| Sodium | 50mg | 2% |
| Total Carbohydrate | 20g | 7% |
| Dietary Fiber | 1g | 4% |
| Sugars | 10g | N/A |
| Protein | 2g | 4% |
*Percent Daily Values are based on a 2,000 calorie diet.
Variations & Substitutions
- Gluten-Free: Substitute the all-purpose flour with a gluten-free blend. You may need to add a binder like xanthan gum for best results.
- Dairy-Free: Replace the butter with a plant-based butter alternative. Ensure your milk is also plant-based (almond, soy, or oat milk work well).
- Nut-Free: Omit the nuts in the filling or substitute them with seeds like sunflower or pumpkin seeds.
- Citrus Zest: Add the zest of an orange or lemon to the cookie dough for a bright, citrusy flavor.
- Spiced Cookies: Incorporate warming spices like cinnamon, nutmeg, or cloves into both the dough and the filling for a festive twist.
- Different Dates: Experiment with different types of dates, such as Medjool or Deglet Noor. Medjool dates are softer and sweeter, while Deglet Noor dates are firmer and have a more subtle flavor.
FAQs (Frequently Asked Questions)
Q: Why is my dough crumbly?
A: Your dough might be crumbly if you used cold butter or overmixed the flour. Make sure the butter is softened and mix until just combined. Adding a tablespoon of milk can also help bind the dough.
Q: Can I use a different type of nut in the filling?
A: Absolutely! Walnuts, pecans, almonds, and even pistachios work well in the date filling. Choose your favorite or use a mix of nuts.
Q: How do I prevent the filling from leaking out during baking?
A: Ensure the edges of the cookies are properly sealed by pressing them together firmly. You can also use a fork to crimp the edges for extra security.
Q: Can I make these cookies without a cookie cutter?
A: Yes, you can. Simply roll the dough into a log, chill it, and then slice it into rounds. Alternatively, you can drop rounded tablespoons of dough onto the baking sheet.
Q: How long will these cookies stay fresh?
A: Stored in an airtight container at room temperature, these cookies will stay fresh for up to 3-4 days. They can also be frozen for longer storage.
Final Thoughts
These date-filled cookies are more than just a recipe; they’re a taste of tradition, a connection to the past, and a comforting reminder of simpler times. I encourage you to try this recipe and create your own memories with these delightful treats. Feel free to experiment with different variations and substitutions to make them your own. And please, share your creations and feedback! I’d love to hear how they turn out. Pair them with a steaming cup of coffee or a scoop of vanilla ice cream for the perfect treat. Happy baking!