
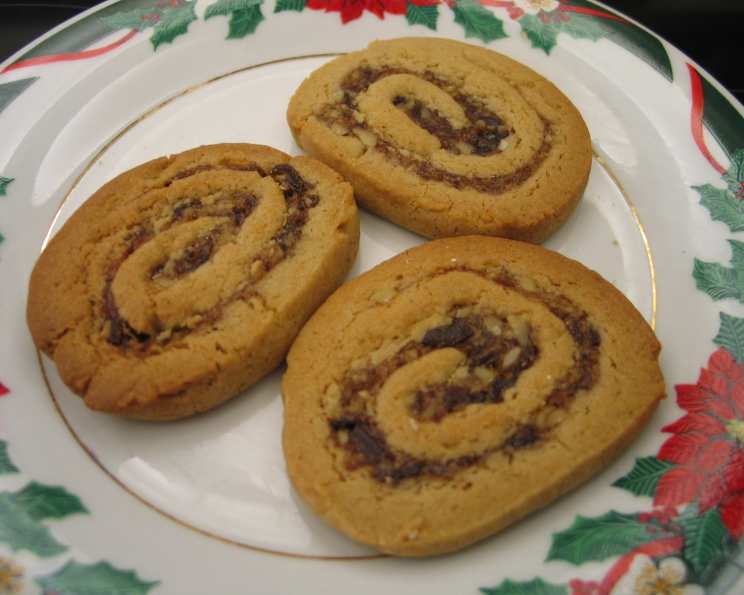
Date Nut Pinwheels: A Sweet Slice of Nostalgia
My grandmother, Nana Bea, had a cookie jar that was perpetually overflowing. While it often held the usual suspects – chocolate chip, peanut butter, oatmeal raisin – the cookies I truly coveted were her date nut pinwheels. I remember being mesmerized as a child by the swirling layers, the slightly chewy texture of the dates, and the satisfying crunch of the nuts. Each bite was a tiny explosion of flavor, a perfect balance of sweet and nutty that transported me straight to Nana Bea’s kitchen. Now, years later, I carry on her tradition, filling my own cookie jar with these delightful little bites of nostalgia, hoping to evoke the same happy memories for my own family.
Recipe Overview
- Prep Time: 45 minutes (includes chilling)
- Cook Time: 10-12 minutes
- Total Time: 55-57 minutes
- Yields: Approximately 72 cookies
- Dietary Type: Vegetarian
Ingredients
For the Filling:
- 1 (8 ounce) package pitted dates, finely snipped (1 1/3 cups)
- 1/3 cup sugar
- 1/3 cup water
- 1/2 cup finely chopped nuts (walnuts or pecans work well)
- 1/2 teaspoon vanilla extract
For the Dough:
- 2 cups all-purpose flour
- 1/2 teaspoon baking soda
- 1/4 teaspoon salt
- 1/4 teaspoon ground cinnamon
- 1/2 cup shortening
- 1 cup packed brown sugar
- 1 egg
- 1/2 teaspoon vanilla extract
Equipment Needed
- Small saucepan
- Large mixing bowl
- Electric mixer
- Measuring cups and spoons
- Waxed paper
- Rolling pin
- Sharp knife
- Cookie sheets
- Cooling rack
Instructions
-
Prepare the Date Filling: In a small saucepan, combine the finely snipped dates, sugar, and water. Bring the mixture to a boil over medium heat.
-
Cook the Filling: Reduce the heat to low and cook, stirring constantly, for 1 to 2 minutes, or until the filling thickens to a jam-like consistency. Be careful not to burn the mixture; constant stirring is key!
-
Flavor the Filling: Remove the saucepan from the heat and stir in the finely chopped nuts and 1/2 teaspoon of vanilla extract. Mix well to combine.
-
Cool the Filling: Set the date filling aside to cool completely. This is important to prevent the filling from melting the dough later.
-
Combine Dry Ingredients: In a separate bowl, whisk together the all-purpose flour, baking soda, salt, and ground cinnamon. This ensures the baking soda and spices are evenly distributed throughout the dough.
-
Cream Shortening and Sugar: In a large mixing bowl, beat the shortening with an electric mixer for about 30 seconds until it becomes smooth and creamy.
-
Add Brown Sugar: Add the packed brown sugar to the bowl with the shortening. Beat the mixture until it is light and fluffy. This step incorporates air into the dough, which helps create a tender cookie.
-
Incorporate Egg and Vanilla: Add the egg and 1/2 teaspoon of vanilla extract to the shortening and sugar mixture. Beat well until everything is thoroughly combined.
-
Combine Wet and Dry Ingredients: Gradually add the flour mixture to the wet ingredients, beating until just combined. Be careful not to overmix the dough, as this can develop the gluten and result in tougher cookies. Stir in the last portion of the flour by hand to prevent overmixing.
-
Chill the Dough: Cover the dough tightly with plastic wrap and chill it in the refrigerator for about 30 minutes, or until it is easy to handle. Chilling the dough allows the gluten to relax, making it easier to roll out, and also prevents the cookies from spreading too much during baking.
-
Roll Out the Dough: On a sheet of waxed paper (or a silicone mat), roll the chilled dough into an 18×10 inch rectangle. Use a rolling pin and apply even pressure to ensure the dough is an even thickness. If the dough is sticking to the waxed paper, lightly dust it with flour.
-
Spread the Filling: Evenly spread the cooled date filling over the rolled-out dough, leaving a 1/2-inch border around the edges. This border will help seal the roll and prevent the filling from oozing out during baking.
-
Roll Up the Dough: Starting from the long side, carefully roll up the dough jelly-roll style. Pinch the edge of the dough to seal the seam tightly. This will ensure that the pinwheels hold their shape during baking.
-
Divide and Chill: Cut the rolled dough in half crosswise. Wrap each half tightly in plastic wrap. Chill the wrapped rolls in the refrigerator for several hours or overnight. For best results, chill them standing upright in a drinking glass to prevent the bottoms from flattening.
-
Preheat Oven and Prepare Baking Sheet: Preheat your oven to 350°F (175°C). Lightly grease a cookie sheet.
-
Slice and Bake: Remove the chilled dough rolls from the refrigerator. Using a sharp knife, cut the rolls into 1/4-inch thick slices.
-
Arrange and Bake: Place the sliced pinwheels on the prepared cookie sheet, leaving a little space between each cookie to allow for spreading.
-
Bake: Bake in the preheated oven for 10-12 minutes, or until the cookies are lightly golden brown around the edges. Keep a close eye on them, as baking times can vary depending on your oven.
-
Cool: Let the cookies cool on the cookie sheet for 1 minute before transferring them to a wire rack to cool completely.
Expert Tips & Tricks
- Nut Variety: Feel free to experiment with different types of nuts in the filling. Walnuts, pecans, and even slivered almonds all work beautifully.
- Date Prep: If your dates are very dry, you can soak them in hot water for about 10 minutes before snipping them. This will help soften them and make them easier to work with. Drain them well before adding them to the saucepan.
- Even Slicing: For consistently shaped pinwheels, use a very sharp knife and wipe it clean between each slice. You can also try using unflavored dental floss to slice the dough – simply slide the floss under the roll and pull the ends to create a clean cut.
- Freezing: These date nut pinwheels freeze exceptionally well. Freeze the sliced, unbaked cookies on a baking sheet until solid, then transfer them to a freezer bag. You can bake them directly from frozen, adding a few extra minutes to the baking time. You can also freeze the unbaked dough roll. Thaw in the refrigerator before slicing and baking.
- Shiny Cookies: For a shiny finish, brush the tops of the pinwheels with a lightly beaten egg white before baking.
Serving & Storage Suggestions
Date nut pinwheels are delicious served as a snack with a cup of coffee or tea, or as part of a dessert platter. They are also a great addition to a holiday cookie exchange. Store the cooled cookies in an airtight container at room temperature for up to 5 days. For longer storage, freeze them for up to 2 months. To reheat frozen cookies, simply let them thaw at room temperature for about 30 minutes.
Nutritional Information
| Nutrient | Amount per Serving | % Daily Value |
|---|---|---|
| Calories | 75 kcal | 4% |
| Total Fat | 3g | 5% |
| Saturated Fat | 1g | 5% |
| Cholesterol | 3mg | 1% |
| Sodium | 30mg | 1% |
| Total Carbohydrate | 10g | 4% |
| Dietary Fiber | 0g | 0% |
| Sugars | 6g | – |
| Protein | 1g | 2% |
Nutritional information is an estimate and may vary based on specific ingredients used.
Variations & Substitutions
- Gluten-Free: Use a gluten-free all-purpose flour blend in place of the regular all-purpose flour.
- Dairy-Free: Since this recipe calls for shortening, it is already naturally dairy free. Just ensure your shortening doesn’t contain any dairy.
- Spice It Up: Add a pinch of ground nutmeg or cloves to the dough for a warmer, more festive flavor.
- Citrus Zest: Add the zest of an orange or lemon to the dough for a bright, citrusy twist.
- Different Nuts: Experiment with using chopped dried cranberries or raisins instead of nuts in the filling, or use a combination of dried fruits and nuts.
FAQs (Frequently Asked Questions)
Q: Why is my dough crumbly and difficult to roll out?
A: This can happen if the dough is too cold or if you’ve added too much flour. Let the dough warm up slightly at room temperature for a few minutes, or add a teaspoon of milk or water to the dough to help bind it together.
Q: Can I make the date filling ahead of time?
A: Yes, you can make the date filling up to 2 days in advance. Store it in an airtight container in the refrigerator. Let it come to room temperature before spreading it on the dough.
Q: Why are my cookies spreading too much during baking?
A: This can be caused by using too much sugar or not chilling the dough long enough. Make sure to measure your ingredients accurately and chill the dough for at least 30 minutes before rolling it out.
Q: How do I prevent the filling from leaking out during baking?
A: Be sure to leave a 1/2-inch border around the edges of the dough when spreading the filling. Pinch the seam of the roll tightly to seal it completely.
Q: Can I use a different type of sugar?
A: While brown sugar is preferred for its molasses flavor, you can substitute granulated sugar if needed. The texture and flavor of the cookies may be slightly different.
Final Thoughts
These Date Nut Pinwheels are more than just cookies; they’re a sweet connection to the past, a reminder of cherished memories, and a delicious way to create new ones. Don’t be intimidated by the multiple steps; the process is surprisingly simple and the results are well worth the effort. I encourage you to give this recipe a try, and share your own baking adventures with friends and family. Pair these delightful pinwheels with a warm cup of coffee, a scoop of vanilla ice cream, or simply enjoy them on their own. Happy baking!