
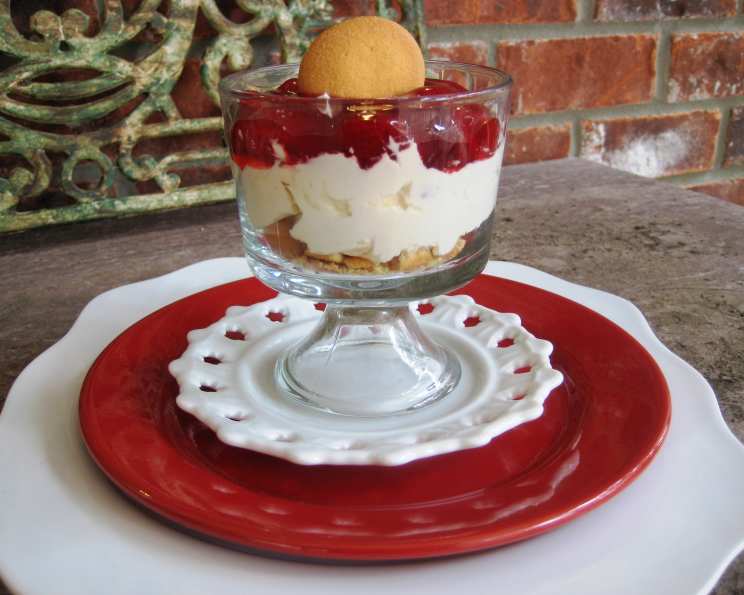
Decadent 5-Minute Strawberry Cheesecake for Two (Regular or Sugar-Free)
I still remember the first time I made this “cheater” cheesecake. It was a Tuesday night, I was home alone, and a craving for something sweet hit me like a rogue wave. I rummaged through my pantry, saw the cream cheese and strawberry pie filling, and thought, “Why not?” A few minutes later, I was curled up on the couch with a decadent, single-serving dessert, and all was right with the world. This recipe has been my go-to emergency treat ever since.
Recipe Overview
- Prep Time: 5 minutes
- Cook Time: 0 minutes
- Total Time: 5 minutes
- Servings: 2
- Yield: 1 small cake
- Dietary Type: Vegetarian
Ingredients
- 10 vanilla wafer cookies (or chocolate ones)
- 1 (8 ounce) package reduced-fat cream cheese
- 1/4 cup half-and-half (or milk)
- 1 teaspoon vanilla extract
- 1/4 – 1/3 cup sugar (or 1/4 to 1/2 cup Splenda or 1/8 cup Stevia)
- 1 (12 ounce) can Solo brand strawberry pie filling
Equipment Needed
- 1-quart casserole dish (or a heart-shaped dish for special occasions)
- Small mixing bowl
- Fork
Instructions
-
Select your serving dish. A 1-quart casserole dish works perfectly, or use something a little more festive like a heart-shaped dish if you’re making this for a special someone. Whatever you choose, make sure it’s about 5 or 6 inches across and has relatively short sides. This helps with layering.
-
Create the cookie crumb base. Using your hands, crumble the vanilla wafer cookies directly into the dish. Aim for a fine, even crumb consistency. Spread the crumbs out uniformly across the bottom of the dish to create a solid foundation for the cheesecake filling.
-
Prepare the cream cheese filling. In a small bowl, combine the reduced-fat cream cheese, half-and-half (or milk), vanilla extract, and your sweetener of choice. Start with the smaller amount of sweetener (1/4 cup sugar, 1/4 cup Splenda, or 1/8 cup Stevia), then taste and adjust to your liking. Remember, you can always add more, but you can’t take it away!
-
Mix the filling until smooth. Using a fork, thoroughly mix all the ingredients together until the cream cheese filling is smooth and well combined. Ensure there are no lumps of cream cheese remaining. A smooth filling provides the best texture in the final dessert.
-
Layer the filling. Carefully spread the cream cheese mixture evenly over the cookie crumbs. Take your time and avoid disturbing the cookie crumb layer. A gentle spreading motion will prevent the crumbs from mixing into the filling.
-
Add the strawberry topping. Spread the strawberry pie filling generously over the top of the cream cheese layer. Make sure to cover the entire surface for a vibrant and flavorful finish.
-
Serve or chill. You can serve the cheesecake immediately for a soft-set texture, or chill it in the refrigerator for later consumption. Chilling will allow the cheesecake to firm up slightly, enhancing its richness and flavor. If chilling, cover loosely with plastic wrap to prevent a skin from forming.
Expert Tips & Tricks
- Cookie Crumb Perfection: For a more intense vanilla flavor, lightly toast the vanilla wafers in a dry skillet for a few minutes before crumbling. Keep a close eye on them – they burn quickly! Alternatively, a quick blitz in a food processor ensures uniformly fine crumbs.
- Sweetener Swaps: If you prefer a different sugar substitute, feel free to experiment! Erythritol or monk fruit sweetener can be used, but adjust the amount to match the sweetness level of your preferred brand.
- Cream Cheese Consistency: Make sure your cream cheese is adequately softened at room temperature before mixing. This will prevent lumps and create a smoother, more homogenous filling. Microwaving cream cheese is not advisable as it can lead to a gummy texture.
Serving & Storage Suggestions
This strawberry cheesecake is best served chilled, especially after the flavors have had a chance to meld together. Garnish with a sprig of fresh mint for an elegant presentation.
Leftovers can be stored in an airtight container in the refrigerator for up to 3 days. While it’s unlikely to last that long, proper storage ensures optimal taste and texture. I do not recommend freezing this dessert, as the cream cheese can become grainy upon thawing.
Nutritional Information
(Estimated per serving, using sugar)
| Nutrient | Amount per Serving | % Daily Value |
|---|---|---|
| Calories | 273 kcal | N/A |
| Calories from Fat | 131g | 48% |
| Total Fat | 14.6 g | 22% |
| Saturated Fat | 8.1 g | 40% |
| Cholesterol | 37.4 mg | 12% |
| Sodium | 220 mg | 9% |
| Total Carbohydrate | 27.9 g | 9% |
| Dietary Fiber | 0.3 g | 1% |
| Sugars | 12.8 g | N/A |
| Protein | 7.1 g | 14% |
Note: Nutritional information is an estimate and will vary based on specific ingredients and portion sizes.
Variations & Substitutions
- Chocolate Lovers: Substitute chocolate wafers for the vanilla wafers and use a chocolate-flavored cream cheese for an even richer dessert.
- Berry Blast: Replace the strawberry pie filling with a mixed berry compote or fresh berries for a brighter, more natural flavor.
- Tropical Twist: Use crushed pineapple and a coconut-flavored extract in the cream cheese filling for a taste of the tropics.
- Gluten-Free: Use gluten-free vanilla wafers to make this dessert gluten-free friendly.
- Dairy-Free: While this particular recipe isn’t naturally dairy-free, you could explore substitutions with plant-based cream cheese alternatives and non-dairy milk for a similar, yet distinct, dessert.
FAQs (Frequently Asked Questions)
Q: Can I use a different size dish?
A: While a 1-quart dish is recommended, you can adjust the recipe to fit other sizes. Just ensure that the ingredients are layered proportionally. A larger dish will result in thinner layers, while a smaller dish might overflow.
Q: Can I use regular cream cheese instead of reduced-fat?
A: Absolutely! Regular cream cheese will result in a richer, creamier dessert. The nutritional values will change accordingly.
Q: How long does this last in the fridge?
A: Properly stored in an airtight container, this strawberry cheesecake will last for up to 3 days in the refrigerator.
Q: Can I make this ahead of time?
A: Yes, this dessert is perfect for making ahead of time. Chilling it for a few hours will allow the flavors to meld together and the cheesecake to firm up slightly.
Q: The filling is too sweet/not sweet enough. What can I do?
A: Taste the filling before assembling and adjust the sweetener accordingly. If it’s too sweet, add a tablespoon of plain yogurt or sour cream to cut through the sweetness. If it’s not sweet enough, add a bit more sweetener, a teaspoon at a time, until you reach your desired level of sweetness.
Final Thoughts
This quick and easy strawberry cheesecake is the perfect solution for those moments when you crave something sweet but don’t have the time or energy for a complicated dessert. It’s a delightful treat that can be customized to your liking. I encourage you to experiment with different variations and share your creations with friends and family. Enjoy this little slice of happiness!