
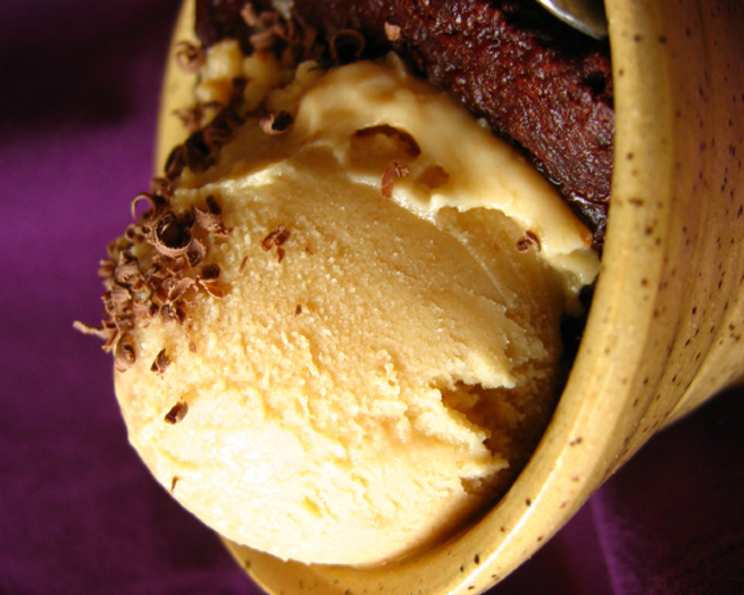
Decadent Peanut Butter Soy Ice Cream: A Taste of Childhood Dreams
There’s something magical about the combination of peanut butter and ice cream. For me, it conjures up memories of sweltering summer afternoons spent at my grandmother’s house. She always had a half-empty jar of peanut butter in the fridge, and somehow, a single spoonful always found its way into my ice cream. This recipe captures that simple joy, but elevates it with a creamy soy base, creating a truly unforgettable frozen treat that’s both comforting and surprisingly sophisticated.
Recipe Overview
- Prep Time: 15 minutes
- Cook Time: 10 minutes
- Chill Time: 2-3 hours
- Freeze Time: 20-25 minutes (in ice cream maker)
- Total Time: Approximately 3-5 hours
- Servings: 6
- Dietary Type: Dairy-Free (can be Vegan if egg is substituted)
Ingredients
- 2 1/3 cups soy milk
- 1/2 cup sugar
- 1 tablespoon cornstarch
- 1/4 cup peanut butter
- 1 egg, beaten
- 1/4 cup peanut butter chips (optional) or 1/4 cup chocolate chips (optional)
Equipment Needed
- Large saucepan
- Whisk
- Measuring cups and spoons
- Ice cream maker
- Refrigerator
- Sink (for ice bath, optional)
Instructions
-
In a large saucepan, vigorously whisk together the sugar, cornstarch, soy milk, and peanut butter until smooth. This step is crucial to ensure the cornstarch dissolves properly, preventing lumps in the final product.
-
Place the saucepan over medium heat, and bring the mixture to a boil, whisking frequently. As the mixture heats up, it’s essential to keep whisking to prevent scorching on the bottom of the pan.
-
Once boiling, continue whisking constantly for one full minute. This allows the cornstarch to fully thicken the mixture. It will become noticeably thicker, almost like a custard base. Remove the saucepan from the heat.
-
Temper the egg: In a separate small bowl, whisk several large spoonfuls of the hot milk mixture into the beaten egg, whisking constantly to prevent the egg from scrambling. This slowly raises the temperature of the egg, allowing it to be incorporated into the hot mixture without cooking prematurely.
-
Whisk the tempered egg mixture back into the saucepan containing the remaining hot milk mixture.
-
Return the saucepan to the heat and cook over medium flame, whisking constantly, until the mixture returns to a boil. This will further thicken the custard base. The mixture should coat the back of a spoon.
-
Remove the saucepan from the heat and transfer the mixture to a bowl. Cover the surface of the mixture directly with plastic wrap to prevent a skin from forming.
-
Refrigerate until completely cold. For faster cooling, you can carefully place the pan in a sink filled with cold water, stirring occasionally. This will significantly reduce the chilling time. Ideally, chill for at least 2-3 hours, or preferably overnight. The mixture must be cold before churning for the best ice cream texture.
-
Once the mixture is thoroughly chilled, freeze in an ice cream maker according to the manufacturer’s directions. This usually takes about 20-25 minutes, depending on the machine.
-
Add the peanut butter chips or chocolate chips (if using) towards the end of the freezing process, usually in the last 5 minutes. This ensures they are evenly distributed throughout the ice cream without becoming completely pulverized.
Expert Tips & Tricks
- For a richer flavor, use natural-style peanut butter, which often has a more intense peanut flavor than processed varieties. However, be sure to stir it well before measuring, as the oil tends to separate.
- If you don’t have an ice cream maker, you can still make this ice cream using the “no-churn” method. Pour the chilled mixture into a freezer-safe container and freeze for 30 minutes. Remove from the freezer and whisk vigorously to break up any ice crystals. Return to the freezer and repeat this process every 30 minutes for about 2-3 hours, or until the ice cream is frozen to your desired consistency.
- To prevent ice crystals from forming, make sure the mixture is thoroughly chilled before churning. Also, avoid over-churning the ice cream, as this can incorporate too much air and result in a less creamy texture.
- If the finished ice cream is too hard to scoop directly from the freezer, let it sit at room temperature for a few minutes to soften slightly.
Serving & Storage Suggestions
Serve this decadent peanut butter soy ice cream on its own in a bowl or cone. It’s also delicious as a topping for brownies, cookies, or even a slice of pie. For an extra touch of indulgence, drizzle with melted chocolate or peanut butter sauce.
Store leftover ice cream in an airtight container in the freezer. It will keep for up to 2 weeks, although the texture may start to deteriorate slightly after that time. To minimize freezer burn, press a piece of plastic wrap directly onto the surface of the ice cream before sealing the container.
Nutritional Information
| Nutrient | Amount per Serving | % Daily Value (Approximate) |
|---|---|---|
| Calories | 250 kcal | 13% |
| Total Fat | 12g | 15% |
| Saturated Fat | 3g | 15% |
| Cholesterol | 20mg | 7% |
| Sodium | 150mg | 7% |
| Total Carbohydrate | 30g | 11% |
| Dietary Fiber | 2g | 7% |
| Sugars | 20g | – |
| Protein | 8g | 16% |
Nutritional information is an estimate and may vary based on specific ingredients and portion sizes.
Variations & Substitutions
- Vegan Option: Substitute the egg with 1 tablespoon of cornstarch mixed with 2 tablespoons of water. Add this slurry to the mixture after it has been removed from the heat.
- Regular Milk Version: While I haven’t personally tried it, you can substitute the soy milk with regular dairy milk for a similar result.
- Different Nut Butter: Experiment with other nut butters, such as almond butter or cashew butter, for a unique flavor profile.
- Add-ins: Get creative with your add-ins! Try chopped peanuts, pretzels, chocolate chunks, or even a swirl of caramel.
- Flavor Enhancements: Add a teaspoon of vanilla extract or a pinch of sea salt to enhance the flavors.
FAQs (Frequently Asked Questions)
Q: Can I use a different type of soy milk?
A: Yes, you can use different types of soy milk. Just be aware that the sweetness and thickness may vary, which could affect the final texture and flavor of the ice cream.
Q: Can I reduce the amount of sugar in this recipe?
A: You can reduce the sugar, but it will impact the texture of the ice cream. Sugar helps prevent ice crystals from forming. Start by reducing it by a couple of tablespoons and adjust to your preference.
Q: How do I know when the custard base is thick enough?
A: The custard base should be thick enough to coat the back of a spoon. If you run your finger across the coated spoon, the line should remain distinct and not immediately flow back together.
Q: My ice cream is icy. What did I do wrong?
A: Icy ice cream is usually caused by ice crystals forming during the freezing process. This can be due to insufficient chilling of the mixture, over-churning, or not storing the ice cream properly.
Q: Can I make this recipe ahead of time?
A: Yes, you can make the custard base ahead of time and store it in the refrigerator for up to 2 days. However, it’s best to churn the ice cream shortly before serving for the best texture.
Final Thoughts
This Decadent Peanut Butter Soy Ice Cream is more than just a recipe; it’s a comforting trip down memory lane. It’s a chance to recreate a childhood favorite with a modern twist, making it accessible for those with dietary restrictions or simply looking for a healthier alternative. Don’t be afraid to experiment with variations, personalize your add-ins, and most importantly, share the joy of this delicious frozen treat with friends and family. I encourage you to give it a try and let me know what you think. I’m confident that you’ll love it as much as I do!