
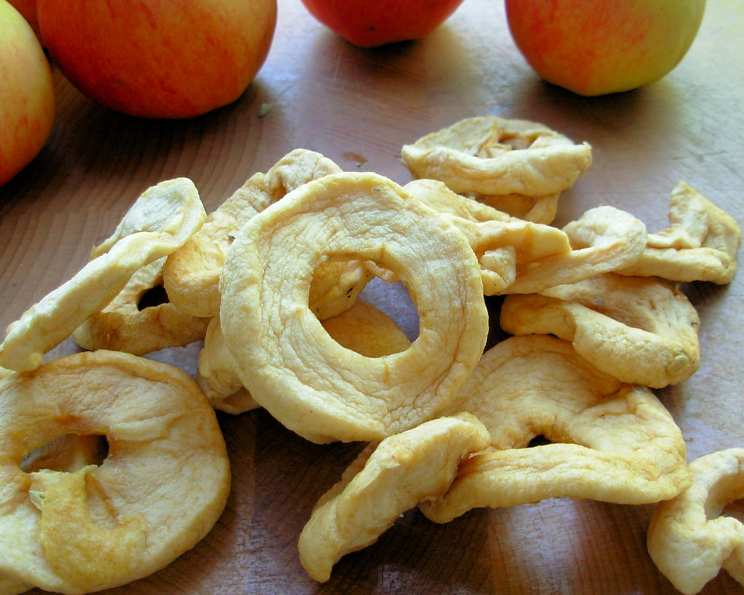
Decorative Dried Apples: A Taste of Autumn’s Charm
The scent of cinnamon and baked apples always transports me back to my grandmother’s kitchen. As a child, I remember her patiently arranging thin apple slices on baking sheets, the warm aroma filling the entire house. We’d string these fragrant rounds together to adorn the Christmas tree, transforming ordinary fruit into rustic, heartwarming ornaments that whispered tales of simpler times. Now, I carry on that tradition, not just for the holidays, but as a year-round celebration of nature’s beauty and the comforting flavors of fall.
Recipe Overview
- Prep Time: 15 minutes
- Cook Time: 3-4 hours
- Total Time: 3 hours 15 minutes – 4 hours 15 minutes
- Yields: Approximately 30 slices
- Serves: 30
- Dietary Type: Vegan, Gluten-Free, Dairy-Free
Ingredients
- 3 Apples (such as Fuji, Gala, or Honeycrisp)
- 2 tablespoons Salt
- 1 gallon Water
- Cinnamon (for dusting)
Equipment Needed
- Sharp Knife or Mandoline
- Large Bowl
- Baking Sheets
- Parchment Paper (optional)
- Oven
- Cooling Rack
- Raffia or Ribbon
Instructions
-
Begin by slicing the apples. The key to evenly dried apples is consistent thickness. Aim for slices that are between 1/8 to 1/4 inch thick. A sharp knife works perfectly fine, but a mandoline can ensure uniform slices, resulting in more evenly dried fruit. Remove the core. You can either core the apples before slicing, or use a small cookie cutter to remove the core from each slice after cutting.
-
Prepare a salt water soak. In a large bowl, combine 2 tablespoons of salt with 1 gallon of water. Stir until the salt is fully dissolved.
-
Soak the apple slices in the salt water solution for 5 to 10 minutes. This step is crucial; the salt water helps to prevent the apples from browning too quickly and also aids in drawing out moisture, which speeds up the drying process.
-
Remove the apple slices from the salt water and gently pat them dry with a clean kitchen towel or paper towels. Removing excess water at this stage will ensure better browning and drying.
-
Arrange the apple slices on a baking sheet lined with parchment paper (optional, but recommended for easier cleanup). Make sure the slices are not overlapping, as this will inhibit proper drying.
-
Bake the apple slices in a preheated oven at 180 degrees Fahrenheit (82 degrees Celsius) for 3 to 4 hours, or until they are dry and slightly leathery. It’s crucial to monitor the apples closely during baking, as drying times can vary depending on the type of apple and your oven’s accuracy.
-
Turn the apple slices occasionally during the baking process, about every hour. This ensures even drying and prevents any sticking to the baking sheet.
-
Once the apple slices are dried, remove them from the oven and let them cool completely on a cooling rack. This will allow them to firm up and crisp further.
-
Dust the dried apple slices with cinnamon. This adds a warm, fragrant touch that complements the natural sweetness of the apples. You can use a shaker or gently sprinkle the cinnamon over the slices.
-
Now, it’s time to get creative! String the dried apple slices together using raffia or ribbon. You can thread them individually or create garlands by overlapping the slices.
Expert Tips & Tricks
- Choose the right apples: Firmer apples like Fuji, Gala, or Honeycrisp hold their shape best during the drying process. Softer varieties can become mushy.
- Salt Water Solution is Key: Do not skip the salt water soak, it helps prevent browning and enhances the flavor.
- Prevent Sticking: Although optional, parchment paper will prevent sticking and make clean-up easier.
- Low and Slow is the Way to Go: Drying apples at a low temperature for a long time prevents them from burning and ensures they dry evenly throughout. If you want to speed up the process slightly, you can increase the temperature to 200°F (93°C), but keep a close eye on them to avoid burning.
- Even Drying is Crucial: Ensure all your apple slices are as close to the same thickness as possible, otherwise, the thinner ones will get crispy and start to burn before the thicker ones have properly dried.
- Check for Doneness: The apples should be pliable but not sticky. They should have a slightly leathery texture. If they are still soft and moist, continue baking them for another 30 minutes and check again.
- Revive Soft Apples: If your dried apples soften over time, you can re-crisp them by placing them back in a low oven (170°F or 77°C) for about 30 minutes.
- Dehydrator Option: If you have a dehydrator, you can use it to dry the apples instead of the oven. Follow the manufacturer’s instructions for drying fruit, typically around 135°F (57°C) for 6-12 hours.
Serving & Storage Suggestions
These decorative dried apples are perfect for adorning Christmas trees, adding a rustic touch to wrapped gifts, enhancing the presentation of gift baskets, or even decorating bottles. They also make a lovely addition to a fall-themed centerpiece.
To store, place the dried apple slices in an airtight container at room temperature. They should last for several weeks. If you live in a humid environment, you can add a desiccant packet to the container to prevent moisture absorption. Avoid storing them in the refrigerator, as the humidity can cause them to become soft and sticky. If your environment is extremely humid, you may want to freeze them in an airtight container to extend their shelf life.
Nutritional Information
| Nutrient | Amount per Serving | % Daily Value |
|---|---|---|
| Calories | 7.2 kcal | N/A |
| Calories from Fat | 0 kcal | N/A |
| Total Fat | 0 g | 0% |
| Saturated Fat | 0 g | 0% |
| Cholesterol | 0 mg | 0% |
| Sodium | 467.7 mg | 19% |
| Total Carbohydrate | 1.9 g | 0% |
| Dietary Fiber | 0.3 g | 1% |
| Sugars | 1.4 g | 5% |
| Protein | 0 g | 0% |
Note: Nutritional information is an estimate and can vary based on the specific ingredients used.
Variations & Substitutions
- Spice it up: Experiment with different spices like nutmeg, allspice, or apple pie spice instead of or in addition to cinnamon.
- Sweeten the deal: Before baking, brush the apple slices with a light coating of maple syrup or honey for a sweeter treat. (Note: this will make them slightly stickier).
- Citrus Zest: Add a touch of citrus zest (lemon, orange, or lime) to the cinnamon for a bright, aromatic flavor.
- Different Apple Varieties: Try using a mix of different apple varieties for a variety of colors and flavors.
- Make it Festive: Dip the dried apple slices in melted dark chocolate for a decadent treat.
- Edible Glitter: Add edible glitter for a festive and sparkly treat during the holidays.
FAQs (Frequently Asked Questions)
Q: Why do I need to soak the apples in salt water?
A: Soaking the apple slices in salt water helps to prevent browning, draw out moisture, and enhance their flavor. It’s a crucial step for achieving evenly dried and beautifully colored apples.
Q: How do I know when the apple slices are done?
A: The apple slices are done when they are dry to the touch, slightly leathery, and pliable but not sticky. If they are still soft or moist, continue baking them for longer.
Q: Can I use a dehydrator instead of an oven?
A: Yes, you can use a dehydrator. Follow the manufacturer’s instructions for drying fruit, typically around 135°F (57°C) for 6-12 hours.
Q: How long will the dried apple slices last?
A: When stored in an airtight container at room temperature, the dried apple slices should last for several weeks.
Q: Can I freeze the dried apple slices?
A: Yes, you can freeze the dried apple slices in an airtight container to extend their shelf life, especially if you live in a humid environment.
Final Thoughts
Creating these decorative dried apples is more than just a recipe; it’s an experience that connects you to the seasons and brings a touch of rustic charm into your home. I encourage you to gather your loved ones, put on some cozy music, and embark on this fragrant journey. Whether you use them to adorn your holiday tree, embellish a gift, or simply enjoy them as a wholesome snack, these dried apple slices are sure to bring a smile to your face. Don’t be afraid to experiment with different spices and flavor combinations to create your own unique twist. And remember, the best part of any recipe is sharing it with those you care about. Happy drying!