
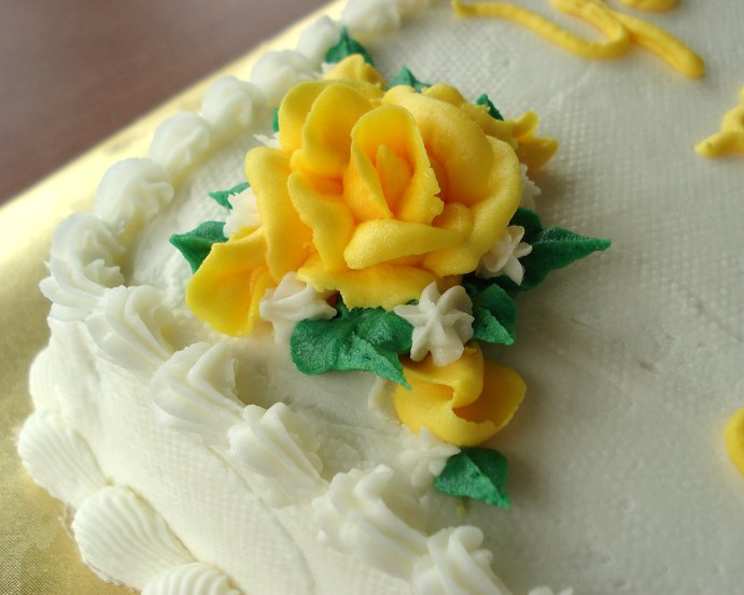
The Only Decorator Buttercream Recipe You’ll Ever Need
The memory is so vivid: my grandmother’s kitchen, smelling of vanilla and sugar, my tiny hands gripping a piping bag overflowing with the most ethereal, perfectly smooth buttercream. She was a master cake decorator, her creations legendary in our small town. That buttercream, the foundation of her art, was something special – never too sweet, never greasy, just melt-in-your-mouth perfection that made every cake a masterpiece. I’ve spent years trying to replicate it, and this recipe comes incredibly close to that magical taste of childhood.
Recipe Overview
- Prep Time: 10 minutes
- Cook Time: 0 minutes
- Total Time: 10 minutes
- Yield: 3 1/2 cups
- Dietary Type: Vegetarian
Ingredients
- 1/2 cup shortening
- 1/2 cup real butter, softened
- 1 1/2 teaspoons clear vanilla extract
- 1 dash salt (optional)
- 5 cups confectioners’ sugar
- 2-3 tablespoons milk
Equipment Needed
- Stand mixer or hand mixer
- Mixing bowl
- Measuring cups and spoons
- Spatula
Instructions
- In a large mixing bowl, cream together the 1/2 cup of softened butter and 1/2 cup of shortening until light and fluffy. This is a crucial step, as the texture of the fats directly impacts the final buttercream consistency. You’re aiming for a pale, airy mixture, free of any lumps.
- Add 1 1/2 teaspoons of clear vanilla extract. If you’re using the optional salt to cut the sweetness, dissolve the salt in the vanilla extract before adding it. This ensures even distribution.
- Gradually add the 5 cups of confectioners’ sugar, one cup at a time, while beating on medium speed. It’s important to incorporate the sugar slowly to prevent a cloud of powdered sugar from erupting from the bowl.
- Add the 2 tablespoons of milk, one tablespoon at a time, and beat on high speed until the buttercream is completely blended and has reached a smooth, spreadable consistency. If the buttercream seems too thick, add the additional tablespoon of milk. If it’s too thin, add a bit more confectioners’ sugar.
- Continue to beat the buttercream on high speed for an additional 2-3 minutes to incorporate air and achieve a light and fluffy texture. The buttercream should hold its shape well when piped.
Expert Tips & Tricks
- Temperature Matters: Ensure your butter is properly softened but not melted. It should be pliable and easily yield to pressure but still hold its shape. Melted butter will result in greasy buttercream.
- Clear Vanilla is Key: Using clear vanilla extract helps maintain the bright white color of the buttercream, which is especially important for decorating. Regular vanilla extract can slightly tint the buttercream.
- Beat, Beat, Beat: Don’t be afraid to beat the buttercream for a longer time. The more you beat it, the lighter and fluffier it will become. However, be careful not to overbeat, as this can cause the buttercream to separate.
- Adjusting Consistency: If your buttercream is too stiff, add a tiny amount of milk, a teaspoon at a time, until you reach the desired consistency. If it’s too thin, add a tablespoon of powdered sugar at a time.
- Preventing Air Bubbles: After mixing, gently press the buttercream against the sides of the bowl with a spatula to release any trapped air bubbles. This will result in smoother piping.
- Coloring Your Buttercream: Gel food coloring is best for coloring buttercream, as it’s highly concentrated and won’t change the consistency. Add color a tiny bit at a time until you achieve your desired shade.
- Flavor Variations: To add different flavors, you can incorporate extracts (almond, lemon, peppermint), citrus zest, or even a tablespoon of melted chocolate.
Serving & Storage Suggestions
This decorator buttercream is perfect for frosting cakes, cupcakes, cookies, and other desserts. It holds its shape beautifully for piping intricate designs and borders.
- Serving: For best results, frost your baked goods when they are completely cool. Apply a thin crumb coat first to seal in any loose crumbs, then chill for about 15-20 minutes before applying the final layer of buttercream.
- Storage:
- Room Temperature: Buttercream can be stored at room temperature for up to 2 days, provided it’s in a cool, dry place. Cover it tightly to prevent it from drying out.
- Refrigerator: Buttercream can be stored in an airtight container in the refrigerator for up to a week. Bring it to room temperature before using and re-whip it to restore its light and fluffy texture.
- Freezer: Buttercream can be frozen for up to 3 months. Thaw it in the refrigerator overnight, then bring it to room temperature and re-whip it until smooth and creamy.
Nutritional Information
| Nutrient | Amount per Serving | % Daily Value |
|---|---|---|
| Calories | 1169 kcal | N/A |
| Calories from Fat | 503 g | 43% |
| Total Fat | 55.9 g | 86% |
| Saturated Fat | 24.2 g | 120% |
| Cholesterol | 70.9 mg | 23% |
| Sodium | 239.4 mg | 9% |
| Total Carbohydrate | 171.7 g | 57% |
| Dietary Fiber | 0 g | 0% |
| Sugars | 167.9 g | 671% |
| Protein | 0.6 g | 1% |
Variations & Substitutions
- All-Butter Buttercream: For a richer flavor, substitute all shortening with butter (1 cup of butter total). Be aware that this version may be slightly less stable at room temperature.
- Dairy-Free Buttercream: Replace the butter with a vegan butter substitute and the milk with a plant-based milk alternative like almond milk or soy milk.
- Chocolate Buttercream: Add 1/2 cup of unsweetened cocoa powder to the buttercream along with the confectioners’ sugar. You may need to adjust the amount of milk to achieve the desired consistency.
- Citrus Buttercream: Add the zest of one lemon, orange, or lime to the buttercream along with the vanilla extract for a bright, refreshing flavor.
- Coffee Buttercream: Dissolve 1-2 tablespoons of instant coffee granules in the milk before adding it to the buttercream.
FAQs (Frequently Asked Questions)
Q: Why use shortening in buttercream?
A: Shortening provides stability to the buttercream, allowing it to hold its shape better, especially in warmer temperatures. It also contributes to a smoother texture.
Q: Can I use salted butter instead of unsalted butter?
A: Yes, but omit the optional dash of salt from the recipe.
Q: My buttercream is grainy. What did I do wrong?
A: This is usually caused by the sugar not fully dissolving. Make sure to beat the buttercream for a sufficient amount of time (at least 2-3 minutes on high speed) to ensure the sugar is fully incorporated.
Q: How do I fix broken or curdled buttercream?
A: This can happen if the ingredients are at different temperatures. Gently warm the sides of the mixing bowl with a hairdryer or over a pot of simmering water (without letting the bowl touch the water) while continuing to beat. This can help bring the ingredients back together.
Q: Can I make this buttercream ahead of time?
A: Absolutely! Buttercream can be made ahead of time and stored in the refrigerator or freezer. See the storage suggestions above for detailed instructions.
Final Thoughts
This decorator buttercream is more than just a recipe; it’s a foundation for creating edible art. Whether you’re a seasoned cake decorator or just starting out, I encourage you to give this recipe a try. Experiment with different flavors and colors, and don’t be afraid to get creative. Share your creations with loved ones, and most importantly, have fun! And if you happen to create a masterpiece, don’t hesitate to share it with me; I’d love to see what you come up with!