
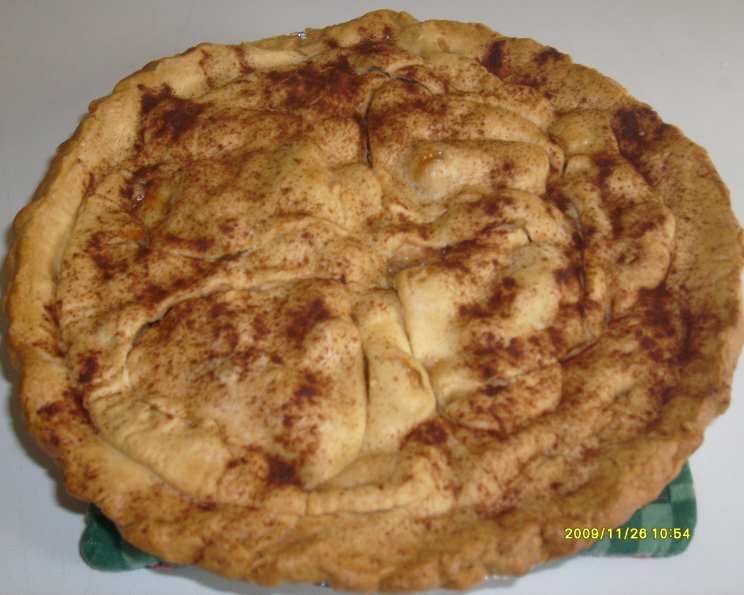
The Quintessential Deep-Dish Apple Pie: A Slice of Nostalgia
The scent of baking apples, cinnamon, and warm sugar always transports me back to my grandmother’s cozy kitchen. Her deep-dish apple pie was legendary, a symphony of sweet and tart flavors encased in a golden, flaky crust. I remember standing on a stool, eager to help sprinkle cinnamon, the warmth of the oven radiating on my face. This recipe, inspired by that very memory, aims to recreate that comforting experience.
Recipe Overview
- Prep Time: 20 minutes
- Cook Time: 55 minutes
- Total Time: 1 hour 15 minutes
- Servings: 8
- Yield: 1 pie
- Dietary Type: Vegetarian
Ingredients
- 3⁄4 cup sugar
- 3 tablespoons all-purpose flour
- 1⁄2 teaspoon ground cinnamon
- 1⁄8 teaspoon ground allspice (optional)
- 4 – 5 cups apples, thinly peeled and sliced (about 2 pounds)
- 2 pie crusts, deep-dish, according to package directions
- Milk, water, or melted butter/margarine (optional, for brushing)
- Sugar (optional, for sprinkling)
Equipment Needed
- Mixing bowl
- Measuring cups and spoons
- Peeler
- Knife
- Deep-dish pie plate (9-inch)
- Fork
- Aluminum foil
- Baking sheet
- Cookie cutters (optional)
Instructions
-
Preheat your oven to 375°F (190°C). Make sure your oven rack is positioned in the center of the oven. This will ensure even baking.
-
In a large mixing bowl, thoroughly combine the sugar, flour, cinnamon, and allspice (if using). The flour helps thicken the apple juices as the pie bakes, preventing a soggy bottom.
-
Add the thinly sliced apples to the bowl. Gently toss the apples with the sugar and spice mixture, ensuring that all the apple slices are evenly coated. This coating helps to draw out moisture from the apples and creates a flavorful syrup as they bake.
-
Take one of your frozen deep-dish pie crusts and place it into your pie plate. Make sure it’s snug against the bottom and sides of the dish.
-
Transfer the coated apple mixture into the prepared pie crust. Mound the apples slightly in the center, as they will shrink down during baking.
-
Carefully place the second pie crust atop the apples.
-
Seal the edges of the top and bottom crusts together. You can do this by pressing the edges together with your fingers or by using a fork to crimp them. Crimp all around the pie, pressing firmly to ensure a good seal. This prevents the filling from bubbling out during baking.
-
Cover the edges of the pie with strips of aluminum foil. This prevents the crust from browning too quickly and burning before the filling is cooked through.
-
Place the pie on a baking sheet. This is crucial! It catches any juices that might bubble over during baking, saving you from a messy oven cleanup.
-
Bake in the preheated oven for 25 minutes with the foil on.
-
Carefully remove the foil from the edges of the pie.
-
Continue baking for another 30 to 35 minutes, or until the crust is golden brown and the filling is bubbly. The filling should be visibly bubbling, indicating that the apples are cooked through and the juices have thickened.
-
If you want a prettier top crust, you can brush the unbaked top with milk, water, or melted butter/margarine before baking. Then, sprinkle lightly with sugar. This will give the crust a beautiful sheen and add a touch of extra sweetness.
-
For decorative steam vents, you can use heart cookie cutters or other shapes to cut out designs in the top crust before baking. Brush the top with melted butter and dust with cinnamon for an extra touch.
-
Remove the pie from the oven and let it cool on a wire rack before slicing and serving. This allows the filling to set slightly, making it easier to cut.
-
Serve the pie warm or at room temperature.
Expert Tips & Tricks
-
Apple Variety: While this recipe doesn’t specify, feel free to experiment with different apple varieties. A mix of sweet and tart apples, such as Granny Smith, Honeycrisp, and Fuji, creates a more complex flavor.
-
Preventing a Soggy Bottom: Blind baking the bottom crust for 10-15 minutes before adding the filling can help prevent a soggy crust. Just prick the bottom of the crust with a fork before baking to prevent it from puffing up.
-
Thickening the Filling: If your apples are particularly juicy, you may need to add an extra tablespoon of flour to the filling to ensure it thickens properly. Cornstarch can also be used.
-
Don’t Skip the Foil: Protecting the edges of the crust with foil during the initial baking period is crucial to prevent burning.
-
Resting Time: Allow the pie to cool for at least 2-3 hours before slicing. This allows the filling to set completely and prevents it from running out when you cut into it.
Serving & Storage Suggestions
Serve your deep-dish apple pie warm with a scoop of vanilla ice cream, a dollop of whipped cream, or a drizzle of caramel sauce. It’s also delicious on its own, served at room temperature.
To store leftovers, cover the pie loosely with plastic wrap or foil and store it at room temperature for up to one day. For longer storage, refrigerate the pie for up to 3-4 days.
To reheat, you can warm individual slices in the microwave for 30-60 seconds or reheat the entire pie in a preheated oven at 350°F (175°C) for 15-20 minutes, or until warmed through. You can also freeze the baked pie for up to 2-3 months. Thaw it overnight in the refrigerator before reheating.
Nutritional Information
| Nutrient | Amount per Serving | % Daily Value |
|---|---|---|
| Calories | 278 kcal | 14% |
| Total Fat | 11 g | 14% |
| Saturated Fat | 3 g | 15% |
| Cholesterol | 0 mg | 0% |
| Sodium | 205 mg | 9% |
| Carbohydrates | 45 g | 16% |
| Fiber | 2 g | 7% |
| Sugar | 27 g | – |
| Protein | 2 g | 4% |
Note: Nutritional information is an estimate and may vary based on specific ingredients and portion sizes.
Variations & Substitutions
-
Gluten-Free Crust: Use a store-bought or homemade gluten-free pie crust for a gluten-free version.
-
Vegan Option: Use a vegan pie crust and substitute melted coconut oil or vegan butter for brushing the top crust.
-
Spiced Apples: Add a pinch of ground nutmeg, cloves, or ginger to the apple mixture for a warmer, spicier flavor.
-
Caramel Apple Pie: Drizzle the apple filling with caramel sauce before adding the top crust for a caramel apple pie variation.
-
Crumb Topping: Instead of a top crust, use a crumb topping made from flour, butter, sugar, and oats.
FAQs (Frequently Asked Questions)
Q: Can I use frozen apples for this recipe?
A: Yes, you can use frozen apples, but be sure to thaw them completely and drain off any excess liquid before adding them to the filling.
Q: How do I prevent the pie crust from browning too quickly?
A: Cover the edges of the crust with aluminum foil during the first half of baking to prevent them from burning.
Q: How can I tell if the pie is done?
A: The crust should be golden brown, and the filling should be bubbly. You can also insert a knife into the center of the pie; it should come out with ease.
Q: Can I make this pie ahead of time?
A: Yes, you can bake the pie a day in advance and store it at room temperature or in the refrigerator. Reheat it slightly before serving for the best flavor.
Q: What kind of apples are best for apple pie?
A: A mix of sweet and tart apples, such as Granny Smith, Honeycrisp, and Fuji, creates a well-balanced flavor.
Final Thoughts
This deep-dish apple pie is more than just a dessert; it’s a slice of comfort and nostalgia. I encourage you to gather your ingredients, preheat your oven, and embark on this delightful baking adventure. Whether you’re a seasoned baker or a kitchen novice, this recipe is sure to bring warmth and joy to your home. Share your creations with loved ones, savor each bite, and don’t hesitate to leave a comment with your feedback or any personal twists you added to the recipe. Perhaps pair it with a sharp cheddar for a truly memorable experience! Happy baking!