
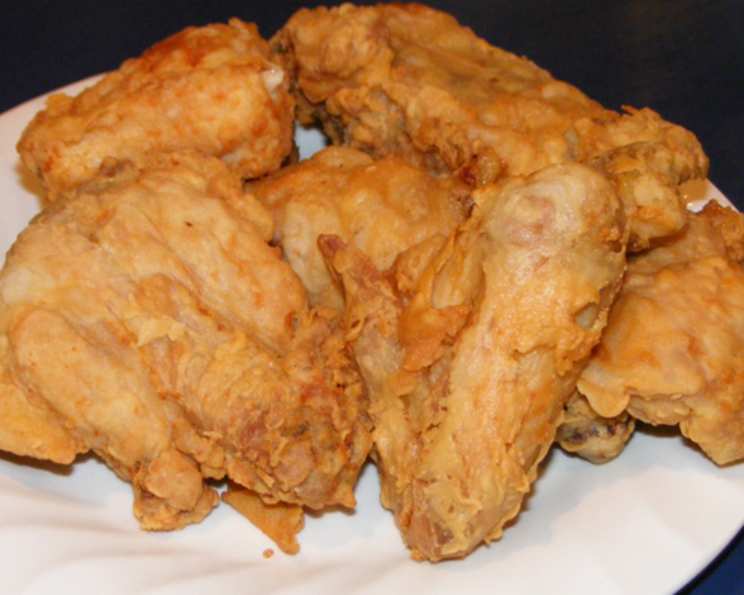
Deep-Fried Chicken (But Low Fat!)
There’s something almost primal about the sound of chicken sizzling in hot oil, that irresistible aroma filling the kitchen. Growing up, Sunday dinners at my grandmother’s house weren’t complete without a platter piled high with golden-brown fried chicken. The crispy skin, the juicy meat—it was pure comfort. But as a chef, I’ve always looked for ways to enjoy those classic flavors with a lighter touch, and this recipe, passed down through generations, delivers just that. It’s a family secret, now shared with you.
Recipe Overview
- Prep Time: 2 hours
- Cook Time: 30 minutes
- Total Time: 2 hours 30 minutes
- Servings: 6
- Yield: 6-8 pieces
- Dietary Type: Reduced Fat
Ingredients
- 1 frying chicken, cut up
- ½ cup flour
- ½ cup milk
- 2 teaspoons salt
- Recycled shortening (or fresh shortening, see instructions)
Equipment Needed
- Large bowl
- Dutch oven (or deep fryer)
- Medium bowl
- Tongs
- Paper towels
Instructions
-
Begin by cutting the chicken into individual pieces. This allows for more even cooking and helps the shortening maintain a more consistent temperature.
-
Now comes the crucial step for reducing the fat content: Carefully remove the skin and any excess fat from each piece of chicken, except for the wings. The wings are tricky and the minimal skin on them contributes to their flavor and crispiness. Use a sharp knife to help lift the skin away from the meat, being careful not to tear the meat itself.
-
Once all the pieces are skinned and rinsed under cold water, it’s time to season them. In a large bowl, generously sprinkle each piece of chicken on both sides with salt. This not only adds flavor but also helps to draw out moisture, resulting in a crispier crust.
-
Cover the bowl tightly with plastic wrap or a lid and place it in the refrigerator. Ideally, let the chicken sit overnight. This allows the salt to fully penetrate the meat, resulting in a more flavorful and moist final product. If you’re short on time, a minimum of one to two hours will still make a noticeable difference.
-
While the chicken is resting, prepare your shortening. In a Dutch oven or deep fryer, heat your recycled shortening (see notes below) over medium-high heat. The shortening is ready when a small piece of flour dropped into the hot oil immediately sizzles and floats to the surface. The temperature should be around 325-350°F (160-175°C).
-
Prepare your dredging station. In a medium bowl, pour in the milk. In another medium bowl, place the flour.
-
When the shortening is hot enough, begin dredging the chicken. Take a piece of chicken and roll it thoroughly in the flour, ensuring it’s completely coated. Then, dip it into the milk, letting the excess drip off. Finally, roll it once more in the flour, creating a double layer of coating. This ensures a thick, crispy crust.
-
Carefully lower each piece of dredged chicken into the hot shortening. If the shortening is hot enough, the chicken will initially float. Avoid overcrowding the Dutch oven; depending on its size, you may need to cook the chicken in 4-6 batches. Overcrowding will lower the oil temperature and result in greasy, less crispy chicken.
-
Cook the chicken, turning occasionally to ensure even browning. Larger pieces, like the thighs and drumsticks, may need to be turned more frequently.
-
Remove the chicken pieces with tongs when they are golden brown and cooked through. This will take approximately 6-8 minutes per batch, but the cooking time can vary depending on the size of the chicken pieces and the temperature of the oil. A meat thermometer inserted into the thickest part of the chicken should read 165°F (74°C).
-
Place the cooked chicken on a plate lined with paper towels to drain any excess shortening. This helps to keep the chicken crispy and prevents it from becoming soggy.
-
Serve hot and enjoy! This chicken is delicious fresh, but it’s also surprisingly good cold the next day.
Recycled Shortening Note: For the first time you make this chicken, use a full 3-lb can of Crisco (or similar vegetable shortening). After cooking, let the shortening cool slightly. Carefully pour the liquid shortening into a container (a metal coffee can works well), leaving behind the brown sludge at the bottom of the Dutch oven, which contains residue from the flour. Store the saved shortening, covered, in your refrigerator until next time. When you make the chicken again, simply add enough fresh shortening to the Dutch oven to replace what you discarded.
P.S. When starting with all fresh shortening, adding a tablespoon or two of bacon grease will subtly improve the flavor of your first batch of chicken.
Expert Tips & Tricks
- For extra crispy chicken, try adding a tablespoon of cornstarch to the flour mixture.
- Don’t be tempted to overcrowd the Dutch oven! Cooking in smaller batches ensures the shortening temperature remains consistent, resulting in perfectly crispy chicken.
- If your chicken starts to brown too quickly, lower the heat slightly to prevent burning.
- A wire rack placed over the paper towels will further help the chicken remain crispy as it drains.
Serving & Storage Suggestions
Serve this delicious chicken hot with your favorite sides, such as mashed potatoes, coleslaw, corn on the cob, or biscuits. Leftover chicken can be stored in an airtight container in the refrigerator for up to 3-4 days. It’s best enjoyed cold or reheated in a 350°F (175°C) oven for 10-15 minutes to help maintain its crispiness. While freezing is possible, it can affect the texture of the crust, so it’s best to consume the chicken within a few days.
Nutritional Information
| Nutrient | Amount per Serving | % Daily Value |
|---|---|---|
| Calories | 380.6 kcal | N/A |
| Calories from Fat | N/A | 57% |
| Total Fat | 23.9 g | 36% |
| Saturated Fat | 7.1 g | 35% |
| Cholesterol | 117.8 mg | 39% |
| Sodium | 892.7 mg | 37% |
| Total Carbohydrate | 8.9 g | 2% |
| Dietary Fiber | 0.3 g | 1% |
| Sugars | 0 g | 0% |
| Protein | 30.3 g | 60% |
Variations & Substitutions
- Spice it up: Add a teaspoon of cayenne pepper or paprika to the flour mixture for a spicy kick.
- Buttermilk marinade: For extra tender chicken, marinate it in buttermilk for several hours before cooking.
- Gluten-free option: Use a gluten-free flour blend instead of regular flour.
- Herbed crust: Add dried herbs like thyme, rosemary, or oregano to the flour for a more complex flavor profile.
FAQs (Frequently Asked Questions)
Q: Why remove the skin from the chicken?
A: Removing the skin significantly reduces the fat content of the dish, making it a healthier alternative to traditional fried chicken.
Q: Can I use fresh shortening instead of recycled shortening?
A: Yes, you can absolutely use fresh shortening. The “recycled” method is a way to reuse and reduce waste, but fresh shortening works just as well.
Q: How do I know when the chicken is cooked through?
A: The best way to ensure the chicken is cooked through is to use a meat thermometer. Insert it into the thickest part of the chicken; it should read 165°F (74°C).
Q: What if my chicken is browning too quickly?
A: If the chicken is browning too quickly, lower the heat slightly to prevent burning.
Q: Can I use a different type of oil for frying?
A: Yes, you can use other high-heat oils such as peanut oil, canola oil, or vegetable oil. Shortening provides a classic flavor and texture.
Final Thoughts
I hope you’re inspired to try this recipe and experience the joy of crispy, delicious fried chicken without all the guilt. This dish is a testament to the fact that you can enjoy your favorite comfort foods while still making healthier choices. Share your feedback and any variations you try – I’d love to hear how it turns out! This chicken pairs wonderfully with a crisp, refreshing coleslaw and a side of creamy mashed potatoes for a truly unforgettable meal.