
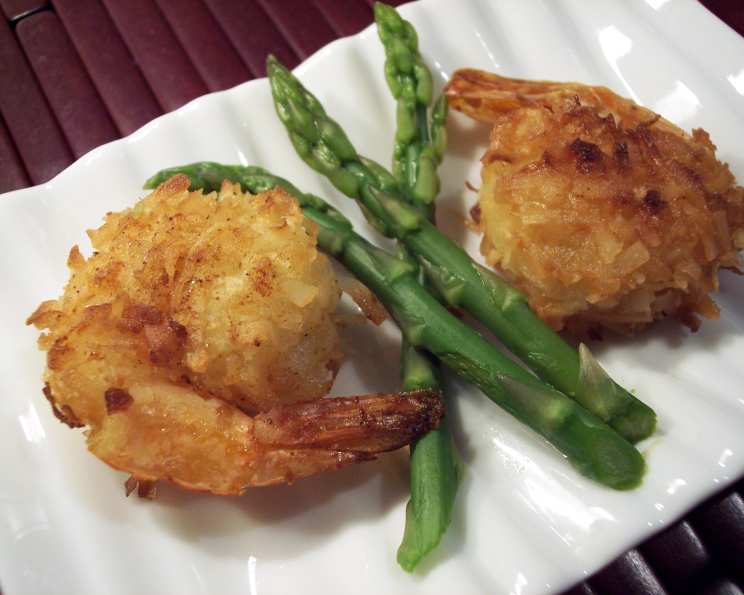
Deep-Fried Coconut Shrimp: A Tropical Culinary Escape
The first time I tasted truly exceptional coconut shrimp, I was on a small, family-run beachside shack in the Florida Keys. The sun was setting, painting the sky in hues of orange and pink, and the gentle sea breeze carried the scent of salt and sunscreen. These weren’t your typical overly-sweet, mass-produced appetizers; they were perfectly crisp, subtly sweet, and bursting with fresh, briny flavor. That memory – the taste, the smell, the atmosphere – has been my gold standard ever since, and this recipe gets me remarkably close to recreating that perfect bite.
Recipe Overview
- Prep Time: 5 hours 5 minutes
- Cook Time: Approximately 10-15 minutes (depending on batch sizes)
- Total Time: 5 hours 20 minutes
- Servings: 4-5
- Yields: 25 shrimp
- Dietary Type: Not Gluten-Free (Can be adapted; see variations)
Ingredients
- 1 large egg
- ½ cup all-purpose flour
- ⅔ cup beer (room temperature)
- 1 ½ teaspoons baking powder
- ⅓ cup all-purpose flour
- 2 cups Mound’s brand sweetened coconut (Good quality, finely shredded)
- 25 medium uncooked fresh shrimp, with tails left on
- 2 ½ cups vegetable oil (can use 3 cups for deeper frying)
Equipment Needed
- Medium bowl
- Whisk
- Two separate bowls
- Parchment-lined baking sheet
- Deep-fryer or large heavy pot
- Tongs
- Brown paper bag or paper towels
Instructions
-
Prepare the Beer Batter: In a medium bowl, whisk together the egg, ½ cup of all-purpose flour, beer (room temperature is crucial for proper activation), and baking powder until you achieve a smooth, well-combined batter. Avoid overmixing, as this can develop the gluten in the flour and result in a tougher coating.
-
Set Up the Dredging Station: Prepare two separate bowls. In one bowl, place the ⅓ cup of all-purpose flour. In the other bowl, add the 2 cups of sweetened coconut. Make sure the coconut is evenly spread out.
-
Dredge and Coat the Shrimp: Holding a shrimp by its tail, first dredge it in the ⅓ cup of flour, shaking off any excess. This helps the batter adhere properly. Next, dip the floured shrimp into the prepared beer batter, allowing any excess batter to drip off.
-
Coconut Crust Application: Roll the beer-battered shrimp in the sweetened coconut, pressing down slightly with your fingers to ensure the coconut adheres well to the shrimp. A gentle but firm press helps to lock the coconut in place during frying.
-
Repeat: Repeat the dredging and coating process with all the remaining shrimp.
-
Chill Time is Crucial: Place the coconut-coated shrimp onto a parchment-lined baking sheet, ensuring they are not overcrowded. Refrigerate for a minimum of 5 hours, but preferably 24 hours. This chilling period is vital as it allows the batter to set and the coconut to adhere firmly, preventing it from falling off during frying. The longer chilling time yields a significantly better result.
-
Heat the Oil: In a deep-fryer or a large, heavy pot, heat the vegetable oil to 350°F (175°C). Use a thermometer to monitor the oil temperature accurately. Maintaining the correct temperature is key to achieving perfectly golden and crispy shrimp without burning them.
-
Fry in Batches: Carefully add the shrimp to the hot oil in batches, being careful not to overcrowd the fryer. Overcrowding will lower the oil temperature and result in soggy shrimp.
-
Golden Perfection: Fry the shrimp, turning once, until they are golden brown on both sides. This should take approximately 2-3 minutes per batch. Watch them carefully to prevent burning.
-
Drain and Serve: Using tongs, carefully remove the fried shrimp from the oil and place them on a brown paper bag or paper towels to drain off any excess oil.
Expert Tips & Tricks
-
Coconut Quality Matters: Use a good-quality, finely shredded sweetened coconut, like Mounds brand, for best results. Coarser shreds tend to fall off more easily.
-
Oil Temperature is Key: Maintain a consistent oil temperature of 350°F (175°C). Too low, and the shrimp will be greasy; too high, and the coconut will burn before the shrimp is cooked through.
-
Don’t Overcrowd the Fryer: Fry the shrimp in batches to prevent the oil temperature from dropping too low.
-
Double Dredge for Extra Crispiness: For an even crispier coating, consider double-dredging the shrimp in flour and batter before coating with coconut.
-
Spice it Up: Add a pinch of cayenne pepper or smoked paprika to the flour mixture for a subtle kick.
Serving & Storage Suggestions
Serve the deep-fried coconut shrimp immediately while they are hot and crispy. They are delicious on their own or with a dipping sauce such as sweet chili sauce, mango salsa, or a creamy horseradish aioli. For an elegant presentation, arrange the shrimp on a platter garnished with lime wedges and fresh cilantro.
Leftovers can be stored in an airtight container in the refrigerator for up to 2 days. Reheat them in a preheated oven at 350°F (175°C) for about 5-7 minutes, or until heated through and crispy. Microwaving is not recommended, as it will make the shrimp soggy. Freezing is not recommended.
Nutritional Information
| Nutrient | Amount per Serving | % Daily Value |
|---|---|---|
| Calories | 248.1 kcal | N/A |
| Calories from Fat | 216 g | 87% |
| Total Fat | 24.1 g | 37% |
| Saturated Fat | 4.6 g | 23% |
| Cholesterol | 17.6 mg | 5% |
| Sodium | 49 mg | 2% |
| Total Carbohydrate | 6.4 g | 2% |
| Dietary Fiber | 0.4 g | 1% |
| Sugars | 2.6 g | 10% |
| Protein | 2.1 g | 4% |
Variations & Substitutions
- Gluten-Free: Substitute the all-purpose flour with a gluten-free flour blend. Ensure the beer is also gluten-free or replace it with sparkling water.
- Dairy-Free: This recipe is naturally dairy-free.
- Spice Levels: Adjust the amount of spice by adding more or less cayenne pepper or by using a spicier dipping sauce.
- Alternative Coconut: Experiment with unsweetened coconut for a less sweet version. You may need to add a touch of sugar to the batter if using unsweetened coconut.
- Air Fryer Variation: For a healthier alternative, you can try air frying the shrimp. Preheat your air fryer to 375°F (190°C), and air fry the shrimp for 8-10 minutes, flipping halfway through, until golden brown and cooked through.
FAQs (Frequently Asked Questions)
Q: Why does the recipe call for chilling the shrimp for so long?
A: Chilling the shrimp allows the batter to set and the coconut to adhere properly, preventing it from falling off during frying. This results in a crispier and more flavorful final product.
Q: Can I use frozen shrimp for this recipe?
A: Yes, but make sure to thaw the shrimp completely and pat them dry before starting the recipe. Excess moisture will prevent the batter from adhering properly.
Q: Can I use a different type of beer?
A: Yes, you can use any light-bodied beer. Avoid dark or heavy beers, as they can overpower the flavor of the shrimp. A light lager or pilsner works well.
Q: How do I know when the shrimp is cooked through?
A: The shrimp is cooked through when it is pink and opaque and the coconut is golden brown. Avoid overcooking, as this will make the shrimp tough and rubbery.
Q: Can I make the batter ahead of time?
A: Yes, you can make the batter up to 24 hours in advance. Store it in an airtight container in the refrigerator. You may need to add a splash of beer or water to thin it out slightly before using.
Final Thoughts
Deep-fried coconut shrimp is more than just an appetizer; it’s a mini-vacation on a plate. The crispy, golden-brown exterior gives way to a sweet and savory explosion that is simply irresistible. So gather your ingredients, crank up the heat, and prepare to transport yourself to a tropical paradise with every delicious bite. Don’t be afraid to experiment with dipping sauces and serving suggestions to create your own signature coconut shrimp experience. And please, share your creations and feedback – I can’t wait to hear how this recipe brings a little sunshine to your kitchen!