
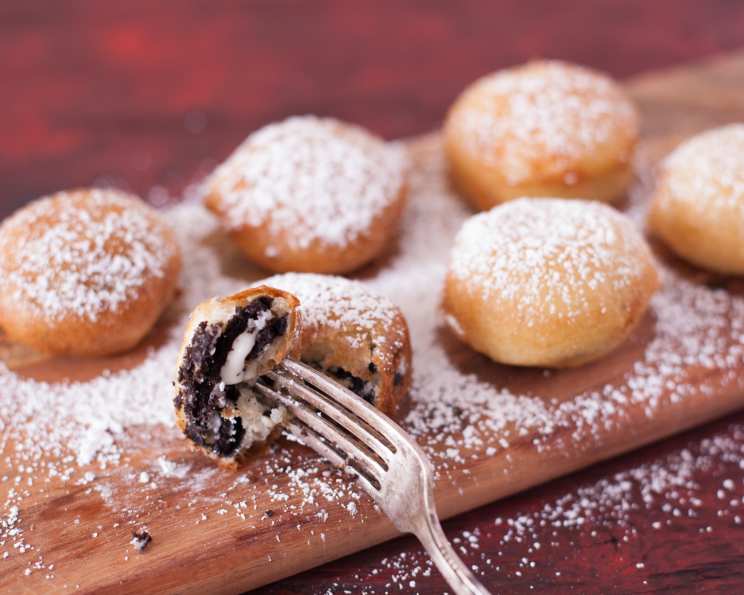
Deep Fried Oreos: An Irresistible Indulgence
I’ll never forget my first encounter with a Deep Fried Oreo. It wasn’t in some fancy restaurant, but at a small-town carnival, the air thick with the scent of popcorn and cotton candy. The golden-brown orb, glistening under the string lights, looked almost too good to be true. One bite, and I was hooked – the warm, gooey interior melding with the crisp, slightly sweet batter was a flavor explosion that immediately transported me back to childhood. It was pure, unadulterated joy on a stick, and a memory I cherish to this day. Now, I’m excited to share my take on this classic carnival treat with you!
Recipe Overview
- Prep Time: 10 minutes
- Cook Time: 5 minutes
- Total Time: 15 minutes
- Servings: About 52 cookies
- Yield: About 4-5 servings
- Dietary Type: Vegetarian (depending on oil used)
Ingredients
- 1 (20 ounce) package Oreo cookies
- 2 cups Bisquick
- 2 eggs
- 1 1/2 cups milk
- 3 teaspoons vegetable oil
- Vegetable oil (enough for deep frying)
Equipment Needed
- Deep fryer or large, heavy-bottomed pot
- Thermometer (if using a pot)
- Whisk
- Bowl
- Slotted spoon or tongs
- Paper towels
Instructions
-
In a large bowl, prepare the batter. Whisk together the Bisquick, eggs, milk, and 3 teaspoons of vegetable oil until smooth. Ensure there are no lumps for a consistent batter coating.
-
Preheat your deep fryer to 375°F (190°C). If you don’t have a deep fryer, use a large, heavy-bottomed pot and attach a thermometer to monitor the oil temperature. Maintaining the correct temperature is crucial for achieving a crispy exterior without burning the cookies.
-
Dip each Oreo cookie into the batter, ensuring it’s completely coated. Use a fork or tongs to carefully lift the cookie from the batter, allowing any excess to drip off before placing it into the hot oil.
-
Carefully place the battered Oreos into the hot oil. Avoid overcrowding the fryer or pot; fry in batches of 4-5 cookies at a time to prevent the oil temperature from dropping too drastically.
-
Keep a close watch on the cookies as they cook. They will float in the oil. Once the bottom side turns golden brown (this usually takes about 1-2 minutes), use a slotted spoon or tongs to gently flip the Oreo.
-
Continue frying until both sides are golden brown and the batter is cooked through. This should only take a short time, approximately 2-3 minutes total cooking time per cookie. Don’t overcook them, or the chocolate inside will melt too much and make them difficult to handle.
-
Remove the deep-fried Oreos from the oil using a slotted spoon or tongs. Place them on a plate lined with paper towels to drain any excess oil.
-
Serve the deep-fried Oreos warm. They are best enjoyed immediately for the ultimate melt-in-your-mouth experience.
Expert Tips & Tricks
- Batter Consistency: The batter should be thick enough to coat the cookies evenly but not so thick that it becomes heavy and doughy. If the batter seems too thick, add a tablespoon or two of milk until you reach the desired consistency.
- Oil Temperature is Key: Maintaining a consistent oil temperature is vital. If the oil is too hot, the outside will burn before the inside is cooked. If it’s too cold, the cookies will absorb too much oil and become greasy.
- Don’t Overcrowd: Frying in batches prevents the oil temperature from dropping too much, which can result in soggy cookies.
- Optional Add-Ins: For an extra touch of flavor, try adding a pinch of cinnamon or nutmeg to the batter. You can also dust the finished cookies with powdered sugar or a drizzle of chocolate syrup.
- Preventing Soggy Oreos: Make sure excess batter drips off before frying and that the oil is hot enough. Also, don’t stack the cooked Oreos on top of each other as they cool; this can trap steam and make them soggy.
Serving & Storage Suggestions
Deep-fried Oreos are best served warm and fresh, ideally within minutes of coming out of the fryer. For a truly indulgent experience, serve them with a scoop of vanilla ice cream or a drizzle of chocolate sauce. They’re also great on their own as a fun party snack or dessert.
Leftovers can be stored in an airtight container at room temperature, but they will lose their crispness over time. They are best eaten the same day they are made. If you want to try reheating them, do so in a preheated oven at 350°F (175°C) for a few minutes to try to crisp them up again, but be aware they won’t be quite as good as fresh. Freezing is not recommended, as it will alter the texture of the batter and filling.
Nutritional Information
Note: Nutritional information is an estimate and may vary based on specific ingredients and portion sizes.
| Nutrient | Amount per Serving | % Daily Value |
|---|---|---|
| Calories | 450 kcal | 23% |
| Total Fat | 25g | 38% |
| Saturated Fat | 10g | 50% |
| Cholesterol | 40mg | 13% |
| Sodium | 300mg | 13% |
| Total Carbohydrate | 55g | 18% |
| Dietary Fiber | 2g | 8% |
| Sugars | 30g | – |
| Protein | 5g | 10% |
Variations & Substitutions
- Pancake Mix: As noted earlier, you can substitute your favorite dry pancake mix for the Bisquick. This can alter the flavor slightly, so experiment to find your preferred taste.
- Milk Alternatives: Use almond milk, soy milk, or oat milk instead of cow’s milk in the batter for a dairy-free option.
- Oil Choice: While vegetable oil is commonly used for deep frying, you can also use canola oil or peanut oil.
- Oreo Flavors: Experiment with different Oreo flavors! Golden Oreos, Mint Oreos, or even limited-edition flavors can add a unique twist to this recipe.
- Lighter Version: For a slightly healthier option, use low-fat milk, canola oil, and reduced-fat Oreos. While it won’t be as decadent, it will still satisfy your craving.
FAQs (Frequently Asked Questions)
Q: Can I bake these instead of deep frying?
A: While deep frying is what gives them their signature crispy texture, you could try baking them. However, they won’t be the same, and the batter may not cook evenly.
Q: How do I prevent the Oreos from falling apart in the batter?
A: Handle the Oreos gently when dipping them in the batter. Avoid soaking them for too long, and make sure the batter is thick enough to coat them properly.
Q: What temperature should the oil be?
A: The ideal oil temperature is 375°F (190°C). Use a thermometer to monitor the temperature and adjust the heat as needed.
Q: Can I make the batter ahead of time?
A: Yes, you can make the batter up to a few hours in advance. Store it in the refrigerator until ready to use. You may need to whisk it again before using, as it may thicken slightly.
Q: What can I do with the leftover oil?
A: Let the oil cool completely, then strain it through a fine-mesh sieve lined with cheesecloth. Store it in an airtight container in a cool, dark place. You can reuse it a few times for deep frying, but discard it if it becomes dark or smells rancid.
Final Thoughts
Now that you’re armed with this delicious recipe, it’s time to recreate the magic of the carnival right in your own kitchen! Don’t be intimidated – deep-fried Oreos are surprisingly easy to make, and the reward is well worth the effort. Imagine the smiles on the faces of your friends and family as they bite into these warm, gooey treats. So, gather your ingredients, preheat your fryer, and get ready for a flavor explosion. Feel free to share your culinary creations and experiences with me – happy frying!