
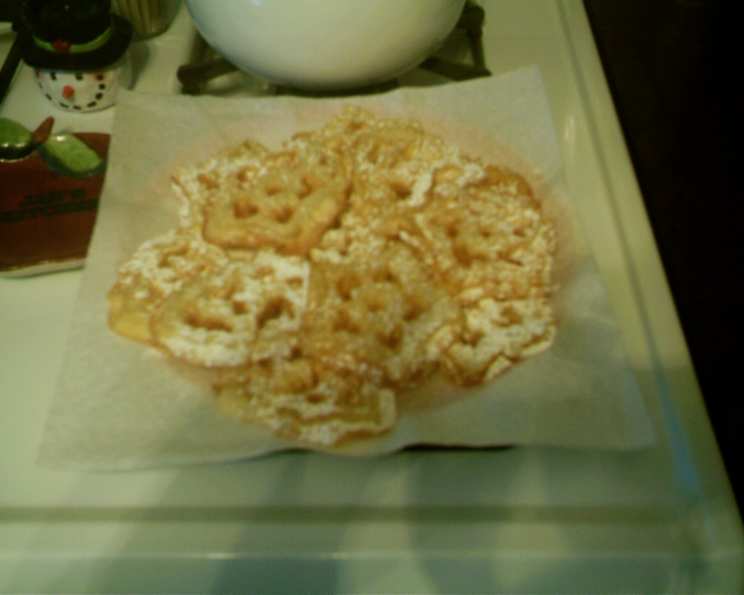
Deep Fried Rosettes: A Delicate Dance of Crisp and Sweet
My grandmother’s kitchen was a place of endless wonder, but nothing captivated me quite like the mesmerizing dance of the rosette iron in hot oil. I remember standing on a stool, mesmerized as she dipped the intricately shaped iron into the batter, then submerged it in the bubbling oil. The golden, lacy creations that emerged were more than just cookies; they were edible works of art, dusted with powdered sugar like a fresh snowfall. Every Christmas, this was the treat I looked forward to the most – a tradition that filled our home with warmth, laughter, and the irresistible aroma of sweet fried dough. Now, I carry on that tradition, sharing the joy of rosettes with my own family and friends.
Recipe Overview
- Prep Time: 10 minutes
- Cook Time: 40 minutes
- Total Time: 50 minutes
- Servings: 4-6
- Yield: Approximately 20-25 rosettes
- Dietary Type: Vegetarian
Ingredients
- 1 cup flour
- 1 cup milk
- 1 egg
- 1 teaspoon salt
- 1 tablespoon sugar
- Powdered sugar, for dusting (amount as needed)
- Vegetable oil, for frying (approximately 4-6 cups)
Equipment Needed
- Deep frying pan or pot
- Rosette iron with handle
- Whisk
- Slotted spoon or tongs
- Paper towels or foil-lined baking sheet
- Knife (optional, for releasing rosettes from the iron)
- Thermometer
Instructions
-
Begin by pouring enough vegetable oil into your deep frying pan or pot to reach a depth of about 2-3 inches. Place the pan over medium-high heat. Clip a thermometer to the side of the pan and heat the oil to 350°F (175°C). Maintaining this temperature is crucial for perfectly cooked rosettes.
-
While the oil is heating, prepare the batter. In a medium bowl, whisk together the flour, milk, egg, salt, and sugar. Ensure there are no lumps in the batter; a smooth consistency is key for even coating.
-
Place your rosette iron in the hot oil to heat up. This is essential for the batter to adhere properly to the iron. Allow the iron to heat for several minutes until it is very hot.
-
Once the rosette iron is sufficiently heated and the oil is at 350°F (175°C), carefully remove the iron from the oil and shake off any excess oil.
-
Dip the hot rosette iron into the batter, being careful not to submerge the top of the iron. Only dip it about ¾ of the way in. If the batter goes over the top, it will be difficult to remove the rosette later.
-
Immediately and carefully transfer the batter-coated iron back into the hot oil. The batter should sizzle upon contact.
-
Fry the rosette for 1-2 minutes on each side, or until it turns a light golden brown. Use a slotted spoon or tongs to gently flip the rosette as needed.
-
Once the rosette is golden brown, carefully remove it from the oil with a slotted spoon or tongs. If the rosette doesn’t easily release from the iron, use a knife to gently loosen it.
-
Place the cooked rosettes on a paper towel or foil-lined baking sheet to drain excess oil.
-
While the rosettes are still warm, generously sprinkle them with powdered sugar. The warmth helps the sugar adhere better.
-
Repeat steps 4-10 until all the batter is used. Remember to reheat the rosette iron in the oil between each rosette.
Expert Tips & Tricks
- Temperature is Key: Maintaining a consistent oil temperature of 350°F (175°C) is critical. If the oil is too cool, the rosettes will absorb too much oil and become soggy. If it’s too hot, they will burn before they cook through. Use a thermometer to monitor the temperature and adjust the heat accordingly.
- Batter Consistency: If your batter seems too thick, add a tablespoon of milk at a time until it reaches a smooth, pourable consistency similar to pancake batter.
- Heating the Iron: Ensure the rosette iron is thoroughly heated before dipping it into the batter. If it’s not hot enough, the batter won’t adhere properly.
- Avoiding Over-Dipping: Be careful not to dip the iron too deeply into the batter, as this will make it difficult to release the rosette and result in a less defined shape.
- Batch Cooking: Work in batches to avoid overcrowding the pan, which can lower the oil temperature and result in unevenly cooked rosettes.
- Rescue Soggy Rosettes: If some rosettes become a little soggy, you can briefly re-fry them to crisp them up.
- Flavor Boost: A touch of vanilla extract or almond extract added to the batter can enhance the flavor of the rosettes.
Serving & Storage Suggestions
Serve your freshly fried rosettes immediately while they are still warm and crisp. The powdered sugar dusting adds a touch of sweetness and elegance. These delicate treats are perfect as a dessert, a festive snack, or a delightful addition to a holiday spread.
Store leftover rosettes in an airtight container at room temperature. They will remain crisp for about 1-2 days. However, they are best enjoyed fresh. If they soften, you can try reheating them briefly in a low oven (around 300°F or 150°C) to restore some of their crispness, but be careful not to burn them. Freezing is not recommended as it can significantly alter the texture.
Nutritional Information
| Nutrient | Amount per Serving | % Daily Value |
|---|---|---|
| Calories | 210 kcal | 11% |
| Total Fat | 12g | 18% |
| Saturated Fat | 4g | 20% |
| Cholesterol | 50mg | 17% |
| Sodium | 150mg | 7% |
| Total Carbohydrate | 20g | 7% |
| Dietary Fiber | 1g | 4% |
| Sugars | 5g | 10% |
| Protein | 4g | 8% |
Nutritional information is an estimate and may vary based on specific ingredients and portion sizes.
Variations & Substitutions
- Gluten-Free Rosettes: Substitute the all-purpose flour with a gluten-free all-purpose flour blend. Be sure to choose a blend that contains xanthan gum or a similar binder to help maintain the structure of the rosettes.
- Dairy-Free Rosettes: Replace the milk with a plant-based milk alternative, such as almond milk, soy milk, or oat milk.
- Spiced Rosettes: Add a pinch of ground cinnamon, nutmeg, or cardamom to the batter for a warm, spiced flavor.
- Citrus Zest: Incorporate a teaspoon of lemon or orange zest into the batter for a bright, citrusy note.
- Savory Rosettes: Omit the sugar and powdered sugar, and add herbs like rosemary, thyme, or parmesan cheese to the batter for a savory twist. Serve with a dipping sauce like marinara or aioli.
- Chocolate Rosettes: Add a tablespoon of cocoa powder to the batter for a chocolatey treat. Drizzle with melted chocolate instead of powdered sugar.
FAQs (Frequently Asked Questions)
Q: Why are my rosettes sticking to the iron?
A: This usually means the iron wasn’t hot enough before dipping it into the batter. Make sure to heat the iron thoroughly in the hot oil before each use.
Q: My rosettes are coming out soggy. What am I doing wrong?
A: The oil temperature is likely too low. Use a thermometer to ensure the oil is consistently at 350°F (175°C). Avoid overcrowding the pan, as this can also lower the oil temperature.
Q: Can I make the batter ahead of time?
A: Yes, you can prepare the batter up to 24 hours in advance. Store it in the refrigerator and whisk it well before using.
Q: How do I prevent the batter from going over the top of the iron?
A: Only dip the iron about ¾ of the way into the batter. If the batter goes over the top, it will be difficult to release the rosette.
Q: Can I use a different type of oil for frying?
A: Yes, you can use other neutral-flavored oils with a high smoke point, such as canola oil, peanut oil, or sunflower oil.
Final Thoughts
These Deep Fried Rosettes are more than just a recipe; they are a connection to the past, a celebration of tradition, and a delicious way to create memories with loved ones. Don’t be intimidated by the process – with a little practice and patience, you’ll be creating beautiful, lacy rosettes in no time. So gather your ingredients, heat up the oil, and embark on this culinary adventure. And most importantly, have fun and savor the sweet taste of homemade goodness! I encourage you to try this recipe and share your own rosette creations. Who knows, you might just start a new family tradition of your own.