
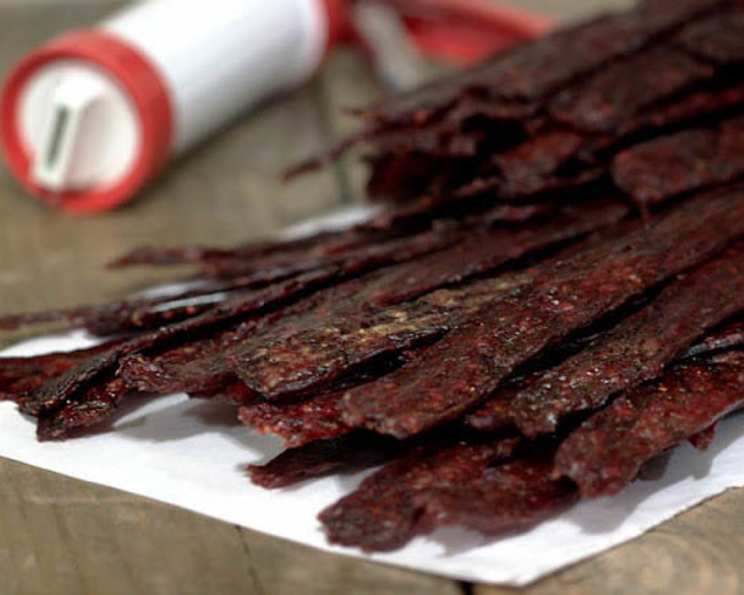
Dehydrator/Oven Beef Jerky: A Taste of Home
The scent of beef jerky always transports me back to childhood road trips. Crammed in the back of our wood-paneled station wagon, my siblings and I would eagerly tear into bags of jerky, the savory, chewy strips a welcome distraction from the endless miles. While gas station jerky was a treat, nothing beat the homemade kind. My dad would spend a weekend afternoon carefully slicing, marinating, and drying the meat – a labor of love that filled the house with an irresistible aroma. This recipe is my attempt to recreate that nostalgic flavor and share the joy of homemade jerky with you.
Recipe Overview
- Prep Time: 15 minutes
- Cook Time: 8-10 hours
- Total Time: 8 hours 15 minutes
- Yields: 1 batch
- Dietary Type: High Protein
Ingredients
- 2 lbs lean ground beef
- 2 lbs ground turkey or 2 lbs ground venison
- 2 teaspoons onion powder
- 2 teaspoons garlic powder
- 1/4 cup brown sugar (optional, for sweetness)
- 1/2 teaspoon hot pepper sauce (to taste)
- 8 tablespoons Worcestershire sauce
- 8 tablespoons soy sauce
- 4 tablespoons ketchup
- 4 teaspoons kosher salt
Equipment Needed
- Large glass bowl
- Plastic wrap
- Jerky Gun (optional, but highly recommended)
- Dehydrator or Baking sheets
- Cooling rack (optional, for oven method)
Instructions
-
In a large glass bowl, thoroughly combine the ground beef (or turkey/venison), onion powder, garlic powder, brown sugar (if using), hot pepper sauce, Worcestershire sauce, soy sauce, ketchup, and kosher salt. Use your hands to ensure all ingredients are evenly distributed.
-
Cover the bowl tightly with plastic wrap. Place it in the refrigerator and allow the mixture to marinate for 4-5 hours. This allows the flavors to meld and penetrate the meat. The longer it marinates, the more flavorful the jerky will be.
-
If using a jerky gun, load the marinated ground meat into the gun according to the manufacturer’s instructions. This tool helps create uniform jerky strips, which is crucial for even drying. If you don’t have a jerky gun, you can spread the mixture thinly onto parchment paper, then cut into strips before drying.
-
For Dehydrator Method: Carefully arrange the raw jerky strips onto the dehydrator racks, ensuring that they do not overlap. Overlapping will prevent proper air circulation and lead to uneven drying.
-
Set the dehydrator to 145 degrees Fahrenheit (63 degrees Celsius). Run the dehydrator for 8-10 hours. The exact drying time will depend on the thickness of the jerky and the efficiency of your dehydrator.
-
Begin checking the consistency of the jerky periodically during the last hour of drying. The edges will typically dry out faster than the center.
-
The ideal jerky consistency is a matter of personal preference. I prefer a slight “softness” in the center. For tougher jerky, continue dehydrating for a longer period.
-
Remove a piece of jerky and let it cool. Jerky tends to stiffen up as it cools. This “cooling test” is essential to achieve your perfect “bite.”
-
For Oven Method: Preheat your oven to the lowest possible temperature, ideally between 150-170 degrees Fahrenheit (65-77 degrees Celsius). Place the jerky strips on baking sheets. For better air circulation, place a cooling rack on top of the baking sheet and arrange the jerky on the rack.
-
Bake the jerky for 8-12 hours, flipping it over every couple of hours to ensure even drying. If using a cooling rack, flipping is less critical. Prop the oven door slightly open with a wooden spoon to allow moisture to escape. This is crucial for proper drying.
-
As with the dehydrator method, begin testing the jerky for doneness during the last few hours of baking.
-
The final yield will depend on the length of the jerky strips. Approximately 70 pieces can be expected if the strips are 6-7 inches long, and about 40 pieces if the strips are closer to 11 inches.
Expert Tips & Tricks
- Marinade Boost: For an even deeper flavor, add a tablespoon of liquid smoke to the marinade.
- Meat Matters: While this recipe calls for lean ground beef, you can experiment with different ground meats, such as bison or even a blend. Just be sure to adjust the cooking time as needed.
- Spice it Up: For extra heat, add a pinch of cayenne pepper or red pepper flakes to the marinade.
- Even Drying: Rotate the dehydrator trays or baking sheets every few hours to ensure even drying.
- Dealing with Humidity: In humid climates, drying times may be longer.
- Fat is the Enemy: Ensure you are using lean ground meat. Fat does not dehydrate well and can lead to spoilage.
- Paper Towel Trick: Gently pat the jerky strips with paper towels before dehydrating or baking to remove excess moisture. This speeds up the drying process.
- Pre-Heating Tip: For the oven method, preheat the oven to the lowest setting, then turn it off for 30 minutes before placing the jerky inside. This helps prevent the jerky from cooking instead of drying. Then turn back on when inserting the jerky.
Serving & Storage Suggestions
Serve your homemade beef jerky as a high-protein snack, a hiking companion, or a tasty addition to charcuterie boards. Store the jerky in an airtight container at room temperature for up to 1-2 weeks. For longer storage, refrigerate it for up to 1 month or freeze it for up to 3 months. To reheat frozen jerky, simply thaw it at room temperature.
Nutritional Information
| Nutrient | Amount per Serving* | % Daily Value |
|---|---|---|
| Calories | 323 kcal | 16% |
| Total Fat | 16g | 25% |
| Saturated Fat | 5.5g | 28% |
| Cholesterol | 122mg | 41% |
| Sodium | 1822mg | 76% |
| Total Carbohydrate | 5.8g | 2% |
| Dietary Fiber | 0.3g | 1% |
| Sugars | 3g | 6% |
| Protein | 38g | 76% |
*Based on approximately 10 servings per batch.
Variations & Substitutions
- Sweet and Spicy: Add a tablespoon of honey and a teaspoon of chili garlic sauce to the marinade.
- Teriyaki Jerky: Replace the ketchup with teriyaki sauce for a tangy and savory flavor.
- Venison Jerky: Venison naturally lends itself well to jerky. Follow the recipe, adjusting the drying time as needed since venison can be leaner.
- Gluten-Free: Ensure that your soy sauce and Worcestershire sauce are gluten-free if needed. Tamari is a great substitute for soy sauce.
- Low-Sodium: Reduce the amount of kosher salt by half or use a low-sodium soy sauce.
- Maple-Glazed: Use maple syrup instead of brown sugar for a unique flavor.
- Smoked Paprika: Add 1 teaspoon of smoked paprika to the marinade for a smoky flavor.
FAQs (Frequently Asked Questions)
Q: Why is my jerky tough?
A: Over-drying is the most common cause of tough jerky. Begin checking for doneness earlier and experiment with shorter drying times to find your preferred consistency.
Q: Can I use a different cut of beef besides ground?
A: Yes, but you’ll need to slice it very thinly against the grain before marinating. London broil or flank steak work well. However, this recipe is specifically formulated for ground meat.
Q: How do I know when the jerky is done?
A: The jerky should be firm and slightly pliable, not brittle. It should bend without breaking and have no visible moisture.
Q: Can I freeze the jerky?
A: Yes, jerky freezes well. Store it in an airtight container or freezer bag for up to 3 months.
Q: Is it safe to make jerky without a dehydrator or oven?
A: It is not recommended. These methods provide consistent and safe drying temperatures. Air-drying can lead to bacterial growth.
Final Thoughts
Homemade beef jerky is more than just a snack; it’s an experience. The rich aroma filling your kitchen, the satisfaction of crafting something delicious from scratch, and the joy of sharing it with friends and family – it’s all part of the magic. So, gather your ingredients, fire up your dehydrator (or oven), and embark on your jerky-making adventure. Don’t be afraid to experiment with flavors and find your perfect bite. And most importantly, share your creations and let me know what you think! Happy jerky-ing!