
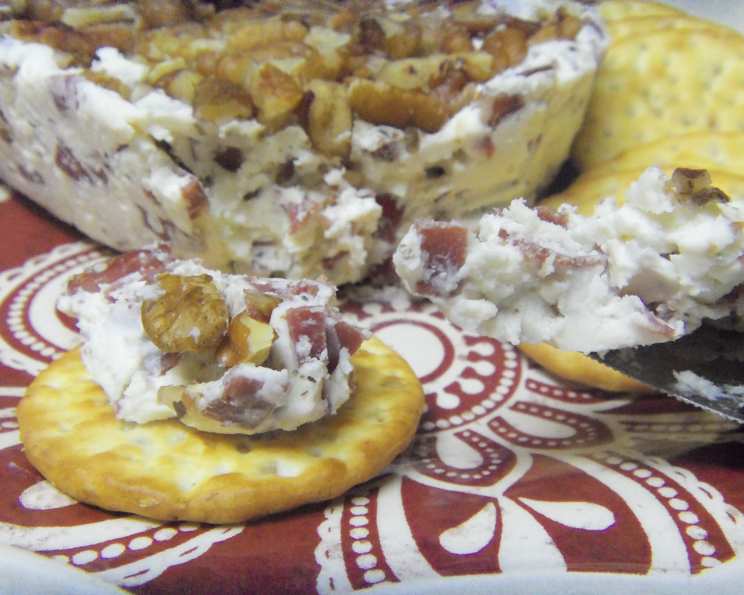
Delicious and Oh So Easy Cheese Ball
I’ll admit, as a classically trained chef, I used to turn my nose up at the humble cheese ball. It seemed a bit… pedestrian. Then, one fateful holiday gathering, my stepmother presented her cheese ball. The aroma of tangy cream cheese, savory dried beef, and fragrant Italian herbs was intoxicating. One bite, and I was a convert. It was creamy, salty, crunchy, and utterly addictive – the perfect party appetizer, and ridiculously easy to make. Now, it’s a staple in my own holiday spread, and I feel only a little guilty about how impressed everyone is with something so simple.
Recipe Overview
- Prep Time: 15 minutes
- Cook Time: 0 minutes
- Total Time: 1 hour 15 minutes (includes chilling time)
- Servings: 12-16
- Yield: 1 large cheese ball
- Dietary Type: Not Gluten-Free
Ingredients
- 16 ounces cream cheese, softened
- 5 ounces dried beef
- 1 (7 ounce) package Italian salad dressing mix
- 4 ounces shelled pecan pieces
Equipment Needed
- Mixing bowl
- Fork
- Cutting board
- Knife
- Plastic wrap
- Serving plate
Instructions
-
First, dice the dried beef into tiny pieces. This is important; you want the beef evenly distributed throughout the cheese ball and not in large, chewy chunks. Set aside the diced beef.
-
In a mixing bowl, combine the softened cream cheese and the Italian salad dressing mix. Use a fork to thoroughly blend the two ingredients. The cream cheese should be at room temperature for easy mixing; otherwise, you’ll end up with lumps.
-
Add the diced dried beef to the cream cheese mixture. Mix well to incorporate the beef evenly.
-
Now comes the fun part: forming the cheese ball. Using your hands (or a spatula if you prefer), shape the mixture into a single, cohesive ball. It doesn’t have to be perfect at this stage.
-
On a clean plate or shallow dish, spread out the pecan pieces.
-
Roll the cheese ball in the pecan pieces, ensuring it’s completely coated. Press the pecans gently into the cheese ball to help them adhere.
-
Place the coated cheese ball on a serving plate.
-
Wrap the cheese ball tightly in plastic wrap. This will prevent it from drying out and absorbing any unwanted flavors in the refrigerator.
-
Refrigerate for at least one hour before serving. This chilling time allows the flavors to meld and the cheese ball to firm up, making it easier to slice or scoop.
Expert Tips & Tricks
- Softening the cream cheese is key. Leave it at room temperature for at least 30 minutes, or microwave it in 15-second intervals until it’s pliable but not melted.
- Don’t be afraid to experiment with the Italian dressing mix. Different brands have different flavor profiles. Use your favorite!
- Toast the pecans for enhanced flavor. Before chopping, toast the pecans in a dry skillet over medium heat for 5-7 minutes, or in a 350°F (175°C) oven for 8-10 minutes, until fragrant and lightly browned. Let them cool completely before using.
- If the cheese ball is too soft to handle, refrigerate it for a shorter period before rolling it in the pecans.
- To prevent the pecans from falling off, gently press them into the cheese ball after rolling. You can even use a small amount of softened cream cheese to “glue” them on if needed.
- For a smoother texture, whip the softened cream cheese with an electric mixer before adding the other ingredients.
- Make ahead: The cheese ball can be made up to 3 days in advance. Just keep it tightly wrapped in plastic wrap in the refrigerator.
Serving & Storage Suggestions
Serve the cheese ball with an assortment of crackers, baguette slices, or even crisp vegetables like celery sticks and carrot coins. A selection of both plain and flavored crackers provides a variety of textures and tastes. Arrange the crackers and vegetables attractively around the cheese ball on a serving platter.
When not serving, keep the cheese ball wrapped in plastic wrap in the refrigerator. It will last for several days – though it rarely does in my house! Properly stored, it will maintain its quality for about 5-7 days.
Do not leave the cheese ball at room temperature for more than two hours, as the cream cheese can become unsafe.
Freezing is not recommended, as the texture of the cream cheese will change upon thawing.
Nutritional Information
| Nutrient | Amount per Serving | % Daily Value |
|---|---|---|
| Calories | 213 kcal | N/A |
| Calories from Fat | 180 g | 85% |
| Total Fat | 20 g | 30% |
| Saturated Fat | 8 g | 40% |
| Cholesterol | 51 mg | 16% |
| Sodium | 451.1 mg | 18% |
| Total Carbohydrate | 3.2 g | 1% |
| Dietary Fiber | 0.9 g | 3% |
| Sugars | 1.9 g | 7% |
| Protein | 6.8 g | 13% |
Variations & Substitutions
- Spice it up: Add a pinch of cayenne pepper or a dash of hot sauce to the cream cheese mixture for a little heat.
- Go nutty: Substitute walnuts, almonds, or pistachios for the pecans.
- Add some herbs: Fresh herbs like chives, dill, or parsley can add a burst of flavor. Chop them finely and mix them into the cream cheese mixture.
- Use different cheeses: Add some shredded cheddar, Monterey Jack, or even crumbled blue cheese to the cream cheese mixture for a more complex flavor.
- Vegetarian version: Replace the dried beef with finely chopped sun-dried tomatoes or roasted red peppers.
- Gluten-free: Ensure your Italian salad dressing mix is gluten-free and serve with gluten-free crackers or vegetables.
FAQs (Frequently Asked Questions)
Q: Can I use low-fat cream cheese?
A: Yes, you can use low-fat cream cheese, but the cheese ball may not be as creamy.
Q: Can I make this ahead of time?
A: Absolutely! In fact, it’s best to make it at least a few hours in advance to allow the flavors to meld.
Q: How long will the cheese ball last in the refrigerator?
A: Properly stored, it will last for about 5-7 days.
Q: Can I freeze the cheese ball?
A: Freezing is not recommended, as the texture of the cream cheese will change upon thawing.
Q: What if I don’t like dried beef?
A: You can substitute it with finely chopped ham, prosciutto, or even crumbled bacon. For a vegetarian option, use sun-dried tomatoes or roasted red peppers.
Final Thoughts
This Delicious and Oh So Easy Cheese Ball is more than just a simple appetizer; it’s a guaranteed crowd-pleaser that’s perfect for any occasion. Whether you’re hosting a holiday party, a casual get-together, or simply want a tasty snack, this recipe is sure to impress. So go ahead, give it a try, and let me know what you think! I’d love to hear about your own variations and flavor combinations. Pair it with a crisp white wine or a refreshing sparkling cider for the ultimate indulgence. Happy snacking!