
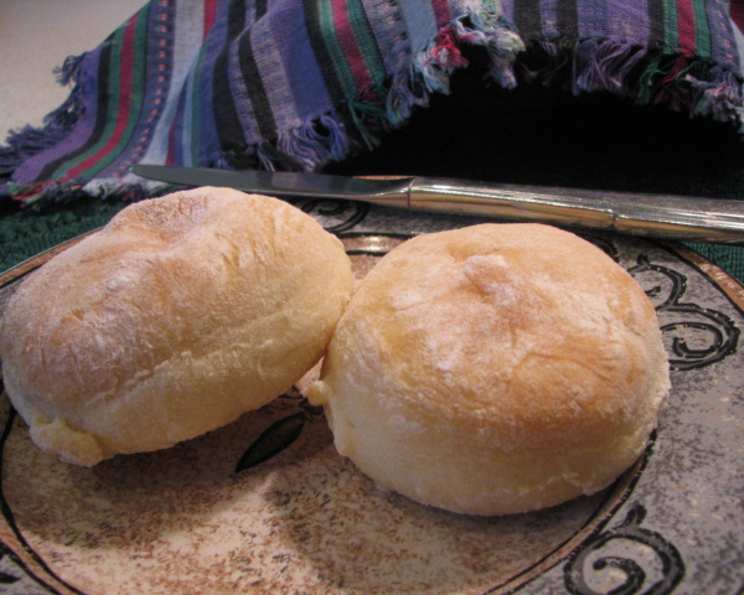
Delicious Cowboy Biscuits: A Taste of Home on the Range
I’ll never forget my grandmother’s kitchen, the heart of our family gatherings. Buttery aromas swirled through the air as she bustled about, humming softly. Her hands, gnarled with age and experience, moved with practiced ease as she prepared what we affectionately called “Cowboy Biscuits.” These weren’t dainty, delicate things. They were hearty, wholesome, and filled with the warmth of her love – a true taste of home, no matter where we roamed. Each bite instantly takes me back to those cherished moments around her table, laughing and sharing stories.
Recipe Overview
- Prep Time: 30 minutes
- Cook Time: 10-12 minutes
- Total Time: 45 minutes
- Servings: 36
- Yield: 3 dozen biscuits
- Dietary Type: Vegetarian
Ingredients
- 2 (1/4 ounce) packages dry yeast, dissolved in
- 1 cup warm water
- 7 cups flour
- 1 teaspoon salt
- 1/2 teaspoon baking soda
- 4 teaspoons baking powder
- 1/2 cup sugar
- 2 cups buttermilk (dry may be used after you add the water)
- 1/2 cup vegetable oil
Equipment Needed
- Large Mixing Bowl
- Measuring Cups and Spoons
- Biscuit Cutter (or knife)
- Baking Sheet
Instructions
-
In a large bowl, begin by dissolving the dry yeast in the warm water. Ensure the water isn’t too hot, as this can kill the yeast. Lukewarm is ideal.
-
To the same bowl, add the remaining ingredients: flour, salt, baking soda, baking powder, sugar, buttermilk, and vegetable oil.
-
Mix all ingredients thoroughly until a dough forms. The dough will be somewhat sticky, which is perfectly normal. Don’t overmix, as this can result in tough biscuits.
-
Allow the bowl of dough to sit for about 30 minutes. This resting period is optional, you can bake the biscuits right away. The rest helps develop the flavor. It’s a matter of preference.
-
On a lightly floured surface, roll the dough to approximately 3/4 inch thickness.
-
Use a biscuit cutter to cut out individual biscuits. If you don’t have a biscuit cutter, a sharp knife works just as well. Cut straight down without twisting to ensure the biscuits rise evenly.
-
Place the biscuits on an ungreased baking sheet. Arrange them so they are slightly touching for softer sides or with a little space for crispier sides.
-
Bake in a preheated 375-degree Fahrenheit (190 degrees Celsius) oven for 10-12 minutes. Keep a close eye on them, baking times may vary depending on your oven.
-
The biscuits are done when they’re golden brown on top. Remove them from the oven and let them cool slightly before serving.
-
LEFTOVER DOUGH: Store in the refrigerator for up to 2 weeks in an airtight container, ensuring there is enough room in the container as the dough will continue to rise slowly.
Expert Tips & Tricks
- For a richer flavor: Use melted butter instead of vegetable oil.
- For extra fluffy biscuits: Sift the dry ingredients together before adding them to the wet ingredients. This helps to aerate the flour and baking powder, resulting in a lighter texture.
- To prevent sticking: Line your baking sheet with parchment paper for easy cleanup and to prevent the biscuits from sticking.
- Want a slightly tangy flavor? Replace a portion of the buttermilk with sour cream or plain yogurt.
- To get an even golden color: Brush the tops of the biscuits with melted butter or milk before baking.
- If your oven runs hot: Reduce the baking time by a minute or two to prevent burning.
- Making the biscuits in advance? You can cut the biscuits and place them on the baking sheet, then cover them tightly and refrigerate them for up to 24 hours before baking. Add a few minutes to the baking time.
Serving & Storage Suggestions
These Cowboy Biscuits are incredibly versatile. Serve them warm with butter and jam for breakfast, alongside a hearty stew for dinner, or use them as a base for a delicious breakfast sandwich. They are amazing served alongside a bowl of chili or homemade soup.
Storage:
- Room Temperature: Store cooled biscuits in an airtight container at room temperature for up to 2 days.
- Refrigerator: For longer storage, keep them in an airtight container in the refrigerator for up to a week.
- Freezer: Biscuits can be frozen for up to 2-3 months. Wrap them individually in plastic wrap, then place them in a freezer bag.
Reheating:
- Oven: Reheat in a 350°F (175°C) oven for about 5-10 minutes, or until warmed through.
- Microwave: Reheat individual biscuits in the microwave for 15-30 seconds.
- Toaster Oven: Reheat in a toaster oven for a few minutes, watching carefully to prevent burning.
Nutritional Information
| Nutrient | Amount per Serving | % Daily Value |
|---|---|---|
| Calories | 133 kcal | N/A |
| Calories from Fat | 30 g | N/A |
| Total Fat | 3.4 g | 5% |
| Saturated Fat | 0.5 g | 2% |
| Cholesterol | 0.5 mg | 0% |
| Sodium | 137.6 mg | 5% |
| Total Carbohydrate | 22.3 g | 7% |
| Dietary Fiber | 0.8 g | 3% |
| Sugars | 3.5 g | N/A |
| Protein | 3.1 g | 6% |
Note: Nutritional information is an estimate and may vary based on specific ingredients and portion sizes.
Variations & Substitutions
- Sweet Biscuits: Increase the amount of sugar to 3/4 cup or 1 cup for a sweeter biscuit.
- Herbed Biscuits: Add 1-2 tablespoons of dried herbs like rosemary, thyme, or oregano to the dough for a savory twist.
- Cheese Biscuits: Incorporate 1 cup of shredded cheddar, parmesan, or other cheese into the dough.
- Garlic Biscuits: Add 1-2 teaspoons of garlic powder to the dry ingredients.
- Spicy Biscuits: Add a pinch of cayenne pepper or red pepper flakes to the dough for a little heat.
- Vegan Biscuits: Replace the buttermilk with a plant-based alternative, such as almond milk or soy milk, and use a vegan butter substitute for greasing the baking sheet (if needed).
FAQs (Frequently Asked Questions)
Q: Can I use all-purpose flour instead of bread flour?
A: Yes, all-purpose flour works perfectly well in this recipe. The texture might be slightly different, but the biscuits will still be delicious.
Q: My dough is too sticky. What should I do?
A: Add a little more flour, one tablespoon at a time, until the dough is easier to handle. Be careful not to add too much, or the biscuits will be dry.
Q: Can I freeze the unbaked biscuits?
A: Yes, you can freeze the unbaked biscuits. Place them on a baking sheet lined with parchment paper and freeze until solid. Then transfer them to a freezer bag. When ready to bake, bake from frozen, adding a few minutes to the baking time.
Q: How do I prevent my biscuits from being dry?
A: Avoid overmixing the dough and overbaking the biscuits. Also, ensure you’re using the correct amount of liquid.
Q: What if I don’t have buttermilk?
A: You can make a buttermilk substitute by adding 1 tablespoon of lemon juice or white vinegar to 1 cup of milk. Let it sit for 5 minutes before using. Dry buttermilk powder can be used, as mentioned in the ingredients section.
Final Thoughts
These Cowboy Biscuits are more than just a recipe; they’re a connection to simpler times, to family traditions, and to the comforting flavors of home. Whether you’re a seasoned baker or just starting out, I encourage you to give this recipe a try. Share them with your loved ones, and create your own memories around the table. And don’t be afraid to experiment with different variations and flavors to make them your own. Let me know how they turn out!