
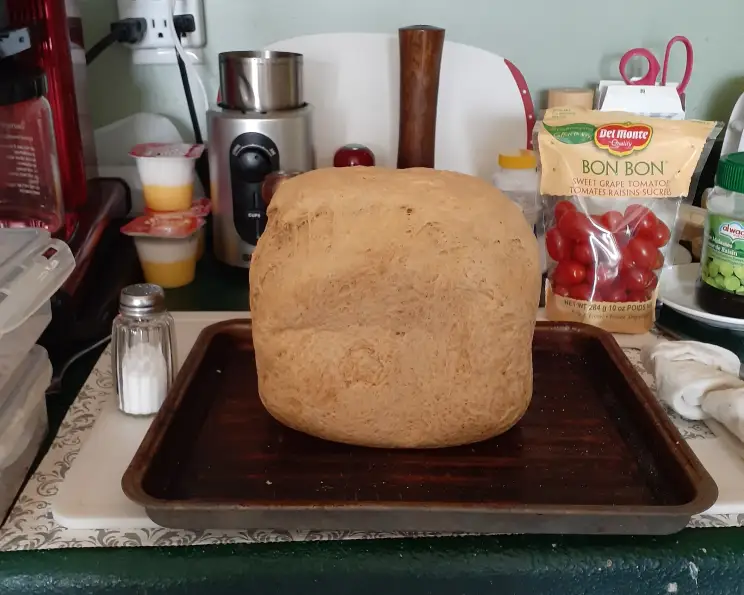
Delicious Low FODMAPs Bread: A Gut-Friendly Delight
I remember the frustration all too well. The joy of a warm, crusty loaf of bread, the simple pleasure of a sandwich, seemed like a distant memory when I first started experiencing digestive issues. Finding satisfying, delicious alternatives that didn’t leave me feeling unwell was a challenge, to say the least. That’s why I poured my heart into developing this Low FODMAPs bread recipe – a bread that delivers on taste and texture without triggering discomfort. It’s a testament to the fact that dietary restrictions don’t have to mean sacrificing the foods you love.
Recipe Overview
- Prep Time: 2 hours 15 minutes (includes rising time)
- Cook Time: 35-40 minutes
- Total Time: 2 hours 50-55 minutes
- Servings: 12
- Yield: 1 loaf
- Dietary Type: Low FODMAP
Ingredients
- 2 cups oat flour (easily made from regular oatmeal)
- 1 cup rice flour
- 1/2 cup tapioca flour
- 1/2 cup cornstarch
- 1/2 cup vital wheat gluten
- 1 1/2 teaspoons salt
- 1 1/2 – 1 3/4 cups lukewarm water
- 2 tablespoons sugar
- 1 tablespoon active dry yeast
- 1 teaspoon vinegar
- 2 tablespoons vegetable oil
- 1 egg
- 3 tablespoons cornmeal, for dusting ovenware
Equipment Needed
- Large Mixing Bowl
- Measuring Cups and Spoons
- Coffee grinder (for oat flour, optional)
- Oiled Plastic Wrap
- Dutch oven or Large Glass Casserole
- Oven
Instructions
-
Begin by activating the yeast. In a small bowl, combine the lukewarm water, sugar, and active dry yeast. Set aside for about 5-10 minutes, or until the mixture becomes foamy. This indicates that the yeast is active and ready to use.
-
In a large mixing bowl, whisk together the dry ingredients: oat flour, rice flour, tapioca flour, cornstarch, vital wheat gluten, and salt. Ensure all ingredients are evenly distributed.
-
In a separate small bowl, beat the egg. Then, add the vegetable oil and vinegar to the beaten egg and whisk to combine.
-
Pour the water/yeast mixture and the egg mixture into the bowl with the dry ingredients. Mix well until a wet, sticky dough forms. This dough will be too wet to knead in the traditional sense. I prefer to mix by hand, but a mixer with a dough hook attachment could also be used.
-
Cover the bowl with oiled plastic wrap. This prevents the dough from drying out while it rises. Place the bowl in a warm spot in your kitchen to rise for about 1 hour. A slightly warm oven (turned off!) or a sunny windowsill works well.
-
After the first rise, the dough should be airy and noticeably larger. Keeping the dough in the bowl, gently punch it down through the plastic wrap to release some of the air.
-
Cover the dough again with the oiled plastic wrap and allow it to rise for a second time, for another hour. This second rise is crucial for developing the bread’s flavor and texture.
-
About 30 minutes before the dough is finished rising for the second time, preheat your oven to 450°F (232°C). Place a Dutch oven or a large glass casserole dish (with a lid) inside the oven to preheat as well. This helps create a steamy environment for the bread to bake, resulting in a crispier crust.
-
Once the dough has completed its second rise, carefully remove the preheated casserole dish from the oven. Toss a handful of cornmeal into the hot casserole. The cornmeal will prevent the bread from sticking and add a pleasant textural contrast to the crust.
-
Tilt the bowl of dough over the hot casserole dish and carefully pour and scrape the dough inside. The dough will be quite wet and full of air pockets.
-
Place the cover on the casserole dish (or use aluminum foil if you don’t have a lid) and return it to the oven.
-
Reduce the oven temperature to 400°F (200°C) and bake the bread for 25-30 minutes with the lid on.
-
After 25-30 minutes, remove the lid (or aluminum foil) and bake for an additional 10 minutes, or until the bread is golden brown. The crust should be chewy and crunchy, especially on the bottom.
-
Remove the bread from the oven and let it cool slightly in the casserole dish before transferring it to a wire rack to cool completely.
-
To make oat flour, simply grind regular rolled oats in a coffee grinder until finely ground. This is a quick and easy way to ensure you have fresh oat flour on hand.
Expert Tips & Tricks
- The Warm Spot: Finding the perfect warm spot for rising can be tricky. If your kitchen is cold, try placing the bowl of dough on top of the refrigerator or in a slightly warmed (then turned off!) oven.
- Wet Dough is Key: Don’t be tempted to add more flour to make the dough less sticky. This dough is meant to be wet, which contributes to its light and airy texture.
- Scoring the Bread: For a more artisan look, you can score the top of the dough with a sharp knife or lame just before baking. This also helps control how the bread expands in the oven. Make shallow cuts, about 1/4 inch deep.
- Adjusting the Water: The amount of water needed may vary depending on the humidity and the specific type of flours you are using. Start with 1 1/2 cups and add more gradually until the dough reaches the desired consistency.
- Gluten Development: Since we are using vital wheat gluten, it’s important to mix the dough thoroughly to allow the gluten to develop. This will give the bread structure and chewiness.
- Doneness Test: If you’re unsure whether the bread is fully cooked, insert a toothpick into the center. If it comes out clean, the bread is done.
Serving & Storage Suggestions
This Low FODMAPs bread is incredibly versatile and can be enjoyed in countless ways. Slice it and enjoy it with your favorite low FODMAPs spreads, such as nut butter, lactose-free cream cheese, or avocado. It’s also perfect for making sandwiches, toast, or croutons.
To store leftovers, wrap the bread tightly in plastic wrap or place it in an airtight container at room temperature. It will stay fresh for about 2-3 days. For longer storage, you can freeze the bread for up to 2 months. Slice the bread before freezing for easy thawing. To reheat, simply toast a slice or wrap the loaf in foil and warm it in a 350°F (175°C) oven for about 10-15 minutes.
Nutritional Information
| Nutrient | Amount per Serving | % Daily Value |
|---|---|---|
| Calories | 179.9 kcal | N/A |
| Calories from Fat | 32 g | 18% |
| Total Fat | 3.6 g | 5% |
| Saturated Fat | 0.6 g | 3% |
| Cholesterol | 15.5 mg | 5% |
| Sodium | 301.4 mg | 12% |
| Total Carbohydrate | 33.5 g | 11% |
| Dietary Fiber | 2.8 g | 11% |
| Sugars | 2.7 g | N/A |
| Protein | 4.4 g | 8% |
Variations & Substitutions
- Gluten-Free Version: While this recipe intentionally uses vital wheat gluten to achieve a “real” bread texture, you could experiment with completely gluten-free flours like a blend of sorghum, millet, and brown rice flour. However, you would need to add a binder like xanthan gum to provide structure.
- Different Flours: Feel free to experiment with different ratios of the low FODMAPs flours. For instance, you could try using more rice flour and less oat flour, or vice versa, depending on your taste preferences and what you have on hand. Just remember that each flour will contribute slightly different textures and flavors.
- Herbed Bread: Add 1-2 tablespoons of your favorite dried herbs (such as rosemary, thyme, or oregano) to the dry ingredients for a flavorful herbed loaf.
- Seed Topping: Sprinkle the top of the dough with sesame seeds, poppy seeds, or sunflower seeds before baking for added texture and flavor.
FAQs (Frequently Asked Questions)
Q: Can I use a stand mixer instead of mixing by hand?
A: Yes, you can use a stand mixer fitted with a dough hook attachment. Mix on low speed until the ingredients are well combined and a wet, sticky dough forms.
Q: Why is the dough so wet? Is that normal?
A: Yes, the dough is intentionally wet. This high hydration level is essential for creating a light and airy crumb in the final bread. Do not add more flour to try and make the dough less sticky.
Q: Can I skip the second rise?
A: While you can technically skip the second rise, it is highly recommended for optimal flavor and texture. The second rise allows the yeast to continue to develop, resulting in a more complex flavor and a lighter, airier crumb.
Q: My bread is browning too quickly. What should I do?
A: If your bread is browning too quickly, you can tent it with aluminum foil during the last 10-15 minutes of baking. This will help prevent the crust from burning while the inside continues to cook.
Q: Can I freeze this bread?
A: Yes, this bread freezes well. Allow it to cool completely, then wrap it tightly in plastic wrap and place it in a freezer bag. Freeze for up to 2 months. Thaw at room temperature or in the refrigerator before serving.
Final Thoughts
Embarking on a low FODMAPs diet doesn’t mean bidding farewell to your beloved bread. This recipe provides a delicious and gut-friendly way to enjoy a classic staple. Don’t be afraid to experiment with different flours and flavorings to create your own signature loaf. I encourage you to give this recipe a try and share your creations with friends and family. Perhaps pair it with a homemade low-FODMAPs soup for a comforting and satisfying meal. Happy baking!