
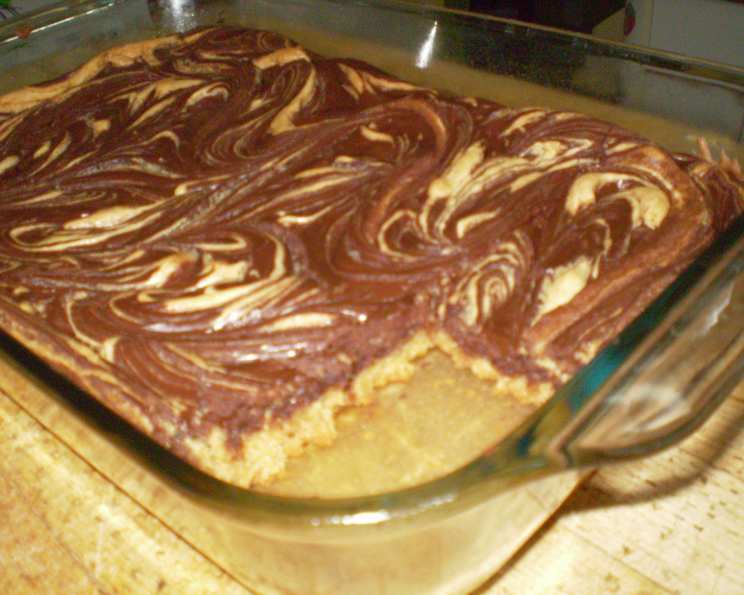
Delicious Marble Bars
I can still recall the aroma of peanut butter and chocolate wafting from the kitchen on a lazy Saturday afternoon. My grandmother, a woman whose love language was clearly expressed through baked goods, would be at the counter, humming a tuneless melody as she prepared these very marble bars. The slightly nutty, sweet scent mingling with the rich, dark chocolate always felt like a warm hug. These bars weren’t just a treat; they were a little square of happiness, and now, I’m thrilled to share that happiness with you.
Recipe Overview
- Prep Time: 15 minutes
- Cook Time: 25-30 minutes
- Total Time: 40-45 minutes
- Yields: 24 bars
- Dietary Type: Not Gluten-Free
Ingredients
- 1/2 cup peanut butter
- 1/3 cup butter, softened
- 3/4 cup light brown sugar
- 3/4 cup sugar
- 2 eggs
- 2 teaspoons vanilla
- 1 cup flour
- 1 teaspoon baking powder
- 1/4 teaspoon salt
- 1 (12 ounce) package swirled chocolate chips or 1 (10 ounce) package milk chocolate chips
Equipment Needed
- Large mixing bowl
- Electric mixer (hand or stand mixer)
- Measuring cups and spoons
- 9×13 inch baking pan
- Grease for the pan
- Knife
Instructions
-
Preheat your oven to 350 degrees F (175 degrees C). Grease a 9×13 inch baking pan. This step is crucial to prevent the bars from sticking and ensuring easy removal after baking.
-
In a large bowl, combine the peanut butter, softened butter, light brown sugar, and sugar. Use an electric mixer to beat these ingredients together until the mixture is light and creamy. This step helps to incorporate air into the batter, resulting in a softer, more tender bar.
-
Add the eggs one at a time to the peanut butter mixture, beating well after each addition. Then, stir in the vanilla. The eggs act as a binder, holding the ingredients together, while the vanilla enhances the overall flavor profile.
-
In a separate bowl, whisk together the flour, baking powder, and salt. This ensures that the baking powder is evenly distributed throughout the flour, which is essential for proper leavening.
-
Gradually blend the dry ingredients into the wet ingredients (the peanut butter mixture). Mix until just combined. Be careful not to overmix, as this can develop the gluten in the flour and result in a tough bar.
-
Spread the batter evenly into the prepared 9×13 inch pan. Use a spatula or the back of a spoon to ensure a uniform layer.
-
Sprinkle the chocolate chips evenly over the top of the batter.
-
Bake for 5 minutes at 350 degrees F (175 degrees C).
-
Remove the pan from the oven. Using a knife, run it through the batter in a swirling motion to create a marbled effect. Don’t overdo it; a few swirls are all you need to achieve the desired look. The contrast between the peanut butter batter and the melted chocolate creates a visually appealing and delicious combination.
-
Return the pan to the oven and continue to bake for an additional 20-25 minutes, or until a toothpick inserted into the center comes out clean. The baking time may vary depending on your oven, so it’s always a good idea to check for doneness a few minutes before the suggested time.
-
Let the bars cool completely in the pan before cutting into squares. This will allow them to firm up and prevent them from crumbling.
Expert Tips & Tricks
- For an extra nutty flavor, use crunchy peanut butter.
- If you want to enhance the chocolate flavor, add a tablespoon of cocoa powder to the dry ingredients.
- To prevent the chocolate chips from sinking to the bottom of the bars, toss them with a tablespoon of flour before sprinkling them on top.
- For cleaner cuts, chill the bars in the refrigerator for at least 30 minutes before slicing. Use a sharp knife and wipe it clean between cuts.
- If your oven tends to bake unevenly, rotate the pan halfway through the baking time to ensure even browning.
- Don’t have swirled chocolate chips? Feel free to use semi-sweet, dark, or even white chocolate chips for a different flavor profile.
- For a richer flavor, use European-style butter, which has a higher fat content.
Serving & Storage Suggestions
These marble bars are delicious served as a snack, dessert, or even as a sweet treat in a lunchbox. They pair well with a glass of cold milk, a cup of coffee, or a scoop of vanilla ice cream.
To store, place the cooled bars in an airtight container at room temperature. They will stay fresh for up to 3 days. For longer storage, you can refrigerate them for up to a week, or freeze them for up to 2 months. To freeze, wrap the bars individually in plastic wrap and then place them in a freezer-safe bag or container. Thaw them at room temperature before serving.
Nutritional Information
(Estimated per serving, based on 24 servings)
| Nutrient | Amount per Serving | % Daily Value |
|---|---|---|
| Calories | 198.4 kcal | N/A |
| Calories from Fat | 89g | 45% |
| Total Fat | 10 g | 15% |
| Saturated Fat | 4.8 g | 24% |
| Cholesterol | 24.4 mg | 8% |
| Sodium | 92.4 mg | 3% |
| Total Carbohydrate | 27 g | 9% |
| Dietary Fiber | 1.3 g | 5% |
| Sugars | 21.2 g | 84% |
| Protein | 3 g | 6% |
Note: Nutritional information is an estimate and may vary based on specific ingredients and preparation methods.
Variations & Substitutions
- Gluten-Free: Substitute the all-purpose flour with a gluten-free blend. Be sure to add a binder such as xanthan gum to help hold the bars together.
- Nut-Free: Replace the peanut butter with sunflower seed butter (sunbutter) for a nut-free alternative.
- Vegan: Substitute the butter with a vegan butter alternative, the eggs with flax eggs (1 tablespoon of ground flaxseed mixed with 3 tablespoons of water per egg), and ensure your chocolate chips are dairy-free.
- Spice it up: Add a teaspoon of cinnamon or a pinch of cayenne pepper to the batter for a warm, spicy kick.
- Add-ins: Incorporate other mix-ins such as chopped nuts, dried fruit, or pretzels for added texture and flavor.
FAQs (Frequently Asked Questions)
Q: Can I use a different size pan?
A: While a 9×13 inch pan is recommended for the best results, you can use an 8×8 inch pan for thicker bars, but you may need to adjust the baking time accordingly.
Q: My bars are too dry. What did I do wrong?
A: Overbaking is the most common cause of dry bars. Be sure to check for doneness frequently during the last few minutes of baking time.
Q: Can I make the batter ahead of time?
A: Yes, you can make the batter ahead of time and store it in the refrigerator for up to 24 hours. Allow it to come to room temperature before spreading it into the pan and baking.
Q: My chocolate chips sank to the bottom. How can I prevent this?
A: Toss the chocolate chips with a tablespoon of flour before sprinkling them on top of the batter. This will help them adhere to the batter and prevent them from sinking.
Q: How do I get clean cuts?
A: Chill the bars in the refrigerator for at least 30 minutes before slicing. Use a sharp knife and wipe it clean between cuts.
Final Thoughts
I truly hope you give these delicious marble bars a try. They are a simple yet satisfying treat that’s perfect for any occasion. Feel free to experiment with different variations and substitutions to create your own unique version. And most importantly, don’t forget to share your creations with friends and family! They’re guaranteed to be a hit. I’d love to hear about your baking experience and any personal touches you add to the recipe. Happy baking!