
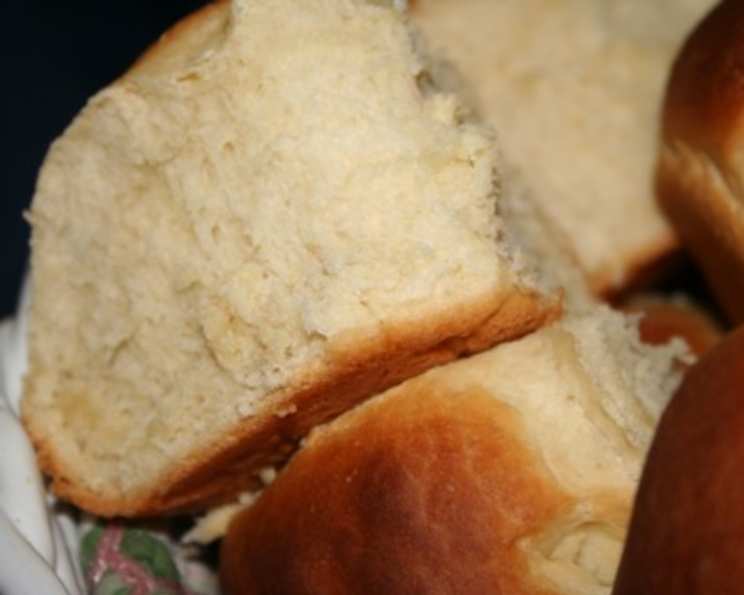
Delicious No-Knead Refrigerator Rolls: The Easiest Homemade Bread You’ll Ever Make
There’s a scent that instantly transports me back to childhood Christmases: the yeasty, buttery aroma of baking bread wafting from my grandmother’s kitchen. While she was a master of countless elaborate dishes, her no-knead refrigerator rolls were always the star. We’d sneak into the kitchen, fingers poised, ready to snatch a warm, golden roll fresh from the oven, slathering it with melting butter before anyone could stop us. That simple pleasure – the soft, pillowy texture, the slightly tangy flavor – is a culinary memory I cherish, and this recipe brings it back every time.
Recipe Overview
- Prep Time: 30 minutes (plus refrigeration time)
- Cook Time: 8-10 minutes
- Total Time: 3 hours 30 minutes (includes rise time)
- Yields: 4 dozen rolls
- Dietary Type: Vegetarian
Ingredients
- 4 1/2 teaspoons active dry yeast (or two .25 oz packets)
- 2 cups warm water (105-115°F)
- 1/2 cup white sugar
- 2 teaspoons salt
- 1/4 cup shortening
- 6 1/2 cups all-purpose flour, divided
- 1 egg
Equipment Needed
- Large mixing bowl
- Small mixing bowl
- Electric mixer
- Measuring cups and spoons
- Damp cloth
- Greased baking pans, baking trays, or muffin pans
Instructions
-
In a large bowl, dissolve the active dry yeast in the warm water. Let it sit for 5-10 minutes to proof. You should see some bubbling, indicating the yeast is active. If not, start with fresh yeast.
-
In a separate, smaller bowl, mix together the white sugar, salt, shortening, and egg with an electric mixer at low speed until well combined. Creaming these ingredients together creates a tender crumb in the final rolls.
-
Add the sugar mixture to the proofed yeast mixture. Stir well to combine.
-
Gradually add the all-purpose flour, one cup at a time, to the wet ingredients. The first 3 1/2 cups can be mixed in with the electric mixer on low speed.
-
Once the dough starts to thicken, remove it from the mixer and stir in the remaining 3 cups of flour by hand. The dough will be sticky. Don’t be tempted to add too much flour, as this will result in dry rolls.
-
Cover the dough with a damp cloth to prevent it from drying out. Place the bowl in the refrigerator.
-
Punch down the dough occasionally as it rises in the refrigerator. Because this is a no-knead dough, it will rise quite a bit. Punching it down releases the air and allows for more even fermentation and flavor development. You can leave the dough in the refrigerator overnight, or even for a couple of days. The longer it sits, the more complex the flavor will become.
-
Two hours before you plan to bake the rolls, remove the dough from the refrigerator.
-
Shape the dough into rolls. You can make classic round rolls, knot rolls, or even fill them with cheese or herbs.
-
Place the shaped rolls on greased baking pans, baking trays, or muffin pans. The type of pan you use will affect the shape and texture of the rolls. For softer rolls, use a baking pan or muffin tin where the rolls can touch each other while baking. For crispier rolls, use a baking tray where they have more space.
-
Let rise for 2 hours in a warm place. This second rise is crucial for light and airy rolls.
-
Preheat your oven to 400 degrees F (200 degrees C).
-
Bake at 400 degrees F (200 degrees C) for 8 to 10 minutes, or until golden brown. Keep a close eye on them, as oven temperatures can vary.
-
Remove the rolls from the oven and let them cool slightly on a wire rack before serving.
Expert Tips & Tricks
- Yeast Activation: Always check the expiration date on your yeast. If you’re unsure if your yeast is still good, proof it in warm water with a pinch of sugar. If it doesn’t bubble after 10 minutes, it’s time for a new batch.
- Dough Consistency: This dough is meant to be sticky. Resist the urge to add more flour than the recipe calls for, or your rolls will be dense.
- Refrigeration Time: Don’t be afraid to let the dough sit in the refrigerator for longer than overnight. This develops a more complex flavor profile.
- Shaping: For perfectly round rolls, gently pull the edges of the dough down and tuck them underneath, creating a smooth top.
- Baking Time: Keep a close eye on the rolls during baking. They should be golden brown and sound hollow when tapped on the bottom. If they start to brown too quickly, tent them with foil.
- Buttery Goodness: For extra flavor, brush the tops of the rolls with melted butter before baking and again as soon as they come out of the oven.
- Garlic Herb Rolls: Add 2 cloves minced garlic, 1/4 cup chopped fresh parsley, 1 tbsp dried rosemary and 1/2 teaspoon dried thyme to dough when mixing in the flour. Brush with garlic butter after baking.
- Make-Ahead Tip: You can shape the rolls the night before and let them rise in the refrigerator overnight. Just be sure to cover them well to prevent them from drying out. Bring them to room temperature for about 30 minutes before baking.
Serving & Storage Suggestions
These no-knead refrigerator rolls are best served warm, fresh from the oven, slathered with butter or your favorite spread. They’re a perfect accompaniment to soups, stews, salads, or any main course.
- Room Temperature: Store leftover rolls at room temperature in an airtight container for up to 2 days.
- Refrigerator: Store leftover rolls in the refrigerator in an airtight container for up to 5 days. Reheat in the oven or microwave before serving.
- Freezer: Freeze leftover rolls in a freezer-safe bag or container for up to 2 months. Thaw overnight in the refrigerator or at room temperature before reheating. To reheat from frozen, wrap the rolls in foil and bake in a preheated oven at 350 degrees F (175 degrees C) for 10-15 minutes, or until warmed through.
Nutritional Information
| Nutrient | Amount per Serving | % Daily Value |
|---|---|---|
| Calories | 980.9 kcal | N/A |
| Calories from Fat | 146 g | 15% |
| Total Fat | 16.2 g | 24% |
| Saturated Fat | 3.9 g | 19% |
| Cholesterol | 52.9 mg | 17% |
| Sodium | 1188.9 mg | 49% |
| Total Carbohydrate | 181.8 g | 60% |
| Dietary Fiber | 6.4 g | 25% |
| Sugars | 25.6 g | 102% |
| Protein | 24.3 g | 48% |
Note: Nutritional information is an estimate and may vary based on specific ingredients and portion sizes.
Variations & Substitutions
- Whole Wheat: Substitute up to half of the all-purpose flour with whole wheat flour for a nuttier flavor and added fiber.
- Dairy-Free: Use a plant-based milk alternative like almond or soy milk instead of water in the initial yeast mixture. Ensure your shortening is also dairy-free.
- Sweet Rolls: Add an extra 1/4 cup of sugar to the dough and brush the baked rolls with a simple glaze made from powdered sugar and milk.
- Savory Rolls: Add chopped fresh herbs, such as rosemary or thyme, to the dough for a savory twist.
- Cheese Rolls: Incorporate shredded cheddar, mozzarella, or parmesan cheese into the dough before shaping.
FAQs (Frequently Asked Questions)
Q: Can I use instant yeast instead of active dry yeast?
A: Yes, you can. Use the same amount, but you don’t need to proof it in water first. Just add it directly to the dry ingredients.
Q: Why is my dough not rising?
A: Several factors can prevent dough from rising. Make sure your yeast is fresh and that the water is warm, not hot. Also, avoid placing the dough in a cold environment.
Q: Can I freeze the dough after it has risen in the refrigerator?
A: Yes, you can. Punch down the dough, wrap it tightly in plastic wrap and then in foil, and freeze for up to 2 months. Thaw overnight in the refrigerator before shaping and baking.
Q: What if I don’t have shortening? Can I use butter or oil?
A: While shortening contributes to a tender crumb, you can substitute with melted butter or vegetable oil. Be aware that this may slightly alter the texture and flavor of the rolls.
Q: How do I know when the rolls are done baking?
A: The rolls are done when they are golden brown on top and sound hollow when tapped on the bottom. An internal temperature of 200-210°F (93-99°C) indicates doneness.
Final Thoughts
These no-knead refrigerator rolls are a testament to the fact that delicious homemade bread doesn’t have to be complicated. With minimal effort and a little patience, you can create warm, pillowy rolls that will impress your family and friends. So, gather your ingredients, follow the steps, and prepare to be amazed by the simplicity and flavor of these incredibly easy rolls. Don’t hesitate to experiment with variations and substitutions to make them your own. And, most importantly, enjoy the process and share the love with those you cherish. I encourage you to try this recipe and let me know in the comments how they turned out. Maybe you can serve them alongside a hearty bowl of chili for the perfect cozy meal!