
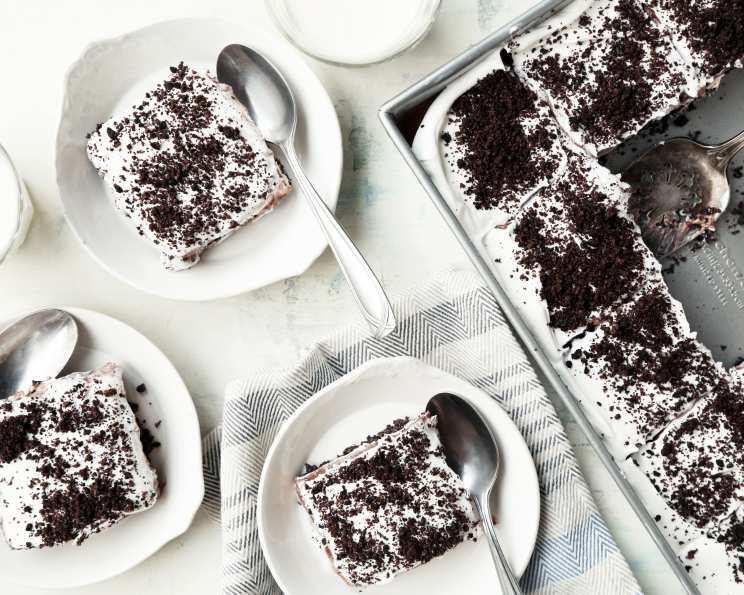
Delicious Oreo Refrigerator Cake (No-Bake)
My grandmother, bless her heart, wasn’t much of a baker, but she had a knack for simple desserts that brought smiles to our faces. This Oreo Refrigerator Cake reminds me of her; effortless, delicious, and always a crowd-pleaser. I remember her making a similar version for my tenth birthday, and the look on everyone’s faces as they devoured it was pure joy. It was a sweet, chocolaty dream, and instantly became a family favorite – one that I still make today, carrying on her legacy of sweet treats and happy memories.
Recipe Overview
- Prep Time: 20 minutes
- Cook Time: 0 minutes
- Total Time: 1 hour 50 minutes (plus refrigeration time)
- Servings: 12
- Yield: 1 cake
- Dietary Type: Not specified
Ingredients
- 1 (15 ounce) bag Oreo cookies, crushed, divided
- ½ cup butter, melted
- 1 (8 ounce) package cream cheese, softened
- 1 cup confectioners’ sugar
- 1 (12 ounce) container Cool Whip, frozen topping thawed
- 1 (6 ounce) package chocolate fudge instant pudding mix (lemon flavor is also good)
- 2 ¼ cups half-and-half cream (or use whole milk)
Equipment Needed
- 13 x 9-inch baking pan
- Mixing bowls
- Electric mixer
- Measuring cups and spoons
- Rubber spatula
Instructions
- Begin by crushing the Oreo cookies. The easiest way is to use a food processor, but you can also place them in a large ziplock bag and crush them with a rolling pin. Be sure to reserve ¼ cup of the crushed cookies for topping.
- In a medium bowl, mix the remaining crushed cookies with the melted butter. Ensure the butter is fully incorporated, creating a slightly damp, sandy mixture.
- Press the cookie mixture into the bottom of a greased 13 x 9-inch baking pan. Use the bottom of a measuring cup or your hands to firmly press the crust evenly across the pan. This will form the base of your cake.
- In a separate, large bowl, beat the softened cream cheese with the confectioners’ sugar using an electric mixer on medium speed until light and fluffy. Make sure your cream cheese is properly softened to avoid any lumps in your filling.
- Gently fold in half of the thawed Cool Whip topping into the cream cheese mixture until just combined. Be careful not to overmix, as this can deflate the Cool Whip.
- Spread the cream cheese mixture evenly over the cookie crumb layer in the baking pan. Ensure the layer is smooth and reaches all edges of the pan.
- Refrigerate the pan for ½ hour to allow the cream cheese layer to set slightly. This helps prevent the pudding layer from seeping into the crust.
- While the cream cheese layer is chilling, combine the half-and-half cream (or whole milk) with the chocolate fudge instant pudding mix in another bowl. Beat well with a whisk or electric mixer until smooth and thickened according to package directions.
- Pour the chocolate pudding mixture carefully over the chilled cream cheese layer in the pan. Spread it evenly to cover the entire surface.
- Refrigerate the cake again for at least 1 hour, or longer if possible, to allow the pudding layer to set completely.
- Once the pudding layer is firm, spread the remainder of the Cool Whip topping evenly on top of the pudding layer.
- Finally, sprinkle the reserved crushed Oreo cookie crumbs over the Cool Whip topping.
- Store the finished cake in the refrigerator, covered tightly, until ready to serve.
Expert Tips & Tricks
- For an even richer flavor, consider using dark chocolate Oreo cookies.
- If you’re short on time, you can use a pre-made Oreo pie crust instead of making your own.
- To make the cake easier to slice, run a knife under hot water before each cut.
- For a truly decadent dessert, drizzle melted chocolate or caramel sauce over the top before serving.
- If you want a more intense chocolate flavor, add a tablespoon of cocoa powder to the pudding mix.
- Consider doubling the chocolate pudding mixture, or even the cream cheese mixture, if you prefer thicker layers.
- For a fun variation, use lemon flavor instant pudding mix instead of chocolate for a refreshing twist.
Serving & Storage Suggestions
Serve this Oreo Refrigerator Cake chilled directly from the refrigerator. It’s best enjoyed within 3-4 days. To store, cover the cake tightly with plastic wrap or transfer it to an airtight container. It should be kept in the refrigerator to maintain its texture and prevent spoilage. This cake is also delicious frozen. If you choose to freeze it, remove it from the freezer about 6 minutes before slicing to allow it to soften slightly. It can be stored in the freezer for up to 2 months.
Nutritional Information
| Nutrient | Amount per Serving | % Daily Value |
|---|---|---|
| Calories | 717.5 kcal | N/A |
| Calories from Fat | 406 g | 57% |
| Total Fat | 45.1 g | 69% |
| Saturated Fat | 27.2 g | 135% |
| Cholesterol | 77.3 mg | 25% |
| Sodium | 510 mg | 21% |
| Total Carbohydrate | 75.9 g | 25% |
| Dietary Fiber | 2.2 g | 8% |
| Sugars | 50.1 g | 200% |
| Protein | 7 g | 14% |
Note: Nutritional information is an estimate and may vary based on specific ingredients and preparation methods.
Variations & Substitutions
- Gluten-Free: Use gluten-free Oreo cookies for a gluten-free version of this cake.
- Dairy-Free: Substitute the cream cheese with a dairy-free cream cheese alternative, the half-and-half with a non-dairy milk like almond or soy milk, and use a dairy-free whipped topping.
- Peanut Butter Cup: Swirl peanut butter into the cream cheese layer and sprinkle chopped peanut butter cups on top.
- Mint Chocolate: Use mint-flavored Oreos and add a few drops of peppermint extract to the pudding mixture.
- Seasonal: Decorate with seasonal sprinkles or candies to match a holiday or special occasion. For instance, add mini Oreo cookies into the topping of Cool Whip facing sideways if you are serving this at a kid’s birthday party
FAQs (Frequently Asked Questions)
Q: Can I use regular milk instead of half-and-half?
A: Yes, you can use regular milk. Half-and-half will provide a richer flavor, but regular milk will work just fine.
Q: How long does this cake need to chill?
A: It needs to chill for at least 1 hour after adding the pudding layer, but chilling it longer (2-3 hours or even overnight) will allow the flavors to meld together even more and the cake to set completely.
Q: Can I freeze this cake?
A: Yes, this cake can be frozen. Wrap it tightly in plastic wrap and then in foil. Thaw in the refrigerator before serving.
Q: Can I use a different flavor of pudding?
A: Absolutely! Chocolate fudge is a classic choice, but vanilla, cookies ‘n cream, or even lemon pudding would be delicious variations.
Q: Can I reduce the amount of sugar in this recipe?
A: You can try reducing the amount of confectioners’ sugar slightly, but keep in mind that it helps stabilize the cream cheese filling.
Final Thoughts
This Oreo Refrigerator Cake is the ultimate no-bake dessert for any occasion. It’s incredibly easy to make, requires minimal effort, and is always a hit with kids and adults alike. Don’t be afraid to get creative with the variations and make it your own. I encourage you to give this recipe a try and share your feedback. Enjoy every chocolaty, creamy bite! This cake pairs perfectly with a cold glass of milk or a scoop of vanilla ice cream. Happy baking (or rather, refrigerating)!