
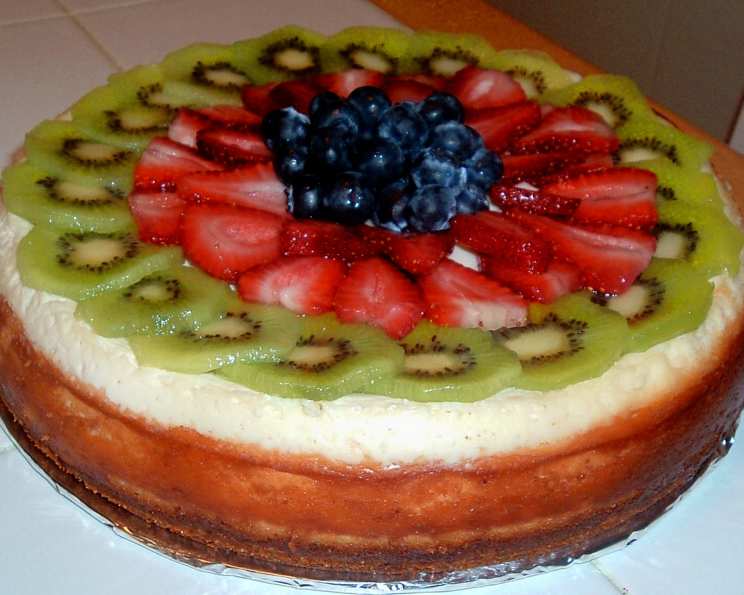
Deluxe Cheesecake: A Slice of Heaven
The first time I tasted truly transcendent cheesecake, I was a wide-eyed child perched on a stool in my grandmother’s bustling kitchen. The aroma of vanilla hung heavy in the air, mingling with the subtle tang of cream cheese. She presented it with a flourish, a perfect circle of creamy delight, its surface shimmering like polished ivory. One bite, and I was hooked – the velvety texture, the balanced sweetness, the subtle hint of cinnamon – it was pure magic. Years later, I still chase that memory, always striving to recreate the perfect cheesecake experience.
Recipe Overview
- Prep Time: 30 minutes
- Cook Time: 33-43 minutes (depending on oven adjustments)
- Total Time: 8 hours 30 minutes (including chilling time)
- Servings: 12
- Yield: 1 cheesecake
- Dietary Type: Not Gluten-Free
Ingredients
For the Crust:
- 1 ½ cups graham cracker crumbs
- 2 tablespoons sugar
- ¼ cup butter, plus 2 tablespoons butter, melted
- 1 ½ teaspoons ground cinnamon
For the Filling:
- 3 (8 ounce) packages cream cheese, softened
- 1 cup sugar
- 3 eggs
- 1 teaspoon vanilla extract, divided
- 1 (16 ounce) carton sour cream
- 3 tablespoons sugar
Equipment Needed
- 10-inch springform pan
- Mixing bowls (medium and large)
- Electric mixer
- Measuring cups and spoons
- Rubber spatula
Instructions
-
Preheat your oven to 375°F (190°C). This initial temperature is crucial for ensuring the cheesecake bakes evenly and avoids cracking.
-
In a medium bowl, combine the graham cracker crumbs, 2 tablespoons of sugar, ¼ cup of butter, and cinnamon. Mix thoroughly until all ingredients are well incorporated and the mixture resembles wet sand. The melted butter helps bind the crumbs together for a sturdy crust.
-
Press the crumb mixture firmly into the bottom of a 10-inch springform pan. Ensure the crust is evenly distributed across the base. Use the bottom of a measuring cup or your fingers to create a compact and uniform layer. This will serve as the foundation for your decadent cheesecake. Set the pan aside while you prepare the filling.
-
In a large mixing bowl, beat the cream cheese until it is soft and creamy. It’s essential that the cream cheese is properly softened; otherwise, you risk ending up with a lumpy filling. Allow the cream cheese to come to room temperature for at least 30 minutes before beginning.
-
Gradually add 1 cup of sugar to the softened cream cheese, beating until the mixture is light and fluffy. This process incorporates air into the filling, resulting in a delicate texture. Be careful not to over-beat at this stage, as it can lead to a dense cheesecake.
-
Add the eggs, one at a time, beating well after each addition. Incorporate each egg fully before adding the next. The eggs provide structure and richness to the cheesecake.
-
Stir in ½ teaspoon of vanilla extract. Vanilla enhances the overall flavor profile, adding a subtle sweetness and depth.
-
Pour the cream cheese mixture carefully into the prepared graham cracker crust, spreading it evenly to ensure a consistent thickness.
-
Bake at 375°F (190°C) for 25 to 35 minutes, or until the cheesecake is set. The cheesecake is ready when the edges are firm, but the center still has a slight jiggle. Avoid over-baking, as this can result in a dry and cracked cheesecake. If you find your cheesecake is browning too quickly, reduce the oven temperature slightly or tent it with foil.
-
Increase the oven temperature to 500°F (260°C). This rapid increase in temperature is for the sour cream topping.
-
In the same mixing bowl (no need to wash it), beat the sour cream on medium speed with an electric mixer for 2 minutes, until it is smooth and creamy.
-
Add 3 tablespoons of sugar and the remaining ½ teaspoon of vanilla extract to the sour cream, and beat for 1 minute longer, until well combined.
-
Spread the sour cream mixture evenly over the top of the baked cheesecake, creating a smooth and uniform layer.
-
Bake at 500°F (260°C) for 5 to 8 minutes, or until the topping is bubbly and lightly golden. Keep a close eye on the cheesecake during this stage, as it can burn quickly at such a high temperature.
-
Allow the cheesecake to cool to room temperature completely before chilling it in the refrigerator for at least 8 hours, or preferably overnight. This chilling period is essential for the cheesecake to set properly and develop its signature creamy texture.
-
Once the cheesecake is completely chilled, remove it from the springform pan. This can be done by running a thin knife around the edge of the cheesecake to loosen it from the pan.
-
Top with your favorite fruit (such as berries, sliced peaches, or cherries), drizzle with chocolate syrup, or sprinkle with a dusting of cocoa powder before serving. Get creative and personalize it!
Expert Tips & Tricks
- Prevent Cracking: To minimize the risk of cracking, consider baking the cheesecake in a water bath. Wrap the bottom of the springform pan tightly in foil, and place it in a larger roasting pan. Fill the roasting pan with hot water until it reaches about halfway up the sides of the springform pan. The steam from the water bath helps keep the cheesecake moist and prevents it from drying out and cracking.
- Softened Cream Cheese is Key: Ensure your cream cheese is fully softened before using it. This will prevent lumps in your cheesecake.
- Don’t Overbake: Overbaking leads to dry, cracked cheesecakes. Look for a slight jiggle in the center.
- Even Baking: Rotate the cheesecake halfway through the baking process to ensure even browning.
- Room Temperature Ingredients: Allowing all ingredients, especially the cream cheese and eggs, to come to room temperature will help them blend more smoothly, resulting in a better texture.
Serving & Storage Suggestions
Serve the Deluxe Cheesecake chilled, ideally after it has rested in the refrigerator overnight. A slice of this creamy delight pairs perfectly with fresh berries, a dollop of whipped cream, or a drizzle of chocolate sauce.
Storage: Store leftover cheesecake in an airtight container in the refrigerator for up to 5 days. For longer storage, you can freeze the cheesecake for up to 2 months. Wrap it tightly in plastic wrap and then foil to prevent freezer burn. To thaw, transfer the frozen cheesecake to the refrigerator overnight.
Nutritional Information
| Nutrient | Amount per Serving | % Daily Value |
|---|---|---|
| Calories | 483.4 kcal | N/A |
| Calories from Fat | 325 g | 67% |
| Total Fat | 36.2 g | 55% |
| Saturated Fat | 21.9 g | 109% |
| Cholesterol | 148 mg | 49% |
| Sodium | 311 mg | 12% |
| Total Carbohydrate | 33.6 g | 11% |
| Dietary Fiber | 0.5 g | 1% |
| Sugars | 25.5 g | N/A |
| Protein | 7.9 g | 15% |
Note: Daily values are based on a 2,000 calorie diet.
Variations & Substitutions
- Gluten-Free Crust: Use gluten-free graham crackers or a mixture of almond flour and gluten-free oats to create a gluten-free crust. Adjust the butter amount as needed to achieve the desired consistency.
- Lemon Zest: Add 1-2 teaspoons of lemon zest to the cream cheese filling for a bright, citrusy flavor.
- Chocolate Swirl: Melt semi-sweet chocolate and swirl it into the cream cheese filling before baking for a rich, chocolatey twist.
- Seasonal Fruit: Top the cheesecake with seasonal fruit compote or fresh fruit for a beautiful presentation and added flavor.
FAQs (Frequently Asked Questions)
Q: Can I use low-fat cream cheese?
A: While you can, using full-fat cream cheese is highly recommended for the best flavor and texture. Low-fat cream cheese may result in a less creamy and slightly rubbery cheesecake.
Q: My cheesecake cracked. What did I do wrong?
A: Cracking can be caused by overbaking, sudden temperature changes, or baking at too high of a temperature. Consider using a water bath to prevent cracking and ensure even baking.
Q: Can I make this cheesecake ahead of time?
A: Absolutely! In fact, cheesecake is best when made ahead of time, as it allows the flavors to meld and the texture to set properly. You can prepare it up to 2 days in advance.
Q: How do I prevent the crust from getting soggy?
A: To prevent a soggy crust, make sure to press it firmly into the pan and bake it for a few minutes before adding the filling. This will help to crisp it up and create a barrier against moisture.
Q: Can I freeze this cheesecake?
A: Yes, you can freeze cheesecake for up to 2 months. Wrap it tightly in plastic wrap and then foil to prevent freezer burn. Thaw it in the refrigerator overnight before serving.
Final Thoughts
Indulge in the timeless elegance of this Deluxe Cheesecake and let its rich, creamy texture transport you to a world of pure dessert bliss. Whether you’re celebrating a special occasion or simply treating yourself to a well-deserved indulgence, this recipe is sure to impress. Don’t hesitate to experiment with different toppings and variations to make it your own signature creation. Share your culinary masterpiece with friends and family, and prepare for rave reviews. After all, a slice of heavenly cheesecake is best enjoyed in good company!