
Deluxe Sourdough Bread: An Artisan’s Approach
The scent of sourdough, that distinctive tang mingling with the warm aroma of baking bread, instantly transports me back to my grandmother’s kitchen. I can still picture her, sleeves rolled up, deftly kneading a mass of dough on her well-worn wooden table, a quiet hum of contentment filling the air. The simplicity of the ingredients, flour, water, salt, and a living culture, transformed into something so profoundly satisfying. That’s the magic of sourdough, and this recipe is my attempt to capture some of that old-world magic, combined with a few modern touches for a truly deluxe loaf.
Recipe Overview
- Prep Time: 60 minutes (plus overnight proofing)
- Cook Time: 35-45 minutes
- Total Time: 37 hours
- Servings: 24
- Yield: 2 loaves
- Dietary Type: Vegetarian
Ingredients
- 1 1/4 cups sourdough starter, proofed*
- 1 cup water
- 3 tablespoons powdered milk
- 1 tablespoon lemon juice
- 1/4 cup instant potato flakes
- 3 3/4 cups bread flour
- 1/4 cup white whole wheat flour
- 2 tablespoons sugar
- 3 tablespoons butter, softened
- 2 teaspoons salt
*To make proofed starter, see instructions below.
Equipment Needed
- Large mixing bowl
- Measuring cups and spoons
- Dough scraper
- Bread machine (optional)
- Baking stone (optional)
- Parchment paper
- Plastic wrap
- Wire rack
- Shallow pan
Instructions
- Proof the Starter: Begin by proofing your sourdough starter. Take 2 tablespoons of your established starter and stir it into 1 cup of water. Then, stir in 1 cup of flour. Cover the mixture and let it sit at room temperature overnight, or for 8 to 14 hours. Once proofed, measure out 1 1/4 cups of the starter needed for the recipe, and return the rest to your starter jar.
- Combine Wet Ingredients: In a large mixing bowl, combine the proofed sourdough starter, water, powdered milk, lemon juice, and instant potato flakes. Mix well to ensure the potato flakes are fully dissolved.
- Incorporate Flour: Gradually add the bread flour and white whole wheat flour to the wet ingredients. Mix until just combined, forming a shaggy mass. Avoid over-mixing at this stage.
- Autolyse: Cover the bowl and let the dough rest for 30 minutes. This process, called autolysing, allows the flour to fully hydrate, resulting in a more extensible and flavorful dough.
- Add Remaining Ingredients: After the autolyse, add the sugar, softened butter, and salt to the dough.
- Knead the Dough: Knead the dough until it becomes smooth and satiny. This can be done by hand on a lightly floured surface, or in a stand mixer with a dough hook. The dough should be elastic and slightly tacky, but not sticky.
- Bread Machine Option: If you prefer to use a bread machine, combine all the ingredients according to the manufacturer’s instructions. However, remove the dough from the machine about 10 minutes before the final kneading cycle is complete. This helps prevent over-processing, which can result in a slack and wet dough.
- First Rise: Cover the dough and let it rest for 45 minutes at room temperature.
- Divide and Shape: Divide the dough into two equal portions. Gently pat each portion into a large, flat circle. Stretch and fold the left side of the circle over the middle, then fold the right side over the middle, like folding a letter. Pat the dough down with the palms of your hands, and repeat the folding process with the remaining two unfolded ends.
- Shape the Loaves: Shape each portion into a loaf, keeping the folded side as the bottom. I prefer free-form oval loaves, which I place on parchment paper.
- Cold Fermentation (Overnight): Lightly spray the loaves with cooking spray (such as Pam) and cover them loosely with plastic wrap. Place the loaves in the refrigerator overnight for a slow, cold fermentation. This develops a deeper, more complex flavor in the bread.
- Second Rise (Room Temperature): The next day, take the loaves out of the refrigerator and let them finish rising at room temperature. They should become very light and airy. The rising time will vary depending on the temperature of your kitchen, so be patient and do not rush this step, or your bread will be dense. This could take anywhere from 2-4 hours.
- Alternative Refrigeration: If you prefer, you can refrigerate the dough immediately after kneading and folding it, and then complete the shaping and rising steps the next day.
- Preheat Oven: Preheat your oven to 400°F (200°C) with a baking stone inside (if using) for at least 30 minutes prior to baking. The baking stone helps to create a crispy crust. I also place a shallow pan of hot water on the bottom rack of the oven to create steam, which further enhances the crust.
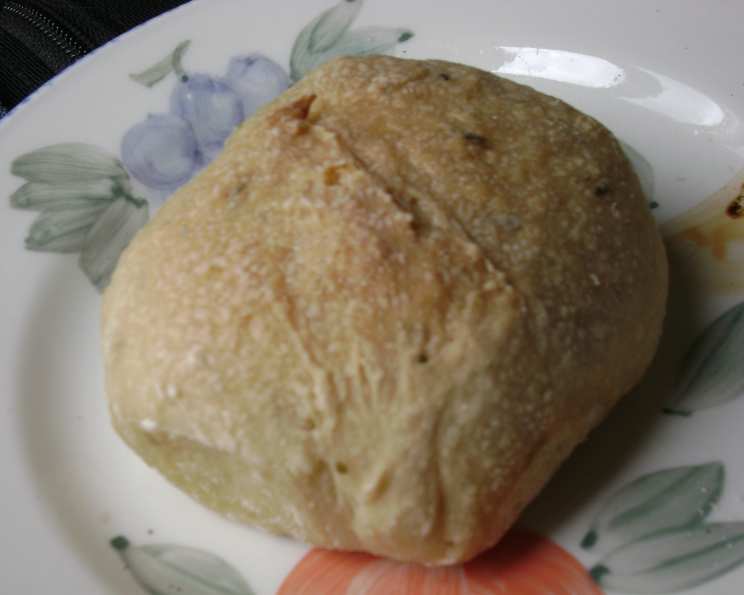
- Score the Loaves: When the loaves are fully risen, use a sharp knife or lame to slash the top of each loaf. This allows the bread to expand properly during baking and creates an attractive appearance.
- Bake the Bread: Carefully slide the loaves (on the parchment paper) onto the hot baking stone or a baking sheet.
- Adjust Temperature: After 10 minutes, reduce the oven temperature to 375°F (190°C).
- Remove Steam: When the loaves start to show color, carefully remove the pan of hot water from the oven.
- Continue Baking: Continue baking the loaves until they are a nice golden brown and sound hollow when tapped on the bottom. The baking time will vary depending on the shape and size of the loaves, but it typically takes between 25 and 35 minutes.
- Cool and Finish: Transfer the baked loaves to a wire rack to cool completely. If you prefer a softer crust, you can brush the crust with melted butter while the bread is still hot.
Expert Tips & Tricks
- Starter Health: A healthy, active sourdough starter is crucial for successful sourdough bread. Make sure your starter is doubling in size within a few hours of feeding before using it in this recipe.
- Hydration Levels: Sourdough recipes can be tricky due to varying flour hydration levels. If your dough seems too dry, add a tablespoon of water at a time until it reaches the desired consistency. Conversely, if it’s too wet, add a tablespoon of flour.
- Scoring: Scoring the loaves properly is important for controlling the oven spring (the final rise in the oven). Experiment with different scoring patterns to achieve different results.
- Oven Temperature: Every oven is different, so you may need to adjust the baking time and temperature slightly to achieve the perfect loaf. A good way to monitor the internal temperature is with a thermometer. You’re looking for around 205-210°F (96-99°C).
Serving & Storage Suggestions
This deluxe sourdough bread is delicious served warm with butter, jam, or olive oil. It also makes excellent sandwiches or toast.
- Storage: Store the bread at room temperature in a bread box or loosely wrapped in plastic wrap. It will stay fresh for 2-3 days.
- Freezing: For longer storage, slice the bread and freeze it in a freezer bag. Frozen bread can be thawed at room temperature or toasted directly from frozen.
Nutritional Information
| Nutrient | Amount per Serving | % Daily Value |
|---|---|---|
| Calories | 99.5 kcal | – |
| Calories from Fat | – | 17% |
| Total Fat | 1.9g | 2% |
| Saturated Fat | 1.1g | 5% |
| Cholesterol | 4.8mg | 1% |
| Sodium | 211.6mg | 8% |
| Total Carbohydrate | 17.8g | 5% |
| Dietary Fiber | 0.7g | 2% |
| Sugars | 1.5g | 6% |
| Protein | 2.5g | 5% |
Variations & Substitutions
- Whole Wheat Sourdough: Substitute up to 50% of the bread flour with whole wheat flour for a nuttier flavor and denser texture.
- Rye Sourdough: Add 1/4 cup of rye flour to the dough for a more complex and tangy flavor.
- Herb Sourdough: Incorporate 1-2 tablespoons of chopped fresh herbs, such as rosemary, thyme, or oregano, into the dough during the kneading process.
- Cheese Sourdough: Add 1 cup of grated cheese, such as cheddar, parmesan, or Gruyere, to the dough during the kneading process.
FAQs (Frequently Asked Questions)
Q: Why do I need to proof my starter?
A: Proofing the starter ensures it’s active and strong enough to leaven the bread. A well-proofed starter will double in size and have a bubbly appearance.
Q: Can I skip the overnight refrigeration?
A: While you can, the cold fermentation in the refrigerator develops a more complex flavor and improves the texture of the bread.
Q: Why is my sourdough bread dense?
A: Several factors can cause dense bread, including an inactive starter, insufficient kneading, or not allowing the dough to rise fully.
Q: What if I don’t have a baking stone?
A: You can still bake the bread on a regular baking sheet. The crust may not be quite as crispy, but the bread will still be delicious.
Q: How do I know when my sourdough bread is done?
A: The bread should be golden brown and sound hollow when tapped on the bottom. The internal temperature should be around 205-210°F (96-99°C).
Final Thoughts
This deluxe sourdough bread recipe is a labor of love, but the result is well worth the effort. The combination of simple ingredients and careful techniques creates a loaf that is both flavorful and satisfying. Don’t be afraid to experiment with different variations and substitutions to create your own signature sourdough bread. I encourage you to try this recipe, and I’d love to hear about your experience and any creative twists you add. Pair this beautiful loaf with a simple bowl of soup or a hearty charcuterie board for a truly memorable meal. Happy baking!