
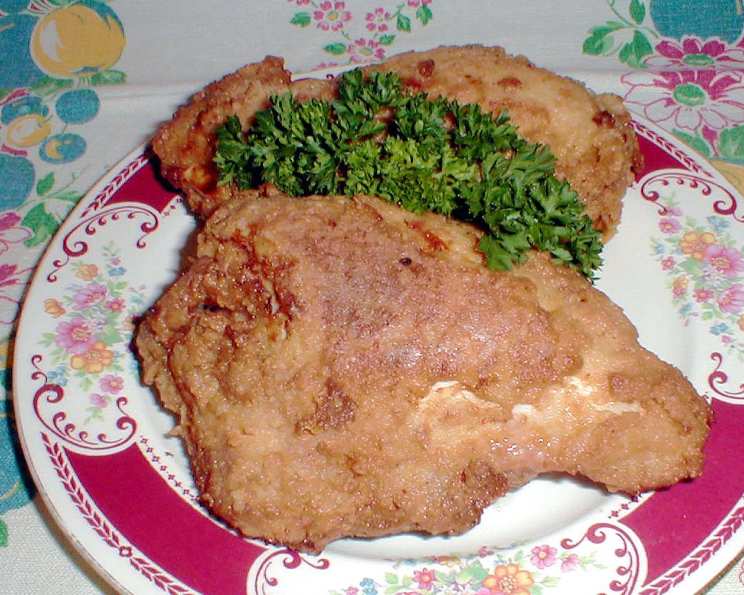
Deviled Fried Chicken: A Fiery Take on a Classic
I still remember the first time I tasted this chicken. It was at a family reunion, a chaotic symphony of laughter, kids running wild, and the comforting aroma of home cooking. My Aunt Clara, the undisputed queen of our family’s kitchen, presented a platter piled high with golden-brown, crispy chicken that had everyone buzzing. One bite and I was hooked. It wasn’t just fried chicken; it was an experience – a fiery, savory, utterly addictive experience that has remained a cherished culinary memory ever since. This recipe brings that memory back to life every single time.
Recipe Overview
- Prep Time: 24 hours 15 minutes
- Cook Time: 20 minutes
- Total Time: 24 hours 35 minutes
- Servings: 4
- Dietary Type: Varies (see Variations)
Ingredients
- 2 cups buttermilk
- 1/4 cup Dijon mustard
- 2 tablespoons onion powder with green onion and parsley
- 5 teaspoons salt
- 4 teaspoons dry mustard
- 4 teaspoons cayenne pepper
- 2 1/2 teaspoons ground black pepper
- 1 (3 1/4 lb) fryer chicken, backbone removed and chicken cut into 8 pieces with skin removed (except wings)
- 3 cups all-purpose flour
- 1 tablespoon baking powder
- 1 tablespoon garlic powder
- 5 cups peanut oil (for frying)
Equipment Needed
- 1-gallon resealable plastic bag
- 13 x 9 x 2-inch glass dish
- Deep 10- to 11-inch-diameter pot
- Deep-fry thermometer
- Large rack
- Baking sheet
- Wooden spoons
Instructions
-
Prepare the Marinade: In a 1-gallon resealable plastic bag, combine the buttermilk, Dijon mustard, 1 tablespoon of the onion powder, 1 teaspoon of the salt, 1 teaspoon of the dry mustard, 1 teaspoon of the cayenne pepper, and 1 teaspoon of the black pepper.
-
Marinate the Chicken: Add the chicken pieces to the bag. Seal the bag, pressing out as much air as possible. Turn the bag to ensure the chicken is evenly coated in the marinade.
-
Refrigerate: Refrigerate the bag for at least 1 day and up to 2 days, turning the bag occasionally to redistribute the marinade.
-
Prepare the Dredge: In a 13 x 9 x 2-inch glass dish, whisk together the flour, baking powder, garlic powder, the remaining 1 tablespoon of onion powder, 4 teaspoons of salt, 3 teaspoons of dry mustard, 3 teaspoons of cayenne pepper, and 1 1/2 teaspoons of black pepper. This is your flavorful coating for the chicken.
-
Dredge the Chicken: With the marinade still clinging to the chicken pieces (do not shake off excess), transfer the chicken to the flour mixture. Turn to coat the chicken thickly on all sides.
-
Let the Coating Set: Let the chicken stand in the flour mixture for 1 hour, turning the chicken occasionally to recoat it with the flour mixture. This crucial step allows the flour to adhere properly, resulting in a crispier crust.
-
Heat the Oil: Pour the peanut oil to a depth of 1 1/4 inches into a deep 10- to 11-inch-diameter pot. Attach a deep-fry thermometer to the side of the pot. Heat the oil over medium-high heat to 350°F.
-
Fry the First Batch: Carefully add 4 pieces of chicken, skinned side down, to the hot oil. Reduce the heat to medium-low and fry for 5 minutes, adjusting the heat as needed to maintain the oil temperature between 280°F and 300°F (the oil should bubble constantly around the chicken).
-
Turn and Fry: Using wooden spoons, turn the chicken over. Fry for 7 minutes.
-
Final Fry: Turn the chicken over again. Fry until the chicken is deep golden brown and cooked through, about 3 minutes longer. The internal temperature of the chicken should reach 165°F.
-
Drain: Using the same spoons, transfer the chicken to a large rack set on a baking sheet to drain excess oil.
-
Fry the Second Batch: Reheat the oil to 350°F. Repeat the frying process with the remaining 4 pieces of chicken.
-
Serve: Serve the chicken warm or at room temperature within 2 hours. Alternatively, chill it for up to 1 day and serve it cold.
Expert Tips & Tricks
- Spice Level: Adjust the amount of cayenne pepper to suit your preferred level of heat. If you’re spice-averse, start with half the amount and taste before adding more.
- Don’t Overcrowd: Frying too many pieces of chicken at once will lower the oil temperature, resulting in soggy chicken. Fry in batches to maintain the ideal temperature.
- Temperature is Key: Using a deep-fry thermometer is essential for achieving perfectly cooked chicken. Maintaining the correct oil temperature ensures the chicken cooks evenly and develops a crispy crust.
- Double Dredge: For an extra crispy crust, dredge the chicken a second time in the flour mixture before frying.
Serving & Storage Suggestions
This deviled fried chicken is fantastic served on its own, alongside classic sides like coleslaw, mashed potatoes, or cornbread. For a fun twist, try serving it with a cooling cucumber salad or a spicy mango salsa to balance the heat.
Leftovers can be stored in an airtight container in the refrigerator for up to 3 days. To reheat, bake the chicken in a preheated oven at 350°F until warmed through and crispy, about 15-20 minutes. You can also reheat it in an air fryer for a similar result. Microwaving is not recommended, as it can make the crust soggy. While best served fresh, it also tastes great served cold straight from the fridge.
Nutritional Information
| Nutrient | Amount per Serving | % Daily Value |
|---|---|---|
| Calories | 925 kcal | 46% |
| Total Fat | 63 g | 97% |
| Saturated Fat | 15 g | 75% |
| Cholesterol | 82 mg | 27% |
| Sodium | 948 mg | 40% |
| Total Carbohydrate | 21 g | 7% |
| Dietary Fiber | 1 g | 4% |
| Sugars | 1.6 g | N/A |
| Protein | 29 g | 58% |
Nutritional information is an estimate and may vary based on specific ingredients and cooking methods.
Variations & Substitutions
- Gluten-Free: Substitute the all-purpose flour with a gluten-free blend for a gluten-free version. Ensure the blend contains xanthan gum or another binder for the best texture.
- Dairy-Free: Replace the buttermilk with a mixture of plant-based milk (such as almond or soy milk) and 1 tablespoon of lemon juice or vinegar per cup. Let it sit for 5 minutes to curdle before using.
- Lower Fat: While this is fried chicken, using an air fryer after frying will help remove a considerable amount of the absorbed oil.
- Spice it Up: Add a pinch of smoked paprika or some chipotle powder to the flour mixture for a smokier, deeper flavor.
FAQs (Frequently Asked Questions)
Q: Can I use chicken breasts instead of the whole chicken pieces?
A: Yes, you can use boneless, skinless chicken breasts. Adjust the cooking time accordingly, as they will cook faster than bone-in pieces. Ensure the internal temperature reaches 165°F.
Q: What if I don’t have peanut oil?
A: You can use other high-heat oils with a neutral flavor, such as canola oil, vegetable oil, or grapeseed oil.
Q: How do I know when the chicken is cooked through?
A: The best way is to use a meat thermometer. Insert it into the thickest part of the chicken, away from the bone. It should read 165°F. The juices should also run clear when pierced with a fork.
Q: Can I prepare the flour mixture ahead of time?
A: Yes, you can whisk together the flour, spices, and baking powder and store it in an airtight container at room temperature for up to a week.
Q: Why is it important to let the chicken stand in the flour mixture for an hour?
A: This allows the flour to absorb moisture from the chicken and adhere properly. This helps to create a thicker, crispier crust that won’t fall off during frying.
Final Thoughts
This Deviled Fried Chicken is more than just a meal; it’s a celebration of flavor, a testament to the power of simple ingredients transformed by careful preparation. Don’t be intimidated by the slightly longer prep time – the results are well worth the effort. Gather your ingredients, embrace the process, and prepare to be transported to fried chicken heaven. I encourage you to try this recipe and share your feedback. Serve it with your favorite sides and a cold glass of sweet tea for the ultimate Southern comfort food experience.