
Dhal Puri: A Taste of the Caribbean Sun
The first time I tasted dhal puri, I was a world away from any fancy restaurant, standing instead on a bustling street corner in Trinidad. The air was thick with the scent of spices and the sounds of vendors calling out their wares. A woman with a warm smile handed me a flatbread, its surface slightly blistered and golden brown. As I bit into it, the soft, savory filling of spiced split peas enveloped my senses. It was a simple yet profound experience, a taste of sunshine and the soul of the Caribbean that I’ve been chasing ever since.
Recipe Overview
- Prep Time: 1 hour
- Cook Time: 40 minutes
- Total Time: 1 hour 40 minutes
- Yields: 15 flat breads
- Dietary Type: Vegetarian
Ingredients
For the Dough:
- 4 cups self-rising flour
- 1 cup whole wheat flour
- 1 1/2 cups cold water
- 2 tablespoons oil, plus extra for frying
- Salt to taste
For the Filling:
- 1 1/2 cups yellow split peas
- 1 tablespoon ground cumin
- 2 garlic cloves, crushed
Equipment Needed
- Large bowl
- Large pan
- Tray
- Mortar and pestle or food processor
- Rolling pin
- Rolling board
- Frying pan
Instructions
-
Begin by preparing the dough. In a large bowl, sift together the self-rising flour, whole wheat flour, and a pinch of salt. This helps to aerate the flour and ensures a lighter, more tender flatbread.
-
Gradually add the cold water, a little at a time, to the dry ingredients. Knead gently until a soft dough forms. Avoid adding all the water at once; you may need slightly more or less depending on the humidity.
-
Continue kneading the dough until it becomes supple. It’s important to achieve a good balance – the dough should be pliable but not overworked. Over-kneading can result in a tough flatbread.
-
Add the oil to the dough and knead it in thoroughly until the dough is completely smooth and elastic. This step adds richness and helps create a beautifully textured dhal puri.
-
Place the dough in a plastic bag or wrap it tightly in clear film. This prevents the dough from drying out and allows it to relax, making it easier to roll out later.
-
Place the wrapped dough in a cool room or in the refrigerator and let it rest for at least 30 minutes, or preferably overnight. The longer the dough rests, the more relaxed the gluten becomes, resulting in a more tender final product. Overnight resting is ideal for optimal flavor and texture.
-
While the dough is resting, prepare the filling. Place the split peas in a large pan and pour over enough water to cover them generously.
-
Cook the split peas for about 10-15 minutes, until they are half-cooked. They should be tender on the outside but still firm in the middle. This partial cooking ensures that the filling won’t be mushy in the final product.
-
Allow the water to evaporate during cooking, until the pan is almost dry. Keep a close eye on the peas and add a little extra water if necessary to prevent burning. Nobody wants burnt peas!
-
Spread the cooked split peas out on a tray to cool completely. This step is crucial, as grinding warm peas can create a gummy texture.
-
Once the peas are cool, grind them to a paste using a mortar and pestle or a food processor. A food processor will be quicker, but a mortar and pestle provides a more rustic texture.
-
Mix the ground split peas with the ground cumin and crushed garlic. These spices add depth and warmth to the filling, creating that signature dhal puri flavor.
-
Divide the dough into about 15 balls. This will yield approximately 15 flatbreads.
-
Slightly flatten each ball, then place about 1 tablespoon of the split pea mixture into the center. Be careful not to overfill, or the dhal puri will be difficult to seal and roll out.
-
Fold the edges of the dough over the filling to enclose it completely, creating a sealed ball. Ensure there are no gaps, or the filling may escape during cooking.
-
Dust a rolling pin and rolling board generously with flour. This prevents the dough from sticking and makes it easier to roll out.
-
Gently roll out each dhal puri, taking care not to overstretch the dough, until they are about 7 inches in diameter. Roll from the center outwards, applying even pressure.
-
Heat a little oil in a frying pan over medium heat. You don’t need a lot of oil – just enough to lightly coat the pan.
-
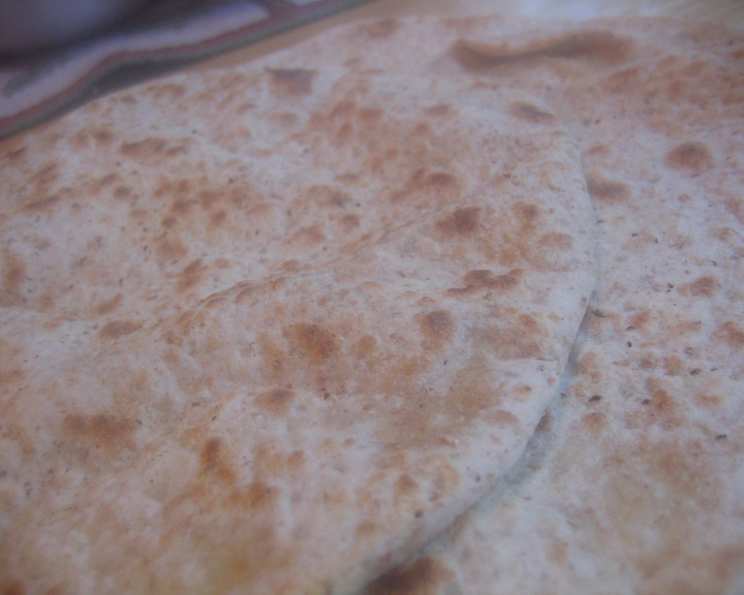
Cook each dhal puri for about 3 minutes on each side, until they are light brown and slightly blistered. The exact cooking time may vary depending on your stove and pan.
-
Serve the dhal puri immediately as soon as the last one is cooked. They are best enjoyed fresh and warm.
Expert Tips & Tricks
- For a richer flavor, try adding a pinch of turmeric to the split pea mixture.
- If the dough is too sticky, add a little more flour, a tablespoon at a time, until it becomes manageable.
- To prevent the dhal puri from puffing up too much while cooking, prick the surface with a fork before placing it in the pan.
- If you don’t have self-rising flour, you can make your own by adding 1 1/2 teaspoons of baking powder and 1/2 teaspoon of salt per cup of all-purpose flour.
- If you want to make the dhal puri ahead of time, you can prepare the dough and filling in advance and store them separately in the refrigerator.
Serving & Storage Suggestions
Dhal puri is best served warm, straight from the pan. It can be enjoyed on its own as a snack or as part of a larger meal. Serve it alongside curries, stews, or simply with a dollop of chutney or yogurt.
Leftover dhal puri can be stored in an airtight container at room temperature for up to 2 days, or in the refrigerator for up to 4 days. To reheat, simply warm them in a dry frying pan or in a microwave until heated through. For longer storage, you can freeze the dhal puri. Wrap them individually in plastic wrap and then place them in a freezer bag. They can be frozen for up to 2 months. Reheat directly from frozen in a dry frying pan.
Nutritional Information
| Nutrient | Amount per Serving | % Daily Value |
|---|---|---|
| Calories | 230 kcal | 12% |
| Total Fat | 2.6g | 4% |
| Saturated Fat | 0.3g | 1% |
| Cholesterol | 0mg | 0% |
| Sodium | 428mg | 17% |
| Total Carbohydrate | 42.8g | 14% |
| Dietary Fiber | 7g | 27% |
| Sugars | 1.7g | 6% |
| Protein | 9.3g | 18% |
Note: Nutritional information is an estimate and may vary based on specific ingredients and preparation methods.
Variations & Substitutions
- For a spicier filling, add some chopped scotch bonnet pepper or a pinch of cayenne pepper to the split pea mixture. Be careful with the scotch bonnet – it’s potent!
- For a gluten-free version, experiment with gluten-free flour blends, but be prepared to adjust the liquid content as gluten-free flours often absorb more moisture.
- You can also add other vegetables to the split pea filling, such as spinach, potatoes, or pumpkin.
FAQs (Frequently Asked Questions)
Q: Can I use pre-cooked split peas to save time?
A: While you could, freshly cooked split peas will give you the best texture and flavor for the filling. Pre-cooked peas might be too soft and result in a mushy filling.
Q: Why is my dough tough?
A: Over-kneading the dough or not allowing it to rest long enough can result in a tough flatbread. Be gentle with the dough and give it ample time to relax.
Q: How do I prevent the filling from leaking out while cooking?
A: Ensure that the dough is properly sealed around the filling and that there are no gaps. Also, be gentle when rolling out the dhal puri to avoid tearing the dough.
Q: Can I bake the dhal puri instead of frying them?
A: While traditionally fried, you can bake them for a healthier option. Preheat your oven to 375°F (190°C), brush the dhal puri with oil, and bake for about 10-12 minutes, or until golden brown.
Q: What’s the best way to reheat dhal puri?
A: The best way to reheat dhal puri is in a dry frying pan over medium heat. This will help to crisp them up and prevent them from becoming soggy.
Final Thoughts
Dhal puri is more than just a flatbread; it’s a taste of culture, a burst of flavor, and a reminder of the warmth and hospitality of the Caribbean. I encourage you to try this recipe and experience the magic for yourself. Don’t be afraid to experiment with different spices and fillings to create your own unique twist. Share your creations and feedback – I’d love to hear about your dhal puri adventures! Enjoy with a glass of sorrel or a spicy mango chutney for the perfect Caribbean experience.