
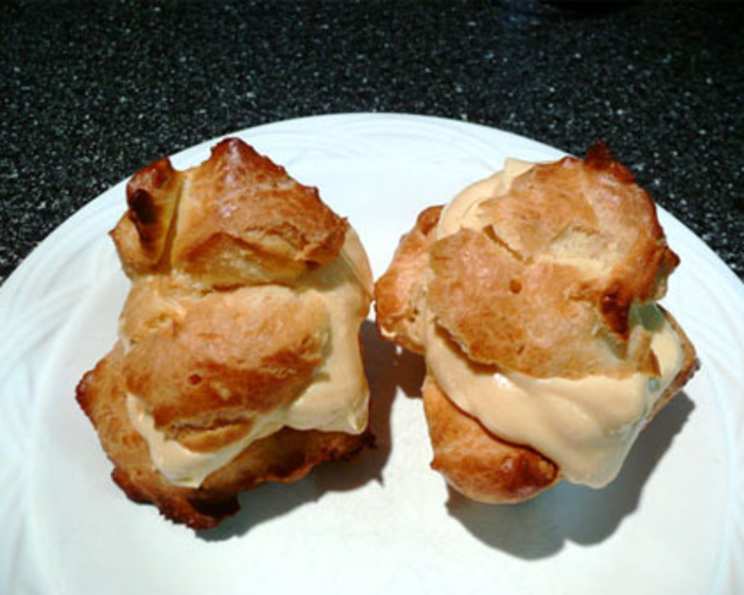
Diabetic Mini Cream Puffs: A Guilt-Free Indulgence
My grandmother, bless her heart, had the sweetest tooth imaginable. Diagnosed with diabetes later in life, she thought her days of delightful desserts were over. That is, until my mother, ever resourceful, started experimenting with sugar-free alternatives. I remember the sheer joy on my grandmother’s face when she first tasted a mini cream puff – light, airy, and wonderfully creamy, without the blood sugar spike. These little puffs became a staple in her kitchen, a testament to the fact that dietary restrictions shouldn’t mean sacrificing life’s little pleasures.
Recipe Overview
- Prep Time: 20 minutes
- Cook Time: 30 minutes
- Total Time: 50 minutes
- Servings: 8
- Yields: 24 cream puffs
- Dietary Type: Diabetic-Friendly
Ingredients
- ½ cup water
- ⅛ teaspoon salt
- ¼ cup margarine
- ½ cup all-purpose flour, plus 2 tablespoons all-purpose flour
- 2 large eggs, at room temperature
- 8 ounces Cool Whip
- 1 (3 ½ ounce) package sugar-free pudding mix, prepared per directions
Equipment Needed
- Baking sheet
- Non-stick cooking spray (like Pam)
- Mixing bowls
- Electric mixer (optional)
- Spatula
- Measuring cups and spoons
- Toothpick
- Sharp knife
Instructions
-
Begin by preheating your oven to 400°F (200°C). Lightly spray a baking sheet with non-stick cooking spray, such as Pam, to prevent the cream puffs from sticking.
-
In a saucepan, combine the ½ cup water and ⅛ teaspoon salt. Bring the mixture to a rolling boil over medium-high heat.
-
Once boiling, add the ¼ cup margarine to the saucepan. Stir continuously until the margarine is completely melted and fully incorporated into the water.
-
Remove the saucepan from the heat. Immediately add the ½ cup all-purpose flour, all at once, to the melted margarine mixture.
-
Using a wooden spoon or a sturdy spatula, vigorously stir the flour into the water and margarine mixture until it forms a smooth ball that pulls away from the sides of the pan. This step is crucial for developing the right texture for the puffs.
-
Return the pan to low heat and continue to cook and stir the mixture for another minute. This helps to dry out the dough slightly, which is essential for a light and airy final product. Remove from heat and let stand for 5 minutes to cool slightly.
-
After the dough has cooled slightly, it’s time to incorporate the eggs. Add the 2 large eggs, one at a time, to the dough mixture.
-
This is the most important part. For best results, using a spoon, beat each egg thoroughly into the dough before adding the next. Ensure that each egg is fully incorporated until the dough is smooth and shiny. It will appear slightly curdled at first, but continue stirring, and it will come together. It is essential that the eggs are at room temperature to help them incorporate properly.
-
Now it is time to put them on the baking sheet. Using a teaspoon or small spoon, drop the dough onto the prepared baking sheet, forming approximately 24 small mounds. Leave some space between each mound to allow for expansion during baking.
-
Place the baking sheet in the preheated oven and bake for 20 minutes, or until the cream puffs are golden brown and puffed up. Avoid opening the oven door during this time, as it can cause the puffs to deflate.
-
Once the cream puffs are golden brown, turn off the oven and prick each puff on the side with a toothpick. This allows steam to escape and prevents them from becoming soggy.
-
Return the baking sheet to the oven with the oven turned off, and let the cream puffs stand for an additional 10 minutes. This helps to further dry them out and ensures they hold their shape.
-
Remove the baking sheet from the oven and transfer the cream puffs to a wire rack to cool completely.
-
While the cream puffs are cooling, prepare the sugar-free pudding according to the package directions. This will serve as the base for your delicious filling.
-
Once the pudding is prepared, gently fold in the 8 ounces of Cool Whip until the mixture is light and airy. Be careful not to overmix, as this can cause the Cool Whip to deflate.
-
Once the cream puffs have cooled completely, use a sharp knife to carefully remove the tops of each puff, creating a small cavity for the filling.
-
Fill each puff with the pudding and Cool Whip mixture. Be generous with the filling, but avoid overfilling them so that they don’t become messy to eat.
-
Replace the tops of the puffs and serve immediately.
Expert Tips & Tricks
- Egg Incorporation: The key to a perfect cream puff is proper egg incorporation. Don’t rush this step! Ensure each egg is fully mixed in before adding the next. A stand mixer can be helpful, but isn’t necessary.
- Oven Temperature: Ovens can vary. If your puffs are browning too quickly, lower the temperature slightly. If they aren’t browning enough, increase it slightly.
- Crispy Puffs: For extra crispy puffs, you can bake them for a few extra minutes after turning off the oven.
- Make-Ahead: The puff shells can be made a day in advance and stored in an airtight container at room temperature. Fill them just before serving to prevent them from becoming soggy.
Serving & Storage Suggestions
Serve these delightful mini cream puffs chilled. They are perfect for afternoon tea, a light dessert after dinner, or as a treat for any special occasion.
Store leftover cream puffs in an airtight container in the refrigerator. They are best consumed within 2-3 days, as the filling can soften the puffs over time. You can freeze unfilled puff shells for longer storage; simply thaw them at room temperature before filling.
Nutritional Information
(Note: Nutritional information is an estimate and may vary based on specific ingredients and preparation methods.)
| Nutrient | Amount per Serving (3 puffs) | % Daily Value* |
|---|---|---|
| Calories | 194.5 kcal | N/A |
| Total Fat | 14.2 g | 21% |
| Saturated Fat | 7.6 g | 37% |
| Cholesterol | 52.9 mg | 17% |
| Sodium | 127.9 mg | 5% |
| Total Carbohydrate | 14.1 g | 4% |
| Dietary Fiber | 0.3 g | 1% |
| Sugars | 6.7 g | N/A |
| Protein | 3 g | 5% |
*Percent Daily Values are based on a 2,000 calorie diet.
Variations & Substitutions
- Gluten-Free: Substitute the all-purpose flour with a gluten-free blend for a gluten-free option. Ensure the blend contains xanthan gum or a similar binder for the best texture.
- Dairy-Free: Use a dairy-free margarine alternative and a dairy-free whipped topping in place of Cool Whip.
- Flavor Variations: Experiment with different flavors of sugar-free pudding. Vanilla, chocolate, butterscotch, or pistachio would all be delicious. You can also add a dash of extract (vanilla, almond, lemon) to the pudding mixture for an extra burst of flavor.
- Toppings: Lightly dust the finished cream puffs with powdered erythritol or cocoa powder for an elegant touch.
FAQs (Frequently Asked Questions)
Q: Why are my cream puffs flat and not puffy?
A: This is often due to not incorporating the eggs properly or opening the oven door during baking. Ensure each egg is fully mixed in before adding the next, and resist the urge to peek!
Q: Can I use a different type of flour?
A: All-purpose flour works best for this recipe. Other flours may not provide the same structure.
Q: How do I know when the puffs are done?
A: The puffs should be golden brown and sound hollow when tapped. They should also be firm to the touch.
Q: Can I make these ahead of time?
A: Yes, the puff shells can be made a day ahead. Store them in an airtight container at room temperature and fill them just before serving.
Q: What if I don’t have Cool Whip?
A: While Cool Whip provides a specific texture, you can substitute it with a similar amount of sugar-free whipped cream or a dairy-free alternative.
Final Thoughts
These diabetic mini cream puffs are a testament to the fact that enjoying life’s sweet moments doesn’t have to come at the expense of your health. With a few simple substitutions, you can create a delightful treat that satisfies your cravings without causing a blood sugar spike. So, gather your ingredients, preheat your oven, and embark on this culinary adventure. I encourage you to try this recipe and share your feedback. Maybe pair these with a nice cup of unsweetened coffee or tea for the perfect guilt-free indulgence. Happy baking!