
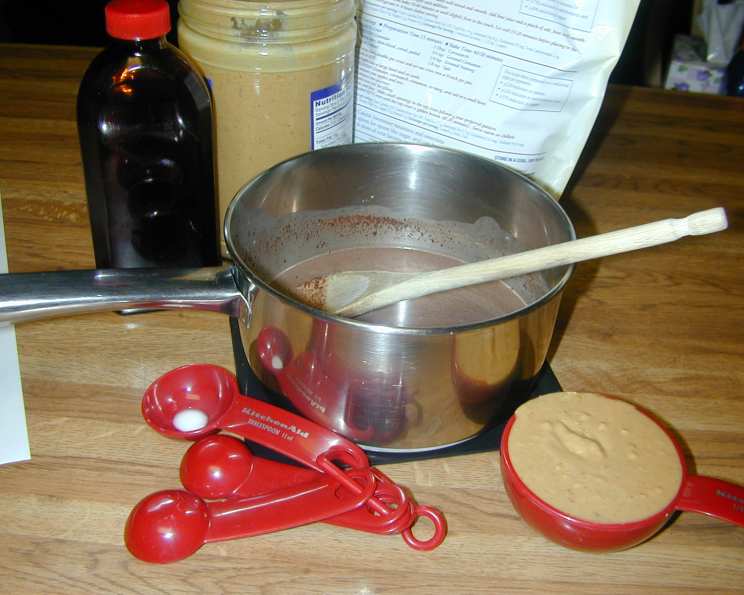
Guilt-Free Delight: Diabetic Peanut Butter Fudge
I remember my grandfather, a man with an insatiable sweet tooth and a recent diabetes diagnosis. Holidays were always bittersweet; he yearned for the rich, decadent desserts that everyone else indulged in, but knew he couldn’t. The look of disappointment on his face inspired me to learn how to create treats that didn’t sacrifice flavor, and this diabetic peanut butter fudge is a direct result of that mission. With its creamy texture, intense peanut butter flavor, and satisfying sweetness, it’s a treat that brings a smile to your face—without the guilt. It’s a reminder that dietary restrictions don’t have to mean deprivation, and that deliciousness can be enjoyed by everyone.
Recipe Overview
- Prep Time: 5 minutes
- Cook Time: 5 minutes
- Total Time: 10 minutes
- Servings: 16
- Yield: About 1 pound
- Dietary Type: Diabetic-Friendly, Gluten-Free
Ingredients
- 2 ounces unsweetened chocolate
- 10 tablespoons half-and-half
- 1/2 cup peanut butter
- 1/2 teaspoon vanilla
- 16 teaspoons artificial sweetener
- 1/2 cup unsalted peanuts
Equipment Needed
- Heavy saucepan
- Greased plate or small baking dish
Instructions
-
In a heavy saucepan, combine the unsweetened chocolate and half-and-half. Place over low heat and melt the chocolate, stirring constantly to prevent burning. It’s crucial to use a heavy saucepan to distribute heat evenly and prevent scorching.
-
Once the chocolate is completely melted and smooth, stir in the peanut butter. Continue to stir until the peanut butter is fully incorporated and the mixture is creamy and homogenous. This might take a minute or two.
-
Remove the saucepan from the heat. At this stage, it’s vital to prevent further cooking and maintain the desired consistency.
-
Add the vanilla and artificial sweetener. Stir vigorously until the sweetener is completely dissolved and evenly distributed throughout the mixture. Be sure to taste test and adjust the amount of sweetener as needed, depending on your preferred level of sweetness and the type of artificial sweetener used.
-
Fold the unsalted peanuts into the fudge mixture. Ensure they are evenly distributed to provide a delightful crunch in every bite. Lightly toasting the peanuts before adding them can enhance their flavor and texture.
-
Spread the fudge mixture onto a greased plate or small baking dish. Use a spatula to create an even layer. The greasing is essential for easy removal of the fudge after chilling.
-
Chill in the refrigerator until firm, which typically takes at least 2 hours. For faster setting, you can briefly place it in the freezer for about 30-45 minutes, but be careful not to freeze it completely.
-
Once firm, cut the fudge into bite-sized pieces. The number of pieces will depend on the size of your plate or dish.
Expert Tips & Tricks
-
Choosing the Right Chocolate: Opt for high-quality unsweetened chocolate for the best flavor. The quality of the chocolate significantly impacts the overall taste of the fudge.
-
Sweetener Considerations: Different artificial sweeteners have varying levels of sweetness. Start with the recommended amount and adjust to taste. Powdered sweeteners tend to dissolve more easily than granulated ones.
-
Peanut Butter Perfection: Use a creamy peanut butter for a smoother fudge, or a chunky peanut butter for added texture. Natural peanut butter (without added sugar or salt) is often a healthier choice. Ensure the peanut butter is well-stirred before adding it to the mixture, as the oil can separate.
-
Toasting the Peanuts: Lightly toasting the peanuts before adding them to the fudge enhances their flavor and adds a delightful crunch. Toast them in a dry pan over medium heat for a few minutes, or in the oven at 350°F (175°C) for about 5-7 minutes, watching closely to prevent burning.
-
Achieving the Perfect Consistency: The key to a good fudge is the right consistency. If the mixture seems too thin, add a tablespoon of unsweetened cocoa powder to help thicken it. If it’s too thick, add a teaspoon or two more of half-and-half.
-
Preventing Graininess: Stir the mixture constantly while melting the chocolate and incorporating the sweetener to prevent a grainy texture. Also, avoid overheating the chocolate, as this can also lead to a grainy fudge.
-
Enhancing Flavor: A pinch of sea salt can enhance the sweetness and peanut butter flavor. Experiment with different extracts, such as almond extract or peppermint extract, for unique flavor variations.
Serving & Storage Suggestions
This diabetic peanut butter fudge is best served chilled. Arrange the cut pieces on a platter for an elegant presentation. It pairs wonderfully with a cup of unsweetened coffee or herbal tea.
To store, keep the fudge in an airtight container in the refrigerator. It will stay fresh for up to a week. For longer storage, you can freeze the fudge for up to 2 months. Thaw it in the refrigerator before serving. Note that freezing may slightly alter the texture.
Nutritional Information
| Nutrient | Amount per Serving | % Daily Value* |
|---|---|---|
| Calories | 105.4 kcal | – |
| Calories from Fat | 85 kcal | 81% |
| Total Fat | 9.5 g | 14% |
| Saturated Fat | 3.1 g | 15% |
| Cholesterol | 3.5 mg | 1% |
| Sodium | 42.2 mg | 1% |
| Total Carbohydrate | 4.1 g | 1% |
| Dietary Fiber | 1.3 g | 5% |
| Sugars | 0.8 g | – |
| Protein | 3.5 g | 6% |
*Percent Daily Values are based on a 2,000 calorie diet.
Variations & Substitutions
-
Nut-Free Option: Substitute the peanut butter with sunflower seed butter for a nut-free alternative.
-
Chocolate Variations: Experiment with different types of unsweetened chocolate, such as dark chocolate or white chocolate.
-
Spice It Up: Add a pinch of cayenne pepper or chili powder for a spicy kick.
-
Coffee Infusion: Add a teaspoon of instant coffee powder to the mixture for a mocha-flavored fudge.
-
Coconut Flakes: Fold in shredded coconut flakes for added texture and flavor.
-
Sugar-Free Chocolate Chips: Fold in sugar-free chocolate chips for extra chocolatey goodness.
FAQs (Frequently Asked Questions)
Q: Can I use regular sugar instead of artificial sweetener?
A: While you can, this recipe is designed to be diabetic-friendly, so using sugar will significantly increase the carbohydrate content. If you choose to use sugar, you’ll need to adjust the amount to achieve the desired sweetness.
Q: Can I use milk chocolate instead of unsweetened chocolate?
A: No, milk chocolate contains added sugar, which defeats the purpose of a diabetic-friendly recipe. Stick to unsweetened chocolate to control the sugar content.
Q: How do I prevent the fudge from being too hard?
A: Avoid overcooking the chocolate mixture. Also, be careful not to chill it for too long, as this can cause it to become too firm.
Q: Can I add other nuts besides peanuts?
A: Absolutely! Walnuts, almonds, or pecans would also be delicious additions. Make sure to chop them into small pieces before folding them into the fudge.
Q: What if I don’t have half-and-half?
A: You can use whole milk or heavy cream as a substitute, but the texture might be slightly different. Whole milk will result in a slightly less creamy fudge, while heavy cream will make it richer.
Final Thoughts
This diabetic peanut butter fudge is more than just a recipe; it’s an act of love and consideration for those who need to manage their sugar intake. It’s a testament to the fact that everyone deserves to enjoy a delicious treat, regardless of dietary restrictions. I encourage you to try this recipe and experience the joy of guilt-free indulgence. Feel free to experiment with variations and make it your own. Share your creations and feedback, and let’s spread the word that delicious and healthy can coexist beautifully. Enjoy!