
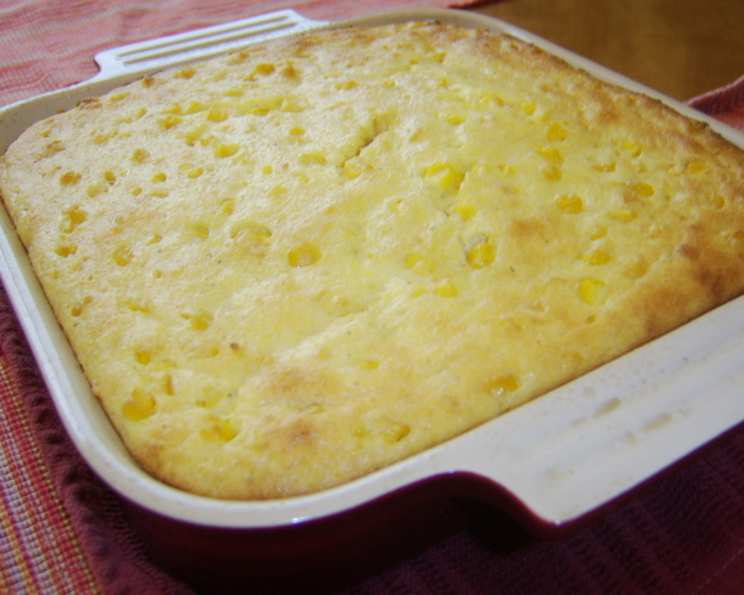
Different Than Everyone Else’s Scalloped Corn
The memory is painted in shades of autumn: crisp air, the scent of burning leaves, and my grandmother’s bustling kitchen. Thanksgiving was always a grand affair, and while the turkey and stuffing took center stage, it was her scalloped corn that held a special place in my heart. It wasn’t the usual sweet, creamy dish everyone else made. Hers had a subtle tang, a comforting richness, and a texture that was somehow both creamy and delightfully firm. It was, simply put, different – and absolutely perfect.
Recipe Overview
- Prep Time: 10 minutes
- Cook Time: 40-45 minutes
- Total Time: 50-55 minutes
- Servings: 6
- Yield: One 2-quart baking dish
- Dietary Type: Not specified (contains dairy)
Ingredients
- 16 1/4 ounces whole kernel corn
- 16 1/4 ounces cream-style corn
- 8 ounces sour cream
- 1/2 cup butter, melted
- 2 eggs, slightly beaten
- 9 1/2 ounces Jiffy corn muffin mix
Equipment Needed
- Large mixing bowl
- Measuring cups and spoons
- Whisk or spatula
- Greased 2-quart baking dish
- Oven
Instructions
- Preheat your oven to 350 degrees Fahrenheit (175 degrees Celsius). Ensure your oven rack is positioned in the center.
- In a large mixing bowl, combine the 16 1/4 ounces of whole kernel corn and 16 1/4 ounces of cream-style corn. Make sure to drain the whole kernel corn well before adding it to the bowl to prevent the scalloped corn from becoming too watery.
- Add the 8 ounces of sour cream to the corn mixture. Mix thoroughly until everything is well blended. The sour cream adds a wonderful tanginess and richness that sets this recipe apart.
- Pour in the 1/2 cup of melted butter. Mix gently to incorporate it evenly. The melted butter contributes to the overall moistness and adds a lovely buttery flavor. Make sure your butter isn’t too hot when you add it, as it could cook the eggs slightly in the next step.
- Add the 2 slightly beaten eggs to the mixture. Mix gently but thoroughly. Beating the eggs slightly before adding them ensures they distribute evenly throughout the corn mixture.
- Finally, add the 9 1/2 ounces of Jiffy corn muffin mix. Stir until just combined. Be careful not to overmix, as this can result in a tougher texture. The corn muffin mix provides the structure and adds a subtle sweetness that complements the corn.
- Pour the corn mixture into a greased 2-quart baking dish. Using cooking spray or butter to grease the dish will prevent the scalloped corn from sticking.
- Bake in the preheated oven for 40-45 minutes, or until the top is golden brown and a knife inserted in the middle comes out clean. The baking time may vary depending on your oven, so keep a close eye on it. A slight wobble in the center is okay, as it will continue to set as it cools.
- Remove from the oven and let cool slightly before serving.
Expert Tips & Tricks
- Spice it up: For a touch of heat, add a pinch of cayenne pepper or a dash of hot sauce to the corn mixture.
- Cheese, please: Stir in a cup of shredded cheddar or Monterey Jack cheese for an extra layer of flavor and richness. Add it after you’ve mixed in the corn muffin mix.
- Make it ahead: This scalloped corn can be assembled a day in advance. Simply cover the prepared baking dish with plastic wrap and refrigerate. Add about 10 minutes to the baking time if baking directly from the refrigerator.
- Browning issues?: If the top is browning too quickly, cover the baking dish loosely with aluminum foil during the last 15 minutes of baking.
- Even butter distribution: To ensure the melted butter is evenly distributed, drizzle it slowly over the corn and sour cream mixture while mixing.
Serving & Storage Suggestions
Serve the scalloped corn warm as a side dish with your favorite main course. It pairs particularly well with roasted chicken, ham, or pork. Garnish with a sprinkle of fresh chopped parsley or chives for a pop of color.
Leftovers can be stored in an airtight container in the refrigerator for up to 3-4 days. To reheat, microwave individual portions or bake the entire dish in a preheated oven at 350°F (175°C) until warmed through.
While not ideal, you can freeze the scalloped corn for up to 2 months. Thaw it overnight in the refrigerator before reheating. Be aware that the texture may change slightly after freezing.
Nutritional Information
| Nutrient | Amount per Serving | % Daily Value |
|---|---|---|
| Calories | 553.2 kcal | N/A |
| Calories from Fat | 287 g | 52% |
| Total Fat | 31.9 g | 49% |
| Saturated Fat | 17 g | 85% |
| Cholesterol | 129.6 mg | 43% |
| Sodium | 1129.4 mg | 47% |
| Total Carbohydrate | 61.8 g | 20% |
| Dietary Fiber | 5.4 g | 21% |
| Sugars | 13.7 g | 54% |
| Protein | 10.1 g | 20% |
Note: Nutritional information is an estimate and may vary based on specific ingredients and portion sizes.
Variations & Substitutions
- Gluten-Free: Use a gluten-free corn muffin mix instead of Jiffy. Bob’s Red Mill makes a good substitute.
- Dairy-Free: Substitute the sour cream with a plant-based sour cream alternative. Melt vegan butter instead of dairy butter.
- Vegetarian: This recipe is already vegetarian!
- Add Vegetables: Roasted red bell peppers or poblano peppers, finely diced, can add a vibrant color and flavor to the dish. Add them along with the corn.
- Herb Infusion: Infuse the melted butter with fresh herbs like thyme or rosemary for a more complex flavor profile. Simply add the herbs to the butter while it’s melting and let it steep for a few minutes before straining.
FAQs (Frequently Asked Questions)
Q: Can I use fresh corn instead of canned?
A: Yes, absolutely! You’ll need about 4 cups of fresh corn kernels. Blanch them briefly before adding to the recipe to ensure they are tender.
Q: Can I reduce the amount of sugar in this recipe?
A: The Jiffy mix already contains sugar, so it’s not recommended to add more. However, if you want to reduce the overall sweetness, you could use a homemade corn muffin mix with less sugar.
Q: How do I know when the scalloped corn is done?
A: The top should be golden brown and a knife inserted into the center should come out clean. A slight wobble is okay, as it will continue to set as it cools.
Q: Can I double the recipe?
A: Absolutely! This recipe doubles easily and can be baked in a 13×9 inch pan. You may need to add a few minutes to the baking time.
Q: Why is my scalloped corn watery?
A: Make sure to drain the whole kernel corn thoroughly before adding it to the mixture. Also, avoid overmixing the batter.
Final Thoughts
This scalloped corn recipe is more than just a side dish; it’s a warm hug on a plate. Its unique blend of flavors and textures sets it apart from the usual creamy corn casseroles, making it a welcome addition to any meal. I encourage you to try this recipe and experience the difference for yourself. Don’t be afraid to experiment with variations and make it your own. I’d love to hear your feedback and how you made it special! Pair it with a crisp, dry white wine for a truly delightful culinary experience. Enjoy!