
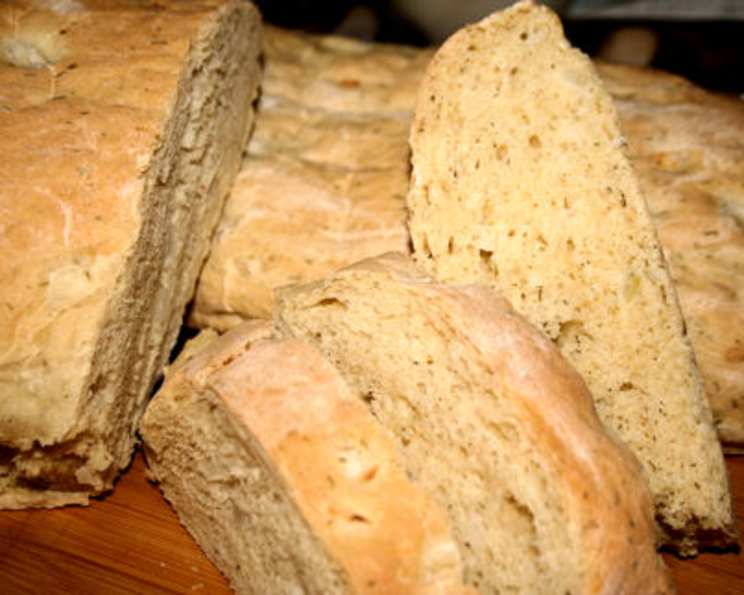
Dill Onion Buttermilk Bread: A Taste of Home
The scent of baking bread has always been synonymous with warmth and comfort in my mind. It’s a powerful trigger, instantly transporting me back to my grandmother’s kitchen. I remember standing on a wobbly stool, barely tall enough to see over the counter, watching her deft hands knead dough with a rhythm as comforting as a lullaby. Her Dill Onion Buttermilk Bread was legendary, a staple at every family gathering, and the taste remains etched in my memory. This recipe is my attempt to recreate that magic, to share a taste of home with you.
Recipe Overview
- Prep Time: 1 hour 30 minutes (includes rising time)
- Cook Time: 30 minutes
- Total Time: 2 hours
- Servings: Varies
- Yield: 3 medium loaves
- Dietary Type: Not specified
Ingredients
Proofing Mixture:
- 2 tablespoons yeast
- 1 teaspoon sugar
- 1/3 cup water, lukewarm
Dry Ingredients:
- 7 – 7 1/2 cups unbleached flour
- 2 teaspoons salt
- 2 teaspoons dill weed
- 1 medium onion, chopped
Liquid Ingredients:
- 3-4 tablespoons butter, melted
- 1 egg, beaten
- 1 cup buttermilk
- 1 cup water (have more on hand)
Equipment Needed
- Large mixing bowl
- Measuring cups and spoons
- 3 medium loaf pans
- Clean kitchen towel
- Oven
Instructions
-
Begin by creating a mound of flour directly on your counter or a large table. This method allows for even incorporation of ingredients and a classic baker’s touch.
-
Form a well in the center of the flour mound. This is where the yeast will bloom.
-
Scatter the salt, dill weed, and chopped onion around the outer edge of the flour mound. It’s crucial to keep the salt away from the yeast at this stage, as salt can inhibit yeast activity.
-
In a separate small bowl, combine the lukewarm water and sugar. Sprinkle the yeast over the top. Allow the yeast to proof for about 5-10 minutes, or until it becomes bubbly and frothy. This indicates that the yeast is active and ready to leaven the bread.
-
In another bowl, whisk together the melted butter, beaten egg, buttermilk, and 1 cup of water. Make sure the butter is cooled slightly so it doesn’t cook the egg.
-
Slowly pour the wet ingredients into the well in the center of the dry ingredients. Using one hand to gradually incorporate the dry ingredients, mix until a dough begins to form.
-
Continue mixing until the dough comes together into a ball that is neither sticky nor dry. The texture should be soft and pliable – often described as “like a baby’s bottom.” If the dough is too sticky, gradually add more flour, a tablespoon at a time, until it reaches the desired consistency. If it is too dry, add water a tablespoon at a time.
-
Grease a large bowl with butter or oil. Place the dough in the greased bowl, turning to coat all sides.
-
Cover the bowl with a light, damp kitchen towel. This helps to create a warm, humid environment that is ideal for rising.
-
Let the dough rise in a warm place until it has doubled in size, which should take approximately 45 minutes, though the time may vary depending on the temperature of your kitchen.
-
Once the dough has doubled, punch it down to release the air.
-
Divide the dough into 3 equal portions for medium loaves.
-
Shape each portion into a loaf and place them in greased loaf pans.
-
Cover the loaf pans with a damp towel and let the loaves rise again for another 45 minutes, or until they have almost doubled in size.
-
Preheat your oven to 350°F (175°C).
-
Bake the loaves for 30 minutes. However, start checking the loaves a few minutes early, as baking times can vary depending on your oven.
-
The bread is done when it is golden brown on top and sounds hollow when tapped on the bottom. You can also use a thermometer; the internal temperature should reach around 200°F (93°C).
-
Remove the loaves from the pans and let them cool on a wire rack before slicing and serving.
Expert Tips & Tricks
- Proofing the Yeast: Always proof your yeast to ensure it’s active. If the yeast doesn’t bubble, it’s dead, and your bread won’t rise.
- Dough Consistency: The dough should be soft and slightly tacky, but not sticky. Adjust flour or water accordingly.
- Rising Time: Rising time depends on your kitchen’s temperature. A warm spot will encourage faster rising. You can even place the dough in a slightly warmed oven (turned off!) for a faster rise.
- Baking Time: Keep an eye on the bread during baking. If the top starts to brown too quickly, tent it with foil.
- Enhance the Onion Flavor: Sauté the chopped onion in a little butter before adding it to the dough for a richer, sweeter onion flavor.
- Egg Wash: For a shiny crust, brush the loaves with an egg wash (1 egg beaten with 1 tablespoon of water) before baking.
- Make-Ahead Tip: You can prepare the dough the night before, let it rise in the refrigerator overnight, and bake it the next day. This develops a deeper flavor.
Serving & Storage Suggestions
This Dill Onion Buttermilk Bread is fantastic served warm with a pat of butter or as a side to soups and stews. It also makes excellent sandwiches. Leftover bread can be stored at room temperature in a breadbox or airtight container for up to 3 days. For longer storage, wrap the bread tightly and freeze it for up to 2 months. To reheat, thaw completely and warm in a 350°F oven for about 10 minutes.
Nutritional Information
Nutritional information is an estimate and may vary based on specific ingredients and portion sizes.
| Nutrient | Amount per Serving | % Daily Value* |
|---|---|---|
| Calories | 422 kcal | 21% |
| Total Fat | 12g | 18% |
| Saturated Fat | 7g | 35% |
| Cholesterol | 31mg | 10% |
| Sodium | 450mg | 19% |
| Total Carbohydrate | 68g | 23% |
| Dietary Fiber | 3g | 12% |
| Sugars | 3g | N/A |
| Protein | 11g | 22% |
- Percent Daily Values are based on a 2000 calorie diet.
Variations & Substitutions
- Whole Wheat Version: Substitute up to half of the unbleached flour with whole wheat flour for a nuttier flavor and added fiber.
- Garlic Dill: Add 1-2 cloves of minced garlic to the dough along with the dill weed for a garlicky twist.
- Cheese Bread: Incorporate 1 cup of shredded cheddar or Gruyere cheese into the dough for a cheesy delight.
- Gluten-Free: While this recipe is not naturally gluten-free, you can experiment with gluten-free flour blends designed for bread making. Be prepared to adjust the liquid content and consider adding a binder like xanthan gum.
- Herb Variations: Substitute fresh herbs like rosemary, thyme, or chives for the dill for a different flavor profile.
FAQs (Frequently Asked Questions)
Q: Can I use active dry yeast instead of instant yeast?
A: Yes, you can. Use the same amount and proof it as directed in the recipe. Just be sure to activate it in the lukewarm water with sugar before adding it to the dry ingredients.
Q: Why is my bread dense and not rising properly?
A: Several factors can contribute to dense bread. Make sure your yeast is fresh and active, the water is the correct temperature (not too hot), and that you are not adding too much flour. Over-kneading can also lead to dense bread.
Q: Can I freeze the dough instead of baking it right away?
A: Yes, you can freeze the dough after the first rise. Punch it down, shape it into loaves, wrap it tightly in plastic wrap and then in foil, and freeze for up to 2 months. Thaw it in the refrigerator overnight before letting it rise again and baking as directed.
Q: What is the best way to chop the onion for this recipe?
A: A fine dice is ideal, so it distributes evenly throughout the dough and doesn’t create large pockets of onion.
Q: My bread is browning too quickly on top. What should I do?
A: If the top of the bread is browning too quickly, tent it loosely with aluminum foil for the remaining baking time. This will help to prevent it from burning while allowing the inside to cook through.
Final Thoughts
This Dill Onion Buttermilk Bread is more than just a recipe; it’s a connection to the past, a taste of simple pleasures, and a way to fill your home with warmth and love. I encourage you to give it a try, experiment with your favorite flavors, and share it with those you cherish. The joy of baking bread is in the process, the aroma, and the satisfaction of creating something delicious from scratch. Don’t be afraid to make it your own. Enjoy!