
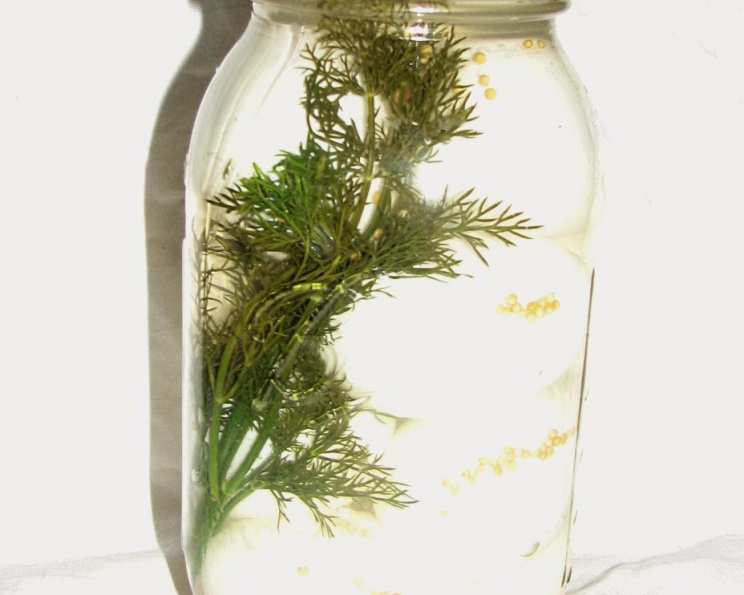
Dill Pickled Eggs: A Briny Bite of Nostalgia
My grandfather, a man whose hands were as comfortable gutting a fish as they were tuning a banjo, always had a jar of pickled eggs on hand. Not just any pickled eggs, mind you, but dill pickled eggs. The kind where the pungent aroma of vinegar and dill permeated the entire refrigerator, promising a briny, savory explosion with every bite. He’d pull them out, offering them with a wink, always saying they were the perfect chaser for just about anything. The memory of that tangy, slightly spicy flavor, shared with a man I loved so much, makes this recipe more than just food – it’s a connection to the past.
Recipe Overview
- Prep Time: 30 minutes
- Cook Time: 15 minutes
- Total Time: At least 1 week (for pickling)
- Yields: 3-4 quart jars
- Serves: Varies depending on serving size
- Dietary Type: High Protein, Gluten-Free
Ingredients
- 1 cup pickling vinegar
- 3 cups water
- 1 tablespoon pickling salt
- 4 tablespoons mustard seeds
- 4 fresh dill flowers or 4 tablespoons dill seeds
- 8 garlic cloves, peeled
- 4 jalapeno peppers
- 18-24 eggs
Equipment Needed
- Large pot
- Slotted spoon
- 4 quart jars with lids and rings
- Toothpick
Instructions
-
Hard-Boil the Eggs: Gently place 18-24 eggs in a large pot and cover them completely with cold water. Bring the water to a rolling boil over high heat.
-
Perfectly Cooked Eggs: Once the water begins to boil, immediately remove the pot from the heat. Cover the pot and let the eggs sit undisturbed in the hot water for exactly 15 minutes. This ensures perfectly cooked yolks without a green ring.
-
Cold Water Bath: After 15 minutes, drain the hot water and immediately transfer the eggs to a bowl filled with ice water. Let them sit in the cold water bath for 5 minutes. This stops the cooking process and makes the eggs easier to peel.
-
Peel the Eggs: Gently peel each egg under cold running water. Make sure to remove all bits of shell. Any remaining shell can affect the texture and flavor of the finished product.
-
Prepare the Brine: In a separate pot, combine 1 cup pickling vinegar, 3 cups water, and 1 tablespoon pickling salt. Bring this mixture to a boil over medium-high heat. Once boiling, remove the pot from the heat and set aside to cool slightly.
-
Sterilize the Jars: While the brine is heating, prepare your jars. Ideally, clean 4 quart jars in a dishwasher on the sanitize cycle. If you don’t have a dishwasher, wash them thoroughly with hot, soapy water and rinse very well.
-
Assemble the Jars: To each clean quart jar, add 1 tablespoon of mustard seeds, 1 fresh dill flower (or 1 tablespoon dill seeds), 2 peeled garlic cloves, and 1 whole jalapeno pepper.
-
Prick the Eggs: Using a toothpick, gently prick each peeled egg in a few places. This helps the brine penetrate the egg and ensures even pickling.
-
Pack the Jars: Carefully place 6-8 eggs into each jar, depending on the size of the eggs. Leave about 1/2 inch of headspace at the top of the jar.
-
Pour the Brine: Carefully pour the slightly cooled brine into each jar, making sure to cover the eggs completely. Again, leave about 1/2 inch of headspace.
-
Seal the Jars: Wipe the rims of the jars clean with a damp cloth. Place the lids on the jars and screw on the rings fingertip tight (not too tight, just snug).
-
Refrigerate and Wait: Place the sealed jars in the refrigerator. These eggs need at least one week to pickle properly, but they are even better if you can wait at least two weeks. The longer they sit, the more the flavors will develop and meld together.
-
Enjoy: After the waiting period, your dill pickled eggs are ready to eat!
Expert Tips & Tricks
- Egg Freshness Matters: Use eggs that are at least a week old. Fresh eggs are harder to peel.
- Don’t Overcook the Eggs: Overcooked eggs will have a green ring around the yolk, which is not only unappealing but can also impart a sulfurous flavor. The 15-minute method in this recipe is designed to prevent that.
- Spice it Up (or Down): Adjust the amount of jalapeno to your liking. For a milder flavor, remove the seeds and membranes from the jalapenos before adding them to the jars.
- Brine Flavor Tweaks: Feel free to experiment with other spices in the brine, such as black peppercorns, bay leaves, or red pepper flakes.
- Perfectly Clear Brine: For a crystal-clear brine, let it cool completely before pouring it over the eggs.
Serving & Storage Suggestions
Dill pickled eggs are fantastic served as a snack, appetizer, or as part of a larger charcuterie board. They are also excellent chopped and added to potato salad or deviled eggs for an extra zing.
Store the pickled eggs in the refrigerator. They will keep for up to 2 months, but their quality is best within the first month. Once opened, keep refrigerated and consume within a week. These eggs are not suitable for freezing.
Nutritional Information
| Nutrient | Amount per Serving | % Daily Value |
|---|---|---|
| Calories | 366.8 kcal | N/A |
| Calories from Fat | 213 g | 58% |
| Total Fat | 23.8 g | 36% |
| Saturated Fat | 7.2 g | 35% |
| Cholesterol | 837 mg | 279% |
| Sodium | 2071.2 mg | 86% |
| Total Carbohydrate | 6.3 g | 2% |
| Dietary Fiber | 1.3 g | 5% |
| Sugars | 1.9 g | 7% |
| Protein | 30.4 g | 60% |
Note: Nutritional information is an estimate and may vary based on specific ingredients and serving sizes.
Variations & Substitutions
- Spice it Up! Add red pepper flakes, whole peppercorns, or a dash of hot sauce to the brine for a spicier kick.
- Sweet and Sour: For a slightly sweeter flavor, add a tablespoon or two of sugar to the brine.
- Herbal Infusion: Experiment with different herbs like thyme, rosemary, or oregano in addition to or instead of dill.
- Pickled Quail Eggs: For a more elegant presentation, use quail eggs instead of chicken eggs. Adjust the cooking time accordingly (around 5 minutes after boiling).
- Beet Pickled Eggs: Add sliced beets to the jars for a vibrant pink hue and a subtly sweet flavor.
FAQs (Frequently Asked Questions)
Q: How long do the eggs need to sit in the refrigerator before they are ready to eat?
A: The eggs need to sit in the refrigerator for at least one week, but ideally two weeks, for the pickling process to fully develop the flavors.
Q: Can I use dried dill instead of fresh dill?
A: Yes, you can use dried dill, but fresh dill flowers will provide a more intense and vibrant flavor. If using dried dill, use 4 tablespoons.
Q: What if my brine doesn’t completely cover the eggs in the jars?
A: It’s important to ensure the eggs are fully submerged in the brine to prevent spoilage. If necessary, prepare a little extra brine (using the same ratio of vinegar, water, and salt) to top off the jars.
Q: Can I reuse the brine after the eggs are finished?
A: No, it is not recommended to reuse the brine after the eggs are finished, as it may contain bacteria.
Q: My pickled eggs turned out rubbery. What did I do wrong?
A: Overcooking the eggs can result in a rubbery texture. Be sure to follow the recommended cooking time and immediately cool the eggs in an ice bath to stop the cooking process.
Final Thoughts
These dill pickled eggs are more than just a recipe; they are a taste of home, a connection to simpler times, and a testament to the enduring power of good food. I encourage you to try this recipe, experiment with your own variations, and share the tangy, savory goodness with friends and family. Perhaps serve them alongside a hearty Reuben sandwich or a crisp, cold beer. I’m confident that once you taste these, you’ll be hooked! Let me know in the comments how your eggs turn out and any personal touches you’ve added to make them your own. Happy pickling!