
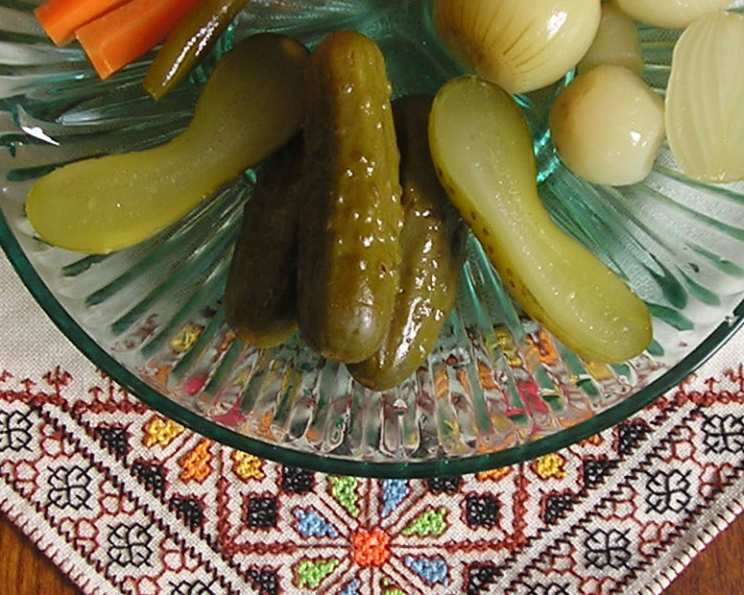
Dill Pickles by the Jar: A Family Tradition
The aroma of dill and vinegar takes me straight back to my grandmother’s sun-drenched kitchen. Every summer, the countertops would be covered with cucumbers, jars, and her well-worn canning equipment. She’d hum softly as she worked, a contented look on her face as she transformed humble cucumbers into tangy, crisp pickles that would last us through the winter months. Those pickles, bursting with flavor, were more than just a condiment; they were a symbol of her love and care, a taste of summer preserved for the cold days ahead.
Recipe Overview
- Prep Time: 30 minutes
- Cook Time: 20 minutes
- Total Time: 6 weeks, 2 days (includes fermentation time)
- Servings: Varies based on cucumber size
- Yield: 1 quart jar
- Dietary Type: Vegan, Gluten-Free, Dairy-Free
Ingredients
- 1 1/2 cups water
- 1/2 cup white vinegar
- 1 1/2 tablespoons pickling salt
- 2-3 sprigs dill seeds (or heads)
- 1-2 garlic cloves (optional)
- 1 dried hot pepper (optional)
- 1 quart small fresh cucumbers (about 1 lb)
Equipment Needed
- Soft vegetable brush
- Large pot
- Quart canning jar
- Canning pot with rack (or a large stockpot with a trivet)
- Jar lifter or tongs (optional, for removing hot jars)
- Wooden spoon
Instructions
-
Begin by thoroughly scrubbing the cucumbers under cool running water using a soft vegetable brush. Pay close attention to removing any dirt or debris.
-
Trim 1/16 inch off the blossom end of each cucumber. This is crucial as the blossom end contains enzymes that can lead to softening of the pickles. Discard any cucumbers that are bruised or damaged.
-
Prepare the canning jar. Place the quart canning jar into a canner, cover with water, bring to a boil, and boil for 10 minutes. This sterilizes the jar, preventing spoilage. If you don’t have a canning pot, a large stockpot with a rack or trivet at the bottom will work.
-
While the jar is sterilizing, make the brine. In a separate pot, combine the 1 1/2 cups of water, 1/2 cup of white vinegar, and 1 1/2 tablespoons of pickling salt. Heat the mixture over medium heat until the salt is completely dissolved, stirring occasionally. Do not boil the brine at this point.
-
Once the jar is sterilized, carefully remove it from the boiling water (using a jar lifter or tongs, if available) and place it on a heat-resistant surface.
-
Add the dill seed sprigs (or heads) to the sterilized jar. The seed heads should be well-formed but still green for the best flavor.
-
If desired, add the optional garlic clove(s) and/or the dried hot pepper to the jar.
-
Pack the jar tightly with the cucumbers. The key here is to maximize the number of cucumbers that fit while ensuring they are submerged in the brine later. I find it easiest to start with the jar on its side, laying some of the larger cucumbers along the bottom, then stacking on top of them. Use the end of a large wooden spoon to gently push more cukes in once it gets snug in there. Repeat with a second row of stacked cukes, picking ones that will fit in without sticking too far up in the jar. There may then be room to lay a couple on top.
-
Carefully pour the hot brine over the cucumbers, leaving about 1/2 inch of headspace at the top of the jar. This headspace is important for proper sealing.
-
Immediately cap the jar with a sterilized lid and ring. Ensure the lid is properly seated.
-
Do not hot water process the pickles. These are fermented pickles, and the fermentation process is what creates the characteristic sour flavor.
-
Store the jars on newspaper in a cool, dark place, as they may overflow slightly during fermentation. The ideal temperature for fermentation is between 65-75°F (18-24°C).
-
Allow the pickles to ferment for at least 6 weeks before opening. They will continue to develop flavor over time and are much better after 6 months. The fermentation process will create carbon dioxide, so you may see some bubbles in the jar. This is normal.
Expert Tips & Tricks
- Use small cucumbers. Smaller cucumbers have a better texture and absorb the brine more evenly.
- Don’t skip trimming the blossom end. This seemingly small step is crucial for preventing soft pickles.
- Use fresh dill seeds or heads. Dried dill weed will not provide the same flavor.
- Ensure the brine is hot enough. This helps to kill any unwanted bacteria and kickstart the fermentation process.
- Burp the jars daily during the first week of fermentation. This involves slightly loosening the lid to release any excess gas that has built up. Then, tighten the lid again.
- If mold appears on the surface of the brine during fermentation, don’t panic! It’s usually harmless. Just scoop it off and continue with the fermentation process.
- Add a grape leaf or horseradish leaf to each jar. These contain tannins that help to keep the pickles crisp.
Serving & Storage Suggestions
Once the pickles have fermented for at least 6 weeks, they are ready to eat! Serve them chilled as a snack, as a side dish with sandwiches or grilled meats, or as part of a charcuterie board.
After opening, store the pickles in the refrigerator. They will last for several weeks, though their texture may soften slightly over time. Properly fermented and sealed, unopened jars can last up to a year.
Nutritional Information
Note: Nutritional information is an estimate and may vary based on specific ingredients and serving size.
| Nutrient | Amount per Serving | % Daily Value |
|---|---|---|
| Calories | ~10 kcal | <1% |
| Total Fat | 0g | 0% |
| Saturated Fat | 0g | 0% |
| Cholesterol | 0mg | 0% |
| Sodium | ~350mg | ~15% |
| Total Carbohydrate | 2g | <1% |
| Dietary Fiber | <1g | ~2% |
| Sugars | 1g | N/A |
| Protein | <1g | 0% |
Variations & Substitutions
- Spicy Dill Pickles: Increase the number of dried hot peppers or add a pinch of red pepper flakes to each jar. You can also use fresh jalapenos for a spicier kick.
- Garlic Dill Pickles: Add extra garlic cloves for a more intense garlic flavor. You can even use roasted garlic for a sweeter, more mellow taste.
- Sweet Dill Pickles: Add a tablespoon or two of sugar to the brine for a slightly sweet flavor.
- Mustard Dill Pickles: Add a teaspoon of mustard seeds to each jar for a subtle mustard flavor.
- Bread and Butter Pickles: While not technically a dill pickle, you can adapt this recipe by adding turmeric, celery seed, and more sugar to create a sweet and tangy bread and butter pickle.
FAQs (Frequently Asked Questions)
Q: Why do I need to cut off the blossom end of the cucumber?
A: The blossom end contains enzymes that can cause the pickles to soften during fermentation, so trimming it off helps maintain their crisp texture.
Q: My pickles are cloudy. Is that normal?
A: Yes, cloudiness is a normal byproduct of the fermentation process. It’s caused by the growth of beneficial bacteria that are responsible for the sour flavor.
Q: How do I know when the pickles are ready to eat?
A: They are generally ready to eat after 6 weeks, but the flavor will continue to develop over time. Taste one after 6 weeks; if it’s not sour enough, let them ferment for a longer period.
Q: Can I use regular table salt instead of pickling salt?
A: No, it’s best to use pickling salt (also known as canning salt). Table salt contains iodine and anti-caking agents that can darken the pickles and affect the fermentation process.
Q: My pickles are soft and mushy. What went wrong?
A: Several factors can contribute to soft pickles, including not trimming the blossom end, using old cucumbers, or not using enough salt in the brine. Make sure to follow the recipe carefully for best results.
Final Thoughts
Making your own dill pickles by the jar is a rewarding experience that allows you to enjoy the taste of summer all year round. Don’t be intimidated by the fermentation process – it’s simpler than you might think! Gather your ingredients, sterilize your jars, and get ready to transform fresh cucumbers into tangy, flavorful pickles that will become a family favorite. I encourage you to experiment with different variations and find your own signature pickle recipe. Once you’ve mastered the basics, the possibilities are endless! Serve these tangy delights with a juicy burger, a hearty sandwich, or simply enjoy them straight from the jar. Happy pickling!