
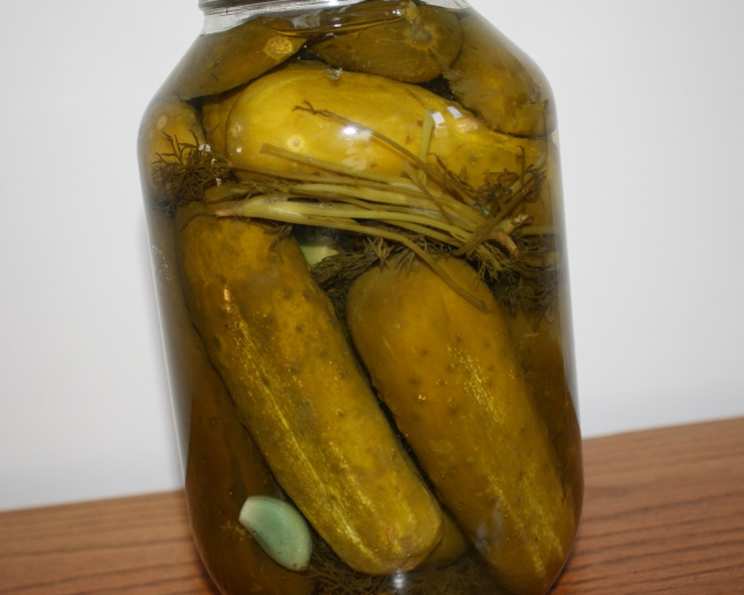
The Joy of Single-Batch Dill Pickles: A Recipe for Freshness
The aroma of dill and vinegar always transports me back to my grandmother’s kitchen. She had a garden overflowing with cucumbers, and every summer, the counter would be covered with jars, lids, and the unmistakable scent of pickling. But what I loved most was that she never made a huge fuss; she’d just wander out, grab a handful of cucumbers, and whip up a single jar. Those small-batch pickles, made with love and garden-fresh ingredients, were the crispiest, most flavorful things I’d ever tasted. This recipe embodies that same simplicity and fresh flavor, allowing you to enjoy homemade dill pickles without the overwhelming commitment of large-scale canning.
Recipe Overview
- Prep Time: 15 minutes
- Cook Time: 5 minutes (for brine)
- Total Time: 20 minutes (plus cooling & pickling time)
- Yield: 1 quart jar
- Serves: Varies, depending on use
- Dietary Type: Vegan, Gluten-Free
Ingredients
- 2 heads dill, per quart jar
- 1-2 garlic cloves, per quart jar
- 10-12 pickling cucumbers
Brine
- 1 1/2 cups water
- 1/2 cup white vinegar
- 1 1/2 tablespoons pickling salt (also known as canning salt)
Equipment Needed
- 1 quart jar (sterilized)
- Saucepan
- Measuring cups and spoons
Instructions
-
Sterilize your jar: This is a crucial step to prevent spoilage. Wash the jar and lid in hot, soapy water, then rinse thoroughly. You can sterilize the jar by boiling it in a large pot of water for 10 minutes. Carefully remove the jar and lid with tongs and let them air dry on a clean towel.
-
Prepare the cucumbers: Wash the pickling cucumbers thoroughly under cold running water. Gently scrub off any dirt or blemishes. Trim the blossom end (the end opposite the stem) of each cucumber. This contains enzymes that can soften the pickles.
-
Add the dill and garlic: Place the dill heads and garlic cloves (peeled) into the sterilized quart jar. You can lightly crush the garlic cloves to release more flavor.
-
Pack the cucumbers: Tightly pack the pickling cucumbers into the jar, leaving about 1 inch of headspace at the top. Try to arrange them so they fit snugly without being crammed. You may need to cut some of the cucumbers to make them fit.
-
Prepare the brine: In a saucepan, combine the water, white vinegar, and pickling salt. Bring the mixture to a boil over medium-high heat, stirring until the salt is completely dissolved.
-
Pour the brine: Carefully pour the boiling brine over the cucumbers in the jar, leaving about 1/4 inch of headspace at the top. Use a clean utensil (like a chopstick or a plastic knife) to gently release any trapped air bubbles.
-
Seal the jar: Wipe the rim of the jar with a clean, damp cloth to remove any spills. Place the lid on the jar and screw on the band until it is fingertip tight (not too tight, as air needs to escape during the cooling process).
-
Cool and store: Let the jar cool completely at room temperature. As the jar cools, you may hear a “pop” sound, which indicates that the jar has sealed properly. You can confirm the seal by pressing down on the center of the lid. If it doesn’t flex, the jar is sealed.
-
Refrigerate: Once the jar is cooled and sealed, refrigerate it for at least 24 hours, but preferably for 1-2 weeks, to allow the flavors to fully develop.
Expert Tips & Tricks
- Use pickling cucumbers: These cucumbers are specifically bred for pickling, with thicker skins and fewer seeds than regular cucumbers. This helps them stay crisp during the pickling process.
- Don’t overpack the jar: Leave enough space between the cucumbers so the brine can circulate properly. Overpacking can lead to uneven pickling and spoilage.
- Use pickling salt: This type of salt is pure sodium chloride and doesn’t contain iodine or anti-caking agents, which can darken the pickles and affect the flavor. Table salt can be used in a pinch, but the results may not be as good.
- Adjust the garlic: I like a pronounced garlic flavor, but you can reduce the amount of garlic if you prefer a milder taste.
- Ensure proper sealing: A properly sealed jar is essential for preventing spoilage. If the jar doesn’t seal properly, refrigerate the pickles immediately and consume them within a few weeks.
- Add a tannin source: For extra crisp pickles, add a source of tannins to the jar. Options include a grape leaf, horseradish leaf, or a pinch of black tea.
Serving & Storage Suggestions
These dill pickles are delicious straight from the jar as a snack or side dish. They are also a great addition to sandwiches, burgers, salads, and charcuterie boards.
- Storage: Properly sealed jars of dill pickles can be stored in the refrigerator for several months. Once opened, consume them within a few weeks for the best quality.
- Serving: Serve the pickles chilled for the crispiest texture. You can also slice them lengthwise into spears or rounds for easier snacking.
- Reheating: Dill pickles are typically served cold, so reheating is not necessary.
Nutritional Information
Please note that these values are estimates and may vary based on specific ingredients used.
| Nutrient | Amount per Serving (Estimate) | % Daily Value* |
|---|---|---|
| Calories | 20 kcal | 1% |
| Total Fat | 0 g | 0% |
| Saturated Fat | 0 g | 0% |
| Cholesterol | 0 mg | 0% |
| Sodium | 400 mg | 17% |
| Total Carbohydrate | 4 g | 1% |
| Dietary Fiber | 1 g | 4% |
| Sugars | 2 g | – |
| Protein | 0 g | 0% |
*Percent Daily Values are based on a 2,000 calorie diet.
Variations & Substitutions
- Spicy Dill Pickles: Add a pinch of red pepper flakes or a sliced jalapeño to the jar for a spicy kick.
- Sweet Dill Pickles: Add a tablespoon or two of sugar to the brine for a slightly sweeter flavor.
- Bread and Butter Pickles: Substitute the white vinegar with apple cider vinegar and add 1/4 cup of sugar to the brine for a sweeter, tangier pickle.
- Garlic Dill Pickles: Increase the amount of garlic to 3-4 cloves per jar.
- Other Herbs: Experiment with other herbs like mustard seeds, peppercorns, or bay leaves for different flavor profiles.
FAQs (Frequently Asked Questions)
Q: Why are my pickles soft?
A: Soft pickles can be caused by several factors, including using old cucumbers, not trimming the blossom end, or using table salt instead of pickling salt.
Q: How long do I need to wait before eating the pickles?
A: While you can technically eat the pickles after 24 hours, the flavor will continue to develop over time. It’s best to wait at least 1-2 weeks for the flavors to fully meld.
Q: Do I need to process these pickles in a boiling water bath?
A: Since this is a refrigerator pickle recipe, processing in a boiling water bath is not necessary. The high acidity of the brine and refrigeration help to prevent spoilage.
Q: Can I reuse the brine?
A: It is not recommended to reuse the brine, as it may contain bacteria that can cause spoilage. Always make a fresh batch of brine for each batch of pickles.
Q: What if my jar doesn’t seal?
A: If the jar doesn’t seal properly, refrigerate the pickles immediately and consume them within a few weeks. You can also try resealing the jar with a new lid and ring.
Final Thoughts
This single-batch dill pickle recipe is a wonderful way to enjoy the taste of homemade pickles without the pressure of a huge canning project. The process is simple, the ingredients are fresh, and the results are incredibly satisfying. Don’t be afraid to experiment with different herbs and spices to create your own signature flavor. So, grab a handful of cucumbers, channel your inner grandma, and get pickling! I’d love to hear what you think, and what variations you create – please leave me your feedback! And if you’re looking for the perfect pairing, these pickles are absolutely divine with a grilled cheese sandwich or alongside a hearty Reuben.