
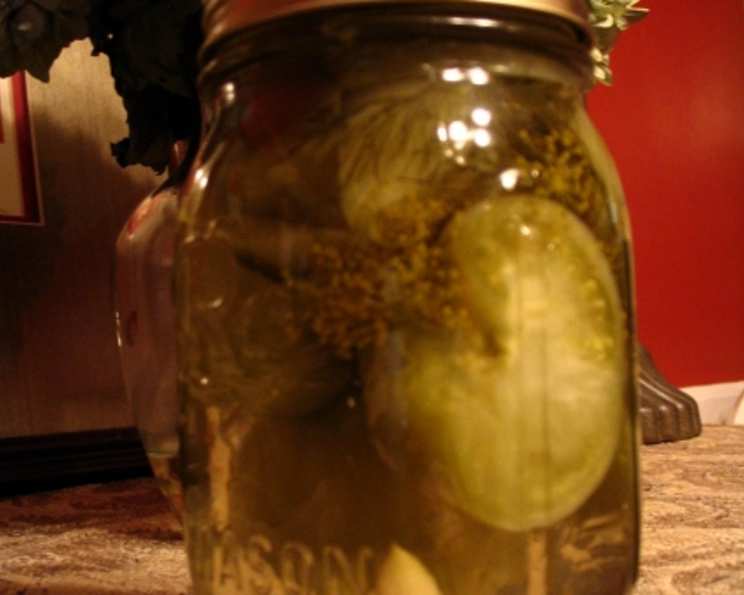
Dilled Green Tomatoes: A Taste of Late Summer
I remember one sweltering August afternoon at my grandmother’s farm, the air thick with the scent of ripe tomatoes and freshly cut grass. We’d just finished a long day of harvesting, and the kitchen table was laden with baskets overflowing with the last of the season’s green tomatoes. Rather than let them go to waste, my grandmother, with her ever-resourceful spirit, whipped up a batch of these dilled green tomatoes. The tangy, briny flavor was an unexpected delight, a perfect complement to our simple farm fare. This recipe, born from that very day, carries with it the warmth of her kitchen and the memory of summers gone by.
Recipe Overview
- Prep Time: 30 minutes
- Cook Time: 15 minutes
- Total Time: 45 minutes
- Yields: 6 pints
- Dietary Type: Vegetarian, Gluten-Free, Dairy-Free
Ingredients
- 5 lbs small firm green tomatoes
- ¼ cup canning salt
- 3 ½ cups vinegar
- 3 ½ cups water
- 6-7 cloves garlic
- 6-7 heads fresh dill (or ¼ cup dill seed)
- 6-7 bay leaves
Equipment Needed
- Large saucepan
- Canning jars (6-7 pint size)
- Jar lifter
- Boiling-water canner
- Ladle
- Measuring cups and spoons
- Cutting board
- Knife
Instructions
-
Begin by thoroughly washing the green tomatoes. Then, core them and cut them into halves or quarters, depending on their size. You want pieces that will pack nicely into the jars.
-
In a large saucepan, combine the canning salt, vinegar, and water. Bring this mixture to a rolling boil over medium-high heat, stirring to dissolve the salt.
-
While the brine is heating, prepare your canning jars. Ensure they are clean and sterilized. You can sterilize them by boiling them in water for 10 minutes or running them through a sterilization cycle in your dishwasher. Keep the jars hot until you’re ready to fill them.
-
Once the jars are ready and the brine is boiling, it’s time to pack the tomatoes. Pack the tomatoes tightly into the hot jars, leaving about ¼-inch headspace (the space between the top of the tomatoes and the rim of the jar).
-
Now, add the flavor enhancers. To each jar, add 1 garlic clove, 1 head of fresh dill (or 2 tsp of dill seed), and 1 bay leaf. These aromatics will infuse the tomatoes with their delicious flavors during the canning process.
-
Carefully ladle the hot liquid (the vinegar and water brine) over the tomatoes in each jar, again leaving ¼-inch headspace. Make sure all the tomatoes are submerged in the liquid.
-
Remove any trapped air bubbles from the jars by gently tapping them on a towel-covered surface or using a non-metallic spatula or bubble remover along the inside of the jar. Air bubbles can prevent a proper seal.
-
Wipe the rims of the jars clean with a damp cloth to ensure a good seal. Then, center the two-piece canning lids on the jars and screw on the bands until they are fingertip tight – not too loose, not too tight.
-
Process the filled jars in a boiling-water canner. Make sure the jars are completely submerged in boiling water, with at least 1 inch of water covering the tops of the jars. Process for 15 minutes after the water returns to a boil. If you are at a higher altitude, you may need to increase the processing time (consult a canning guide for specific adjustments).
-
Once the processing time is complete, carefully remove the jars from the canner using a jar lifter and place them on a towel-lined surface to cool. Avoid placing the jars directly on a cold countertop, as this could cause them to crack.
-
As the jars cool, you should hear a “popping” sound as the lids seal. This indicates that a vacuum has formed inside the jar, preserving the contents.
-
Let the jars cool completely (about 12-24 hours) before checking the seals. To check the seal, press down on the center of the lid. If it flexes or pops, the jar is not properly sealed and should be reprocessed with a new lid or stored in the refrigerator.
Expert Tips & Tricks
- Selecting Tomatoes: Use firm, unripe green tomatoes. Avoid any that are starting to turn color or have soft spots. The firmer the tomatoes, the better they will hold their shape during the canning process.
- Spice it Up: For a little heat, add a pinch of red pepper flakes or a small dried chili pepper to each jar.
- Dill Alternatives: If fresh dill isn’t available, dried dill weed can be used, but use slightly less as dried herbs have a more concentrated flavor.
- Vinegar Choice: White vinegar is standard, but you can experiment with apple cider vinegar for a slightly different flavor profile. Just ensure it has at least 5% acidity for safe canning.
- Don’t Skip the Salt: Canning salt is crucial for proper preservation. Do not substitute table salt, as it contains additives that can cloud the brine and affect the color of the tomatoes.
- Jar Preparation is Key: Ensure your jars are properly sterilized to prevent spoilage.
Serving & Storage Suggestions
These dilled green tomatoes are a fantastic addition to charcuterie boards, relish trays, or as a tangy side dish with grilled meats or sandwiches. They can also be chopped and added to salads or used as a topping for tacos or nachos.
Store properly sealed jars in a cool, dark, and dry place. They will keep for at least a year, and often longer. Once opened, refrigerate any unused portion in an airtight container and consume within a week.
Nutritional Information
Note: Nutritional information is an estimate and can vary based on specific ingredients and portion sizes.
| Nutrient | Amount per Serving | % Daily Value |
|---|---|---|
| Calories | 117 kcal | 6% |
| Total Fat | 0.8g | 1% |
| Saturated Fat | 0.1g | 0% |
| Cholesterol | 0mg | 0% |
| Sodium | 4771mg | 199% |
| Total Carbohydrate | 20.4g | 7% |
| Dietary Fiber | 4.2g | 15% |
| Sugars | 15.2g | 30% |
| Protein | 4.7g | 9% |
Variations & Substitutions
- Pickled Green Cherry Tomatoes: Use green cherry tomatoes instead of larger ones for a cute and flavorful variation.
- Sweet and Sour: Add a touch of sugar (1-2 tablespoons) to the brine for a slightly sweeter pickle.
- Mustard Seed: Include a teaspoon of mustard seed per jar for an added layer of flavor.
- Spicy Pickles: Add a few slices of fresh jalapeno or a pinch of cayenne pepper to each jar.
- Onion: Add thin slices of onion to the jars along with the other aromatics.
FAQs (Frequently Asked Questions)
Q: Can I use larger green tomatoes for this recipe?
A: Yes, but be sure to cut them into smaller, bite-sized pieces so they pack well into the jars and are easier to eat.
Q: Do I have to use canning salt?
A: Yes, canning salt is essential for preserving the tomatoes. It does not contain additives found in table salt that can cloud the brine and affect the texture.
Q: How do I know if my jars have sealed properly?
A: After the jars have cooled completely, press down on the center of the lid. If it doesn’t flex or pop, it’s properly sealed. If it flexes, the jar is not sealed and should be reprocessed or stored in the refrigerator.
Q: Can I reuse the brine from a previous batch of pickles?
A: No, it is not recommended to reuse brine for canning. Fresh brine ensures proper acidity for safe preservation.
Q: What if I don’t have a boiling-water canner?
A: You can use a large stockpot with a rack in the bottom to keep the jars from sitting directly on the heat. The pot must be deep enough to completely submerge the jars in boiling water by at least 1 inch.
Final Thoughts
So, gather those end-of-season green tomatoes and give this recipe a try. It’s a simple yet satisfying way to preserve the flavors of late summer and enjoy them throughout the year. The tangy bite of the tomatoes, infused with the fresh aroma of dill and garlic, is a welcome addition to any meal. Don’t be afraid to experiment with the variations and make it your own. And if you do, I’d love to hear about your creations! Share your experiences and photos – happy canning!