
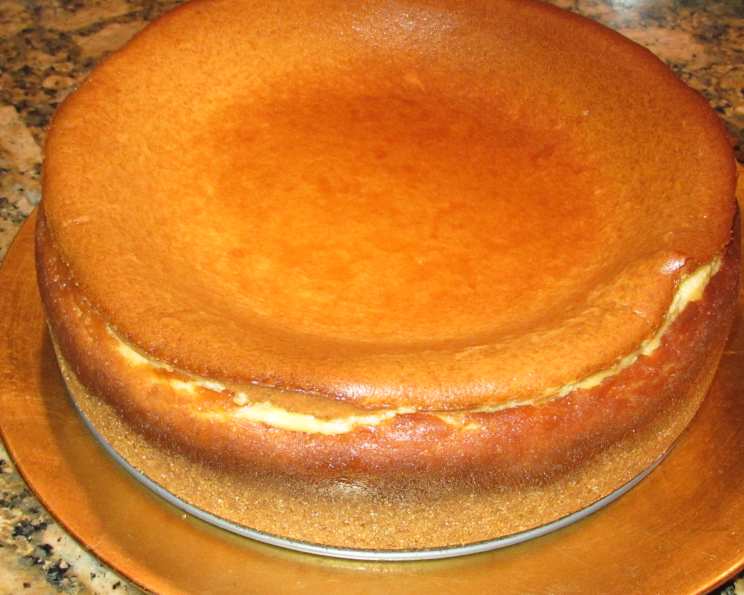
The Quintessential Diner Cheesecake: A Slice of Americana
There’s a certain magic to diner cheesecake. Not the fancy, deconstructed kind you find in upscale restaurants, but the honest-to-goodness, deeply satisfying slice of creamy perfection that sits gleaming under the fluorescent lights of a classic American diner. I remember countless late-night study sessions fueled by endless cups of coffee and generous wedges of this very cheesecake, a comforting reward after hours spent poring over textbooks. Each bite was a little taste of home, a reminder that even amidst the stress of exams, there was always something sweet and familiar to look forward to. The kind of cheesecake that just makes everything right.
Recipe Overview
- Prep Time: 30 minutes
- Cook Time: 1 hour 15 minutes
- Total Time: 1 hour 45 minutes
- Servings: 20
- Yield: 1 (10-inch) cheesecake
- Dietary Type: Not Gluten-Free
Ingredients
For the Crust:
- 13 1/2 ounces graham cracker crumbs
- 1 1/2 cups sugar (less can be used, depending on preference)
- 3/4 teaspoon cinnamon
- 3/4 cup butter, melted
For the Filling:
- 5 (8 ounce) packages Philadelphia Cream Cheese (brick style, softened)
- 1 3/4 cups sugar
- 4 tablespoons flour
- Juice of 1 lemon
- 1/2 cup butter, melted
- 7 eggs, beaten
- 2 teaspoons vanilla extract
- 1 pint heavy cream
- 1/2 cup evaporated milk
Equipment Needed
- 10-inch x 2 3/4-inch springform pan
- Large mixing bowl
- Electric mixer (stand or hand-held)
- Small bowl for lemon juice
- Baking sheet
- Roasting pan for water bath
- Measuring cups and spoons
Instructions
-
Prepare the Crust: In a large bowl, combine the graham cracker crumbs, sugar, and cinnamon. Pour the melted butter over the mixture and stir until evenly moistened.
-
Press the Crust: Press the graham cracker mixture firmly into the bottom and up the sides of a 10-inch x 2 3/4-inch springform pan. The mixture will make a generous amount of crust. If desired, you can reduce the crust ingredients by half or freeze half of the crust mixture for later use.
-
Preheat Oven: Preheat your oven to 350 degrees F (175 degrees C).
-
Cream the Cheese: In a large bowl, cream the Philadelphia Cream Cheese with an electric mixer until smooth and light. This step is crucial for a lump-free cheesecake. Using room temperature cream cheese is key.
-
Combine Wet Ingredients: In the same bowl, add the sugar, flour, lemon juice, and melted butter to the creamed cheese. Mix thoroughly until all ingredients are well combined and the mixture is smooth. Make sure to scrape down the sides of the bowl to ensure everything is incorporated.
-
Incorporate Eggs and Liquids: Add the vanilla extract, evaporated milk, and beaten eggs to the cheese mixture. Mix until just combined. Be careful not to overmix at this stage, as it can incorporate too much air and lead to cracking during baking.
-
Add Heavy Cream: Gently fold in the heavy cream. The mixture will be quite thin at this point, which is normal.
-
Pour into Crust: Pour the cheesecake filling into the prepared graham cracker crust.
-
Prepare Water Bath: Place the springform pan inside a larger roasting pan. This creates a water bath, which helps to bake the cheesecake evenly and prevent cracking.
-
Add Water: Carefully pour hot water into the roasting pan, reaching about halfway up the sides of the springform pan. This will create a humid environment in the oven. As an alternative, a baking sheet with water under the cheesecake can be used to catch drippings and add some humidity.
-
Bake: Bake in the preheated oven for approximately 1 hour and 15 minutes. Baking time can vary depending on your oven.
-
Check for Doneness: The cheesecake is done when the edges are set but the center still has a slight jiggle.
-
Cool Down: Turn off the oven and slightly open the oven door. Let the cheesecake rest in the cooling oven for about 30 minutes to an hour. This gradual cooling helps prevent cracking.
-
Chill: Remove the cheesecake from the oven and water bath. Let it cool completely at room temperature. Then, cover it with plastic wrap and refrigerate for at least 4 hours, or preferably overnight, to allow the flavors to meld and the cheesecake to fully set.
-
Serve: Once chilled, remove the sides of the springform pan. Slice and serve the diner cheesecake chilled.
Expert Tips & Tricks
- Use Philadelphia Cream Cheese: While other brands may work, using Philadelphia Cream Cheese truly makes a difference in the taste and texture of this cheesecake.
- Don’t Overmix: Overmixing the filling can incorporate too much air, leading to cracks on the surface of the cheesecake. Mix until just combined.
- Prevent Cracking: The water bath is crucial for preventing cracks. It creates a humid environment that ensures even baking. Letting the cheesecake cool gradually in the oven also helps.
- If Cracks Appear: If cracks do appear, don’t worry! They won’t affect the taste. You can cover them with a layer of sour cream topping or fruit.
- Get Creative with Crust: If you are not a fan of graham cracker crust, you can substitute for a shortbread or cookie crust.
- Lemon Juice: The lemon juice balances the sweetness. However, avoid using too much lemon juice, as that can cause the eggs to curdle.
Serving & Storage Suggestions
Serve the diner cheesecake chilled, either plain or with your favorite toppings such as fresh berries, whipped cream, chocolate sauce, or a fruit compote. Leftovers should be stored in an airtight container in the refrigerator for up to 5 days. For longer storage, you can freeze individual slices, well wrapped, for up to 2 months. Thaw overnight in the refrigerator before serving.
Nutritional Information
Please note that these values are estimates and can vary based on specific ingredients and serving sizes.
| Nutrient | Amount per Serving | % Daily Value |
|---|---|---|
| Calories | 626 kcal | 31% |
| Total Fat | 43.9g | 56% |
| Saturated Fat | 24.9g | 125% |
| Cholesterol | 192.5mg | 64% |
| Sodium | 416.1mg | 17% |
| Total Carbohydrate | 52.5g | 19% |
| Dietary Fiber | 0.6g | 2% |
| Sugars | 40.4g | 81% |
| Protein | 8.1g | 16% |
Variations & Substitutions
- Gluten-Free Crust: Substitute the graham cracker crumbs with gluten-free graham cracker crumbs or almond flour for a gluten-free option.
- Flavor Extracts: Experiment with different flavor extracts, such as almond, coconut, or peppermint, for a unique twist.
- Chocolate Cheesecake: Add melted dark or milk chocolate to the filling for a decadent chocolate cheesecake.
- Seasonal Fruit: Incorporate seasonal fruits into the filling or as a topping. Think berries in summer, apples in fall, or citrus in winter.
FAQs (Frequently Asked Questions)
Q: Why is it important to use Philadelphia Cream Cheese?
A: Philadelphia Cream Cheese has a specific texture and flavor that contributes significantly to the classic diner cheesecake taste. Other brands may not yield the same results.
Q: Can I use a pre-made graham cracker crust?
A: Yes, you can use a pre-made crust to save time, but make sure it is a 10-inch crust to accommodate the filling. Also, consider the depth of the crust.
Q: How do I prevent the cheesecake from cracking?
A: Baking in a water bath and allowing the cheesecake to cool gradually in the oven are the best ways to prevent cracking.
Q: Can I freeze cheesecake?
A: Yes, cheesecake freezes well. Wrap it tightly in plastic wrap and then in foil, or store in an airtight container. Thaw overnight in the refrigerator.
Q: Why is my cheesecake still wobbly after baking?
A: A slight wobble in the center is normal. The cheesecake will continue to set as it cools in the refrigerator.
Final Thoughts
This Diner Cheesecake recipe is a true classic for a reason – it’s simple, satisfying, and utterly delicious. Don’t be intimidated by the water bath; it’s the secret to that perfectly creamy, crack-free texture. I encourage you to try this recipe and create your own memories with each slice. Whether you enjoy it with a cup of coffee, a scoop of ice cream, or simply on its own, this cheesecake is sure to bring a smile to your face. I’d love to hear about your experiences with the recipe, so feel free to share your feedback and any creative twists you come up with. Happy baking!