
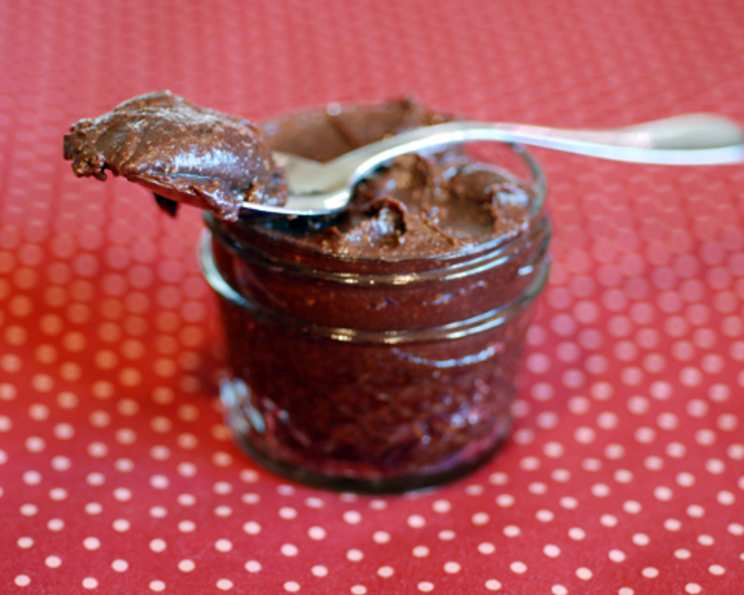
Homemade Hazelnut Chocolate Spread: A DIY Nutella Delight
Growing up, the small glass jar of hazelnut chocolate spread held a certain mystique. It wasn’t an everyday treat, reserved instead for special weekend breakfasts. I remember the pure joy of spreading it thickly on warm toast, the rich, nutty aroma filling the kitchen. That first bite was pure bliss, a combination of sweet chocolate and toasted hazelnuts that was simply irresistible. Now, I recreate that magic in my own kitchen, using simple, wholesome ingredients, and I’m excited to share the recipe with you.
Recipe Overview
- Prep Time: 5 minutes
- Cook Time: 8-10 minutes
- Total Time: 18 minutes
- Yields: 1 1/2 cups
- Serves: 4-6
- Dietary Type: Gluten-Free, Dairy-Free
Ingredients
- 1 cup hazelnuts
- 1/4 cup cocoa powder
- 5 tablespoons agave nectar
- 1 tablespoon vanilla extract
- 1 tablespoon hazelnut oil
- 1 pinch celtic sea salt
Equipment Needed
- Baking sheet
- Towel
- Food processor
- Glass mason jar
Instructions
- Preheat your oven to 350°F (175°C).
- Spread the hazelnuts in a single layer on a baking sheet.
- Roast the hazelnuts in the preheated oven for 8-10 minutes, or until they darken slightly and become fragrant. Keep a close eye on them to prevent burning.
- Remove the hazelnuts from the oven and immediately transfer them to a clean kitchen towel.
- Fold the towel over the hazelnuts and rub them vigorously to remove as much of the skins as possible. Don’t worry if you can’t remove all the skins; a little bit of skin won’t affect the flavor significantly.
- Transfer the hazelnuts to a food processor.
- Grind the hazelnuts in the food processor until they form a smooth butter. This will take about 5 minutes, and you’ll need to stop occasionally to scrape down the sides of the bowl with a spatula. Be patient; the hazelnuts will initially turn into a coarse meal, then gradually release their oils and transform into a creamy butter.
- Once the hazelnuts have transformed into a smooth butter, add the cocoa powder, agave nectar, vanilla extract, hazelnut oil, and celtic sea salt to the food processor.
- Process the mixture until all the ingredients are well blended and the spread is smooth, about 1 minute. Scrape down the sides of the bowl as needed to ensure everything is evenly incorporated.
- Transfer the homemade hazelnut chocolate spread to a clean glass mason jar.
- Store the jar in the refrigerator.
- Before serving, allow the spread to come to room temperature for a smoother, more spreadable consistency.
Expert Tips & Tricks
- Roasting the Hazelnuts: The roasting step is crucial for developing the nutty flavor of the spread. Don’t skip it! Watch the hazelnuts carefully while they are roasting, as they can burn quickly. If you notice them smoking, reduce the oven temperature slightly.
- Removing the Hazelnut Skins: While removing the skins is ideal for a smoother texture, it can be a bit tedious. If you’re short on time or don’t mind a slightly more rustic texture, you can skip this step.
- Achieving a Smooth Consistency: The key to a smooth spread is a powerful food processor and patience. Continue processing the hazelnuts until they release their oils and form a creamy butter. If your food processor struggles, you may need to add a little more hazelnut oil to help it along.
- Sweetness Level: Adjust the amount of agave nectar to your preference. If you prefer a sweeter spread, add a bit more. You can also substitute maple syrup or honey (if not vegan).
- Enhancing the Chocolate Flavor: For a richer chocolate flavor, try using dark cocoa powder or adding a tablespoon of melted dark chocolate to the mixture.
Serving & Storage Suggestions
Serve your homemade hazelnut chocolate spread on toast, bagels, pancakes, waffles, or crackers. It’s also delicious as a dip for fruit or pretzels, or as a filling for crepes. You can even add it to smoothies or milkshakes for a decadent treat.
Store the spread in an airtight glass jar in the refrigerator for up to 2 weeks. It will firm up in the fridge, so allow it to come to room temperature for about 30 minutes before serving for optimal spreadability. While freezing is not recommended due to potential changes in texture, the spread will last quite a while in the refrigerator if stored properly.
Nutritional Information
| Nutrient | Amount per Serving | % Daily Value |
|---|---|---|
| Calories | 263.6 kcal | N/A |
| Calories from Fat | 221 g | 84% |
| Total Fat | 24.6 g | 37% |
| Saturated Fat | 2.2 g | 10% |
| Cholesterol | 0 mg | 0% |
| Sodium | 146.8 mg | 6% |
| Total Carbohydrate | 9.2 g | 3% |
| Dietary Fiber | 5.1 g | 20% |
| Sugars | 2 g | 7% |
| Protein | 6.1 g | 12% |
Note: Nutritional information is an estimate and may vary depending on specific ingredients and portion sizes.
Variations & Substitutions
- Chocolate Intensity: Experiment with different types of cocoa powder to tailor the chocolate flavor to your liking. Dutch-processed cocoa will yield a smoother, milder chocolate taste, while natural cocoa powder will provide a more intense, bitter flavor.
- Nut Butters: While this recipe focuses on hazelnuts, feel free to experiment with other nut butters, such as almond butter or cashew butter, for a unique twist.
- Sweeteners: If you don’t have agave nectar on hand, you can substitute maple syrup, honey (if not vegan), or even a few drops of liquid stevia to taste.
- Spices: Add a pinch of cinnamon, nutmeg, or cardamom for a warm, spiced variation.
- Sea Salt: A pinch of flaky sea salt on top of the spread enhances the flavors.
FAQs (Frequently Asked Questions)
Q: Why is my hazelnut butter grainy?
A: The graininess is often due to the hazelnuts not being processed long enough. Continue processing until the oils are fully released, and a smooth butter forms. You may also need a higher-powered food processor.
Q: Can I use a blender instead of a food processor?
A: While a blender can work, it’s more challenging to achieve a truly smooth consistency. You may need to add more hazelnut oil to help the mixture blend properly, and you’ll need to scrape down the sides frequently.
Q: How do I make this spread sweeter?
A: Gradually add more agave nectar (or your preferred sweetener) to taste, processing until well combined. Remember that a little goes a long way.
Q: Why is my spread so thick?
A: The spread will thicken as it cools in the refrigerator. Allow it to come to room temperature for a softer, more spreadable consistency. If it’s still too thick, add a teaspoon or two of hazelnut oil and mix well.
Q: Can I use roasted hazelnuts that I buy from the store?
A: Yes, you can use pre-roasted hazelnuts to save time, but make sure they are unsalted and unflavored. You may still want to warm them slightly in the oven before processing to enhance their flavor and help them release their oils.
Final Thoughts
Creating your own homemade hazelnut chocolate spread is a simple and rewarding experience. Not only do you get to control the ingredients and sweetness level, but you also get to enjoy a delicious and wholesome treat that’s far superior to store-bought versions. So, gather your ingredients, fire up your food processor, and prepare to be amazed by the rich, nutty flavor of this DIY delight. I encourage you to try it, experiment with variations, and share your creations with loved ones. Bon appétit!