
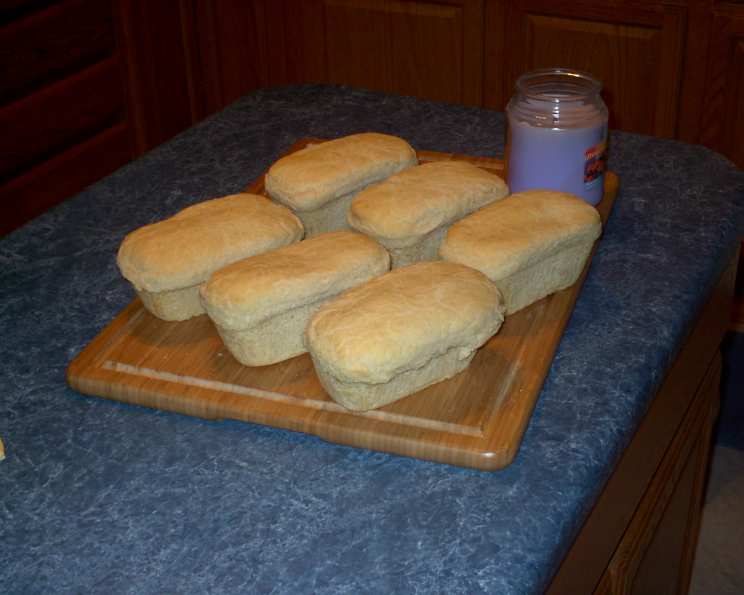
Dj’s “True” Salt Rising Bread: A Culinary Journey
My grandmother, bless her heart, was a woman of simple pleasures, and her salt rising bread was the cornerstone of our family gatherings. I remember the unique aroma, a kind of pungent, almost cheese-like scent that filled her kitchen as the starter worked its magic. It wasn’t your typical yeasty bread smell; it was something earthier, more primal. Every slice, slathered with butter fresh from the churn, felt like a warm hug, a taste of history and heritage that connected us to generations past. Now, years later, I’m sharing my rendition of this special loaf, a process refined with the help of salt rising bread experts.
Recipe Overview
- Prep Time: 30 minutes
- Cook Time: 30-45 minutes
- Total Time: 12 hours 30 minutes (including rising time)
- Yields: 3 loaves
- Serves: 30
- Dietary Type: Vegetarian (can be vegan with plant-based milk)
Ingredients
For the Starter:
- 3 teaspoons cornmeal
- 1 teaspoon white flour
- 1/8 teaspoon baking soda
- 1/2 cup scalded milk (dairy or non-dairy)
For the Sponge:
- 2 cups warm water
- 1 1/2 cups white flour
For the Bread:
- 3 cups warm water
- 11 cups white flour (approximately)
Equipment Needed
- Medium-sized bowl
- Large mixing bowl
- Three 9×5 inch loaf pans
- Yogurt maker (optional, but recommended for consistent temperature)
Instructions
- Prepare the Starter: In a small bowl, combine the cornmeal, white flour, and baking soda.
- Add the Milk: Pour the scalded milk over the dry ingredients and stir until just combined. Do not overmix.
- Incubate the Starter: Keep the mixture warm overnight until foamy. This is crucial. A yogurt maker set to a consistent temperature is ideal for this. The starter needs to develop a distinctive, almost “rotten cheese” smell. This is a sign that the necessary bacterial activity is taking place. If you don’t achieve this smell and a foamy texture, the bread will not rise properly. This initial mixture is called a “raisin.”
- Prepare the Sponge: Once the “raisin” has foamed and smells ripe, transfer it to a medium-sized bowl.
- Add Water and Flour: Add 2 cups of warm water to the starter mixture. Then, gradually add enough flour (about 1 1/2 cups) to create a thin batter consistency similar to pancake batter.
- Proof the Sponge: Stir the batter thoroughly and let it rise again until it becomes foamy. This usually takes between 2 to 3 hours. The environment should be warm and draft-free.
- Prepare the Dough: In a large mixing bowl, add 1 cup of warm water for each loaf of bread you intend to make. (For example, 3 cups of warm water for 3 loaves.)
- Combine Ingredients: Add approximately 10 cups of flour to the water in the large bowl. Gradually incorporate the foamy sponge into the mixture.
- Knead the Dough: Knead the dough vigorously for about 8 to 10 minutes until it becomes smooth and elastic. The dough should be firm but not stiff.
- Shape the Loaves: Divide the dough into the desired number of loaves (up to 3, or adjust the ingredients proportionally for up to 6). Form each portion into a loaf shape and place it into a well-greased loaf pan.
- Grease the Tops: Grease the tops of the loaves to prevent them from drying out during the final rise.
- Proof the Loaves: Let the loaves rise again in a warm place until doubled in size. This can take anywhere from 2 to 6 hours, depending on the temperature and humidity. A slightly warmed oven with the oven light turned on provides a controlled, consistent environment.
- Bake the Bread: Preheat your oven to 300°F (150°C).
- Bake: Bake the loaves for 30 to 45 minutes, or until they sound hollow when tapped on the bottom. Keep a close eye on them; ovens vary.
- Cool: Let the loaves cool completely on a wire rack before slicing. This prevents the bread from becoming gummy.
Expert Tips & Tricks
- Temperature is Key: Maintaining a consistent, warm temperature throughout the starter and sponge stages is paramount for success. A yogurt maker or a warm water bath can be your best friend.
- The Smell Test: Don’t be afraid of the “rotten cheese” smell. It’s a sign that the bacteria are doing their job.
- Flour Adjustments: The amount of flour needed may vary depending on humidity and the type of flour used. Add flour gradually until the dough reaches the desired consistency.
- Doneness Check: Tapping the bottom of the loaf is a reliable way to check for doneness. If it sounds hollow, it’s ready.
- Prevent Over-Browning: If the tops of the loaves are browning too quickly, tent them loosely with foil during the last 15 minutes of baking.
Serving & Storage Suggestions
Salt rising bread is delicious served warm with butter, jam, or honey. It also makes excellent toast and sandwiches. Store cooled loaves at room temperature in a bread box or airtight container for up to 3 days. For longer storage, wrap tightly and freeze for up to 3 months. To reheat frozen bread, thaw completely and then warm in a low oven or toaster.
Nutritional Information
| Nutrient | Amount per Serving | % Daily Value |
|---|---|---|
| Calories | 193.4 kcal | N/A |
| Calories from Fat | 6 g | 3% |
| Total Fat | 0.7 g | 1% |
| Saturated Fat | 0.2 g | 0% |
| Cholesterol | 0.6 mg | 0% |
| Sodium | 9.2 mg | 0% |
| Total Carbohydrate | 40.2 g | 13% |
| Dietary Fiber | 1.4 g | 5% |
| Sugars | 0.1 g | 0% |
| Protein | 5.5 g | 11% |
Note: Nutritional information is an estimate and may vary depending on specific ingredients and preparation methods.
Variations & Substitutions
- Dairy-Free: Use your favorite plant-based milk (soy, almond, or oat) in place of dairy milk. Ensure it is scalded.
- Whole Wheat: Substitute up to half of the white flour with whole wheat flour for a nuttier flavor and added fiber.
- Sweetness: Add a tablespoon or two of honey or maple syrup to the dough for a slightly sweeter bread.
- Herbs: Incorporate dried herbs like rosemary, thyme, or sage into the dough for a savory twist.
FAQs (Frequently Asked Questions)
Q: What is salt rising bread, and how is it different from regular bread?
A: Salt rising bread is a type of bread that doesn’t rely on commercial yeast for leavening. Instead, it uses a bacterial fermentation process, resulting in a unique flavor and texture.
Q: Why is it called salt rising bread if there’s no salt listed in the ingredients?
A: The name likely originates from the practice of setting the starter near a source of warmth, such as a salt bin, in early American kitchens. It’s not because salt is a direct ingredient.
Q: What if my starter doesn’t foam or develop the “rotten cheese” smell?
A: The most common reason is an inconsistent or insufficient temperature. Ensure a consistently warm environment (around 90-100°F) and be patient. It may take longer depending on your environment.
Q: Can I use bread flour instead of all-purpose flour?
A: While you can, all-purpose flour is recommended for this recipe. Bread flour might result in a slightly denser loaf.
Q: How do I know when the loaves are properly proofed?
A: The loaves should be almost doubled in size and feel light and airy to the touch. Gently poke the dough; if the indentation slowly springs back, it’s ready to bake.
Final Thoughts
Embarking on the salt rising bread journey is more than just baking; it’s about connecting with a culinary tradition, understanding the science of fermentation, and experiencing the satisfaction of creating something truly unique. While it requires patience and attention to detail, the reward is a loaf of bread with unparalleled flavor and a story to tell. Don’t be afraid to experiment, share your successes (and learning experiences!), and most importantly, enjoy the process. Pair your freshly baked salt rising bread with a hearty soup or stew for a comforting meal, or simply savor a slice with a cup of coffee – the possibilities are endless.