
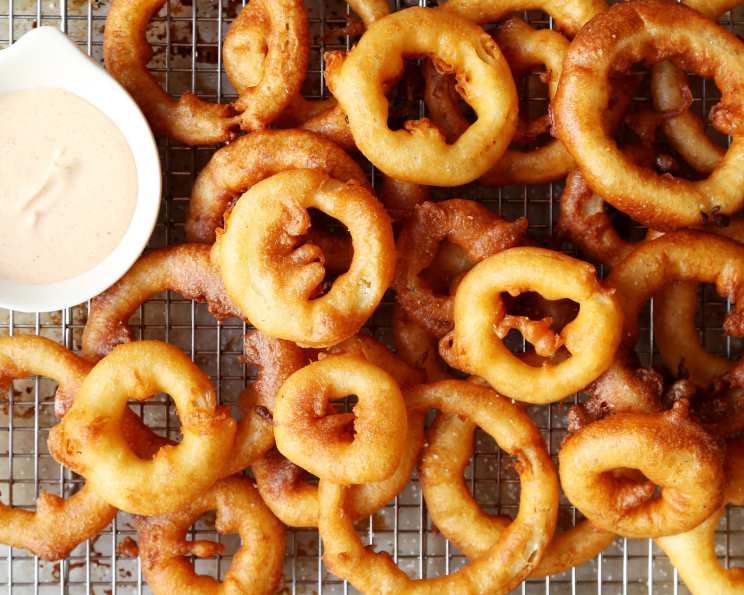
Golden, Crispy, Homemade Onion Rings: A Chef’s Guide
There’s a certain magic about biting into a perfectly cooked onion ring. For me, it’s pure nostalgia. I remember summers spent at my grandfather’s diner, the scent of frying onions swirling in the air. He’d always sneak me an extra order, fresh from the fryer, their crispy batter yielding to the sweet, tender onion inside. Forget the burgers; those golden rings were the star of the show. And while I appreciate a good frozen onion ring in a pinch, nothing beats the taste of homemade. These are so much fresher and better than the frozen ones.
Recipe Overview
- Prep Time: 15 minutes
- Cook Time: Approximately 10-15 minutes per batch
- Total Time: 25-30 minutes
- Servings: 4-6
- Yield: Variable, depending on onion size
- Dietary Type: Vegetarian
Ingredients
- 1 egg
- 1/4 cup vegetable oil
- 1 cup milk
- 1 cup flour
- 1/2 teaspoon salt
- 1 teaspoon baking powder
- 2 large sweet onions, sliced into 1/4-inch rings
- 1/2 cup flour (for coating onions)
- Oil (for frying) – vegetable, canola, or peanut oil work well
Equipment Needed
- Large bowl
- Whisk or mixer
- Shallow dishes or plates
- Large, heavy-bottomed pot or deep fryer
- Slotted spoon or spider
- Paper towels
Instructions
- In a large bowl, combine the egg, vegetable oil, and milk. Use a mixer on low speed or a whisk to blend for about 1 minute, until well combined.
- In the same bowl, add the flour, salt, and baking powder. Mix until the batter is smooth, ensuring there are no lumps. Overmixing can lead to a tougher batter, so mix only until just combined.
- Place the 1/2 cup of flour in a shallow dish or on a plate. This flour is used to coat the onion rings before dipping them into the batter.
- Separate the onion slices into individual rings. Dredge each onion ring in the flour, making sure it is fully coated. Shake off any excess flour. This dry coating helps the batter adhere better.
- Heat the oil in a large, heavy-bottomed pot or deep fryer to 375°F (190°C). Use a thermometer to ensure the oil reaches the correct temperature. If the oil is not hot enough, the onion rings will be soggy. If it is too hot, they will burn before the onion is cooked.
- Dip the flour-coated onion rings into the prepared batter, ensuring they are fully submerged. Let any excess batter drip off before carefully placing the onion rings into the hot oil.
- Fry the onion rings in batches, being careful not to overcrowd the pot. Overcrowding will lower the oil temperature and result in soggy onion rings. Fry for about 2-3 minutes per side, until they are golden brown and crispy.
- Use a slotted spoon or spider to remove the fried onion rings from the oil. Place them on a plate lined with paper towels to drain any excess oil.
- Repeat steps 4-8 until all of the onion rings are cooked.
- Serve immediately and enjoy.
Expert Tips & Tricks
- Temperature is Key: Maintaining the correct oil temperature (375°F) is crucial for achieving crispy, non-greasy onion rings. Use a deep-fry thermometer and adjust the heat as needed to maintain the temperature.
- Don’t Overcrowd: Frying in batches is essential. Overcrowding the pot lowers the oil temperature, resulting in soggy onion rings.
- Double Dip for Extra Crunch: For extra-crispy onion rings, try double-dipping them. After the initial flour and batter coating, dip them back into the batter and then fry.
- Seasoned Flour: Add a pinch of paprika, garlic powder, or cayenne pepper to the flour used for coating the onions for an extra layer of flavor.
- Chill the Batter: Let the batter rest in the refrigerator for 30 minutes before using. This allows the gluten to relax, resulting in a slightly more tender onion ring.
- Beer Batter: Substitute some of the milk with beer (lager or pale ale) for a slightly richer, more flavorful batter.
Serving & Storage Suggestions
Serve your freshly fried onion rings immediately for the best flavor and texture. They pair perfectly with burgers, sandwiches, or as a side dish for grilled meats. Offer them with your favorite dipping sauces, such as ketchup, ranch dressing, barbecue sauce, or a spicy aioli.
Leftover onion rings are best stored in an airtight container in the refrigerator. They will lose some of their crispness, but can be reheated in a preheated oven at 350°F (175°C) for a few minutes to help restore some of the texture. Reheating in an air fryer also works well. While you can freeze them, it’s not recommended as the texture will significantly degrade upon thawing. They are best consumed fresh.
Nutritional Information
Please note that these values are estimates and can vary based on specific ingredients and cooking methods.
| Nutrient | Amount per Serving | % Daily Value |
|---|---|---|
| Calories | 400 kcal | 20% |
| Total Fat | 25g | 38% |
| Saturated Fat | 5g | 25% |
| Cholesterol | 60mg | 20% |
| Sodium | 500mg | 21% |
| Total Carbohydrate | 40g | 13% |
| Dietary Fiber | 3g | 12% |
| Sugars | 5g | – |
| Protein | 8g | 16% |
Variations & Substitutions
- Gluten-Free: Use a gluten-free all-purpose flour blend in place of regular flour. Ensure the baking powder is also gluten-free.
- Dairy-Free: Substitute the milk with a plant-based milk alternative, such as almond milk, soy milk, or oat milk.
- Spicy Onion Rings: Add a pinch of cayenne pepper or a dash of hot sauce to the batter for a spicy kick.
- Sweet Potato Onion Rings: Substitute sweet onions with sweet potatoes, sliced into rings. Note that sweet potatoes may require slightly longer cooking times.
- Panko Breadcrumb Coating: For a different texture, replace the flour coating with panko breadcrumbs. Dip the onion rings in flour, then egg, then panko before frying.
FAQs (Frequently Asked Questions)
Q: Why are my onion rings soggy?
A: Soggy onion rings are usually caused by frying at too low a temperature or overcrowding the pot. Make sure your oil is at 375°F (190°C) and fry in batches.
Q: Can I make the batter ahead of time?
A: Yes, you can prepare the batter up to a few hours in advance. Cover it and store it in the refrigerator. You may need to whisk it again before using.
Q: What is the best type of oil for frying onion rings?
A: Vegetable oil, canola oil, and peanut oil are all good choices for frying onion rings. They have a high smoke point and a neutral flavor.
Q: How do I keep the onion rings warm and crispy until serving?
A: Place the fried onion rings on a wire rack in a preheated oven at 200°F (93°C) to keep them warm and crispy. Avoid stacking them, as this will cause them to steam and become soggy.
Q: Can I bake these instead of frying?
A: While you can bake them, the texture will not be the same as fried onion rings. If baking, preheat your oven to 400°F (200°C), place the battered onion rings on a baking sheet lined with parchment paper, and bake for about 20-25 minutes, flipping halfway through.
Final Thoughts
Now that you’re armed with this comprehensive guide, it’s time to create your own batch of golden, crispy, homemade onion rings. Don’t be afraid to experiment with different seasonings and dipping sauces to find your perfect combination. Share your culinary creations with friends and family, and let the crispy goodness bring a smile to everyone’s face. And please, let me know how they turn out! I’m always eager to hear about your cooking adventures. Maybe try pairing them with a juicy burger and a cold beer for the ultimate comfort food experience. Happy frying!