
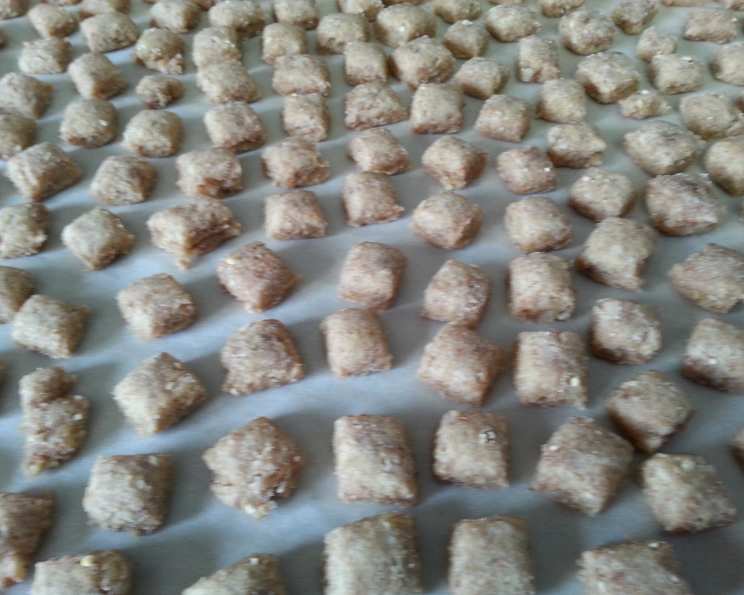
Dog Treats – Pet Puffs
My old golden retriever, Bailey, had the most discerning palate of any dog I’ve ever known. He wouldn’t just eat anything; every treat had to pass his rigorous sniff test. Store-bought treats were often rejected with a dramatic turn of his head, leaving me on a quest for something he’d actually enjoy. That’s how I stumbled upon creating my own dog treats, starting with these “Pet Puffs.” The first batch? A resounding success. Bailey practically inhaled them, tail wagging furiously – a moment I’ll always cherish.
Recipe Overview
- Prep Time: 30 minutes
- Cook Time: 25 minutes
- Total Time: 55 minutes
- Yields: Approximately 100 small puffs
- Dietary Type: Contains Gluten, Dairy
Ingredients
- 1 (1/4 ounce) envelope yeast
- 1/4 cup very warm water
- 1 teaspoon sugar
- 1 1/2 cups whole wheat flour
- 1 cup flour
- 1 cup powdered milk
- 1 (1/4 ounce) envelope unflavored gelatin
- 1/4 cup corn oil
- 1 egg
- 1 (6 ounce) can dog food (Wellness Core Turkey, turkey liver, chicken liver flavor recommended)
- 1/4 cup water
Equipment Needed
- Mixing bowls
- Measuring cups and spoons
- Cookie sheets
- Spoon or small cookie scoop
- Oven
Instructions
-
Preheat your oven to 300°F (150°C). This low temperature ensures that the puffs dry out nicely without burning.
-
In a small bowl, dissolve the yeast in the very warm water. Add the sugar and let it stand for about 5-10 minutes, or until foamy. This step activates the yeast, ensuring a good rise and a lighter texture for the puffs.
-
In a large mixing bowl, combine the whole wheat flour, flour, and powdered milk. Whisk them together to ensure even distribution. The powdered milk adds a subtle sweetness and enhances the browning during baking.
-
In another bowl, mix together the activated yeast mixture, corn oil, egg, dog food, and water. Ensure that the dog food is well combined – a fork works well to break it down. I’ve found that using a high-quality, flavorful dog food like Wellness Core Turkey significantly improves the taste and aroma of the puffs (at least, according to my dogs!).
-
Gradually add the wet ingredients to the dry ingredients, mixing well to form a stiff dough. The dough will be quite firm, and you may find it easier to incorporate the last bit of flour with your hands. Don’t be afraid to get in there!
-
Shape the dough into small, roughly 1/2 teaspoon-sized balls. A small cookie scoop can help with uniformity, but don’t stress about making them perfect. Place the balls on ungreased cookie sheets, leaving a little space between each one.
-
Bake in the preheated oven for 25 minutes. The puffs should be lightly golden brown and firm to the touch. If you make larger puffs, increase the baking time accordingly.
-
Cool the Pet Puffs completely on the cookie sheets before transferring them to a storage container. This allows them to firm up further and prevents condensation, which can lead to spoilage.
Expert Tips & Tricks
-
Flavor Boost: For an extra layer of flavor, consider adding a small amount of pureed liver or even unsweetened applesauce to the wet ingredients. Experiment to find your dog’s favorite combination.
-
Texture Perfection: Freezing and thawing these Pet Puffs significantly improves their texture. They become slightly chewier, which many dogs find more appealing.
-
Rolling and Cutting: Instead of forming individual balls, you can roll out the dough and cut it into small pieces using a pizza cutter or cookie cutters. This method can save time and create more uniform shapes.
-
Even Baking: To ensure even baking, rotate the cookie sheets halfway through the baking time. This helps to prevent hot spots and ensures that all the puffs are cooked to perfection.
-
Peanut Butter Caution: While peanut butter might seem like a good addition, I’ve found that it can make the dough crumbly and difficult to work with. If you do use peanut butter, use it sparingly and adjust the other ingredients as needed.
Serving & Storage Suggestions
Serve the Pet Puffs as a training treat or a small snack between meals. Because these treats contain fresh ingredients, they are best stored in an airtight container in the refrigerator for up to a week. For longer storage, freeze them for up to three months. Thaw them in the refrigerator before serving.
Nutritional Information
Here’s an estimated nutritional breakdown per puff:
| Nutrient | Amount per Serving | % Daily Value (for dogs) |
|---|---|---|
| Calories | 23 kcal | N/A |
| Fat | 1 g | N/A |
| Saturated Fat | 0.3 g | N/A |
| Cholesterol | 3 mg | N/A |
| Sodium | 6 mg | N/A |
| Carbohydrates | 3 g | N/A |
| Fiber | 0.2 g | N/A |
| Sugar | 0.6 g | N/A |
| Protein | 1 g | N/A |
Note: Daily values for dogs vary greatly depending on breed, size, activity level, and overall diet. Consult with your veterinarian for personalized recommendations.
Variations & Substitutions
-
Gluten-Free: Substitute the whole wheat flour and flour with a gluten-free all-purpose flour blend. Be sure to use a blend that contains xanthan gum or another binder to help hold the dough together.
-
Dairy-Free: Replace the powdered milk with a dairy-free alternative such as powdered coconut milk or nutritional yeast. Keep in mind that nutritional yeast will add a savory flavor to the puffs.
-
Liver Boost: Replace part of the dog food with pureed chicken or beef liver for a richer, more enticing flavor (and extra nutrients!).
-
Seasonal Flavors: Add a pinch of dried herbs like rosemary or thyme for a more aromatic treat. In the fall, a small amount of pumpkin puree can also be added.
FAQs (Frequently Asked Questions)
Q: Can I use a different type of dog food?
A: Yes, you can use other flavors or brands of canned dog food. Just be mindful of the ingredients and avoid those with excessive amounts of salt, sugar, or artificial additives.
Q: My dough is too dry. What should I do?
A: Add a tablespoon or two of water until the dough comes together. The consistency should be stiff but pliable.
Q: Can I bake these in a dehydrator instead of an oven?
A: Yes, you can dehydrate them at a low temperature (around 135°F or 57°C) for several hours, until they are completely dry and firm.
Q: How long do these treats last?
A: They will last for about a week in the refrigerator or up to three months in the freezer.
Q: Are these treats suitable for puppies?
A: It depends on the puppy’s age and dietary needs. Consult with your veterinarian before giving homemade treats to puppies.
Final Thoughts
Creating these Pet Puffs is a simple and rewarding way to show your furry friend some love. They’re packed with wholesome ingredients, and you have complete control over what goes into them. Don’t be afraid to experiment with different flavors and ingredients to create a treat that your dog will absolutely adore. And, who knows, you might even earn a few extra tail wags and sloppy kisses in the process! Happy baking!