
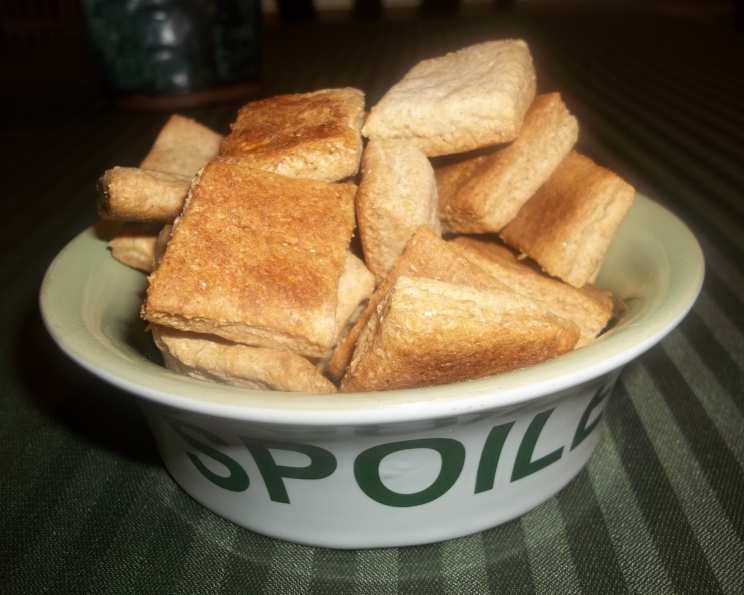
Homemade Dog Treats: A Recipe for Happy Tails
There’s something truly special about the bond we share with our dogs. Their unwavering loyalty and unconditional love deserve the very best, and that includes what they eat! I’ll always remember the first time I baked treats for my golden retriever, Buddy. The sheer joy on his face as he gobbled down those simple, wholesome biscuits was more rewarding than any Michelin-star meal I’ve ever prepared. It’s those moments of pure, unadulterated canine happiness that make baking these treats so worthwhile.
Recipe Overview
- Prep Time: 15 minutes
- Cook Time: 30 minutes
- Total Time: 45 minutes
- Yields: 30-40 cookies
- Dietary Type: Homemade
Ingredients
- 2 ½ cups whole wheat flour
- ½ teaspoon salt
- 1 teaspoon sugar
- ⅓ cup hard margarine (or ⅓ cup butter, cubed)
- 1 egg
- ½ cup skim milk
- ¼ cup creamy peanut butter
Equipment Needed
- Large mixing bowl
- Fork
- Small mixing bowl
- Whisk
- Measuring cups and spoons
- Rolling pin
- Cookie cutters (optional)
- Baking sheet
- Cooling rack
Instructions
- Preheat your oven to 350°F (175°C).
- In a large mixing bowl, combine the whole wheat flour, salt, and sugar. Mix these dry ingredients together using a fork until well combined.
- Add the cubed margarine (or butter) to the flour mixture. Using your fingertips or a pastry blender, work the margarine into the flour until the mixture resembles coarse crumbs or small clumps. This step is crucial for achieving a slightly crumbly yet firm texture.
- Create a large well in the center of the flour mixture.
- In a separate small bowl, whisk the egg with a fork until lightly beaten.
- Add the skim milk and creamy peanut butter to the beaten egg. Whisk all the ingredients together until the peanut butter is mostly incorporated, though it’s perfectly fine if streaks of peanut butter remain. These streaks add a little visual appeal and extra bursts of flavor.
- Pour the wet ingredients (egg, milk, and peanut butter) into the well in the center of the dry ingredients (flour mixture).
- Using a fork, gradually incorporate the wet ingredients into the dry ingredients, working from the center outwards.
- Once a shaggy dough forms, use your hands to knead the mixture on a lightly floured surface. Knead for approximately 2-3 minutes until the dough is evenly moist and comes together into a cohesive ball. Don’t over-knead!
- Place the dough ball on a lightly floured surface. Using a rolling pin, roll the dough out to about ½ inch thickness.
- Use cookie cutters to cut out fun shapes, or simply cut the dough into squares or rectangles using a knife or pizza cutter, according to your desired size and shape. Remember, these are for your dog, so practicality and size are key!
- Carefully transfer the cut-out treats onto an ungreased baking sheet, leaving a little space between each treat.
- Bake in the preheated oven for 30 minutes, or until the treats are golden brown.
- For extra crispy treats, turn off the oven after the initial baking time and leave the treats inside with the oven door slightly ajar for an additional 15-20 minutes. This allows them to dry out further and achieve a satisfying crunch. Monitor closely to prevent burning.
- Remove the baking sheet from the oven and transfer the baked dog treats to a wire rack to cool completely.
Expert Tips & Tricks
- For a richer flavor, use all-natural peanut butter without added sugars or artificial sweeteners. Always check the label to ensure it does not contain xylitol, which is highly toxic to dogs.
- If the dough is too sticky to work with, add a tablespoon of whole wheat flour at a time until it reaches a workable consistency.
- If you don’t have hard margarine, you can use softened butter. Just make sure it’s cold enough to create those crucial clumps when mixed with the flour.
- Consider adding other dog-friendly ingredients like shredded carrots, unsweetened applesauce, or cooked sweet potato for added nutrients and flavor.
- Use different sized cookie cutters to create treats suitable for different sized dogs. Mini treats are perfect for training!
- To prevent the treats from sticking to the baking sheet, you can line it with parchment paper or a silicone baking mat.
Serving & Storage Suggestions
Serve these homemade dog treats as a reward or a snack. Always ensure your dog has fresh water available.
- Room Temperature: Store cooled treats in an airtight container at room temperature for up to 1 week.
- Refrigeration: For longer storage, keep the treats in the refrigerator for up to 2 weeks.
- Freezing: For the longest shelf life, freeze the treats in a freezer-safe bag or container for up to 3 months. Thaw at room temperature before serving.
Nutritional Information
Please note that the following nutritional information is an estimate and may vary based on specific ingredient brands and portion sizes.
| Nutrient | Amount per Serving (approx. 1 cookie) |
|---|---|
| Calories | 69 kcal |
| Total Fat | 3.5g |
| Saturated Fat | 0.8g |
| Cholesterol | 6.3mg |
| Sodium | 77.2mg |
| Total Carbohydrate | 8g |
| Dietary Fiber | 1.2g |
| Sugars | 0.4g |
| Protein | 2.2g |
Variations & Substitutions
- Gluten-Free: Substitute the whole wheat flour with a gluten-free blend specifically formulated for baking.
- Grain-Free: Use oat flour or a blend of almond flour and coconut flour for a grain-free option.
- Dairy-Free: Substitute the skim milk with unsweetened almond milk or oat milk.
- Pumpkin Spice: Add 1-2 teaspoons of pumpkin pie spice to the flour mixture for a seasonal treat.
- Savory Treats: Omit the sugar and add a pinch of garlic powder or dried rosemary for a savory flavor.
FAQs (Frequently Asked Questions)
Q: Can I use regular all-purpose flour instead of whole wheat flour?
A: Yes, you can, but whole wheat flour provides more fiber and nutrients, making it a healthier option for your dog.
Q: My dog has allergies. Can I substitute any of the ingredients?
A: Absolutely! Refer to the “Variations & Substitutions” section for ideas on swapping ingredients based on your dog’s specific needs. Always consult with your veterinarian if you have concerns.
Q: How do I know when the treats are done baking?
A: The treats should be golden brown and firm to the touch. Remember to use the “crisping” step I mentioned earlier by turning the oven off and leaving them inside for a little longer.
Q: Can I add other ingredients like vegetables or fruits?
A: Yes, you can! Shredded carrots, unsweetened applesauce, and cooked sweet potato are great additions. Just adjust the amount of liquid if needed to maintain the dough’s consistency.
Q: How many treats should I give my dog per day?
A: Treats should only make up a small portion of your dog’s daily calorie intake. Consult with your veterinarian to determine the appropriate amount based on your dog’s size, age, and activity level.
Final Thoughts
Baking these homemade dog treats is a simple yet profound way to show your furry friend how much you care. It’s an act of love that nourishes both their body and your bond. I encourage you to try this recipe and experiment with different variations to find your dog’s favorite combination. Don’t be afraid to get creative and have fun! If you do try this recipe, please share your experience with me! I’d love to hear about your dog’s reaction and any adaptations you made. Happy baking, and happy tails!