
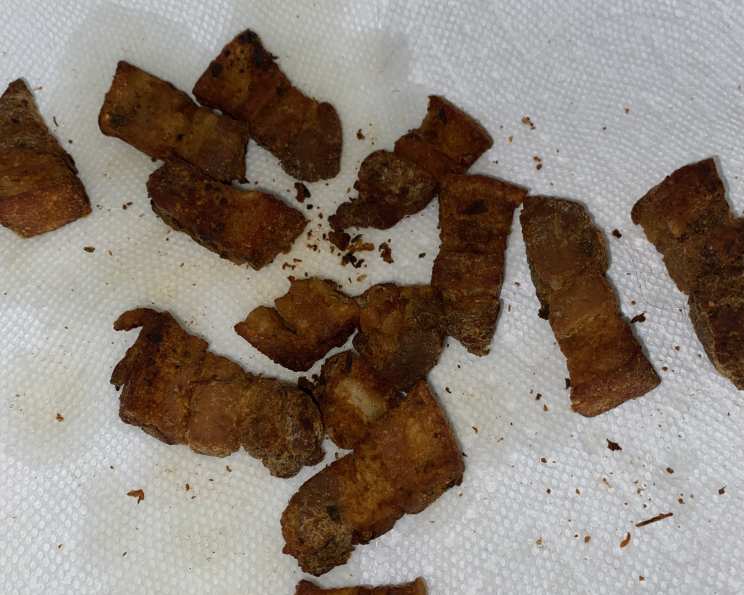
Mastering Dominican Chicharrón: A Crispy Culinary Adventure
The first time I tasted truly exceptional chicharrón was at a roadside colmado in the Dominican Republic. The air hung thick with the scent of frying pork and the sounds of merengue music. I remember biting into a piece, the shattering crispness giving way to succulent, flavorful meat. The combination of textures and tastes was simply divine – a symphony of savory satisfaction that I’ve been chasing ever since. It was more than just food; it was an experience, a connection to the heart of Dominican culture. That memory fuels my passion for recreating this iconic dish, and I’m thrilled to share my version with you.
Recipe Overview
- Prep Time: 15 minutes
- Cook Time: 45 minutes
- Total Time: 1 hour
- Servings: 8
- Yield: Varies depending on the pork, approximately 4-6 cups
- Dietary Type: Not specified, but potentially keto/low carb if strictly pork skins are used
Ingredients
- 2 ½ lbs pork skins or pork belly (for chicharrón)
- 2 cups water
- 2 tablespoons dried oregano
- 2 tablespoons salt
- 1 lime
- Hot sauce (optional, for serving)
Equipment Needed
- Large heavy-bottomed pan or pot
- Slotted spoon or tongs
- Paper towels
- Cutting board
- Knife
Instructions
-
Prepare the Pork: On a cutting board, if using a whole pork belly, cut the pork into 1-2 inch pieces. If using pork skins, ensure they are cut into manageable sizes for frying.
-
Combine Ingredients: Place the pork, water, salt, and dried oregano in a large, heavy-bottomed pan or pot.
-
Add Lime Juice: Squeeze the juice from the lime into the pan with the other ingredients. Discard the lime remains.
-
Initial Cooking: Place the pan over high heat and bring the mixture to a boil. Once boiling, reduce the heat to medium-high. The goal is to cook the pork and allow the water to evaporate gradually.
-
Water Evaporation: Continue cooking the pork uncovered, allowing the water to be absorbed. This process can take approximately 20-30 minutes, depending on the heat and the size of your pan. Stir occasionally to prevent sticking.
-
Rendering Fat: As the water evaporates, the pork will begin to render its own fat. This fat will then be used to fry the chicharrón.
-
Frying Stage: Continue cooking the meat in its own rendered fat. This is the crucial stage where the chicharrón transforms into crispy, golden-brown perfection. Monitor the heat to prevent burning.
-
Achieving Crispness: Continue cooking the meat until it is crispy and brown, but not burned. This may require adjusting the heat as needed. The pieces should be uniformly golden brown and have a crackling texture.
-
Removing and Draining: Once the chicharrón is cooked to your liking, carefully remove it from the pan using a slotted spoon or tongs.
-
Draining Excess Oil: Place the cooked chicharrón on a plate lined with paper towels to drain the excess oil. Allow it to cool slightly before serving.
-
Serving: Serve the chicharrón hot, ideally with wedges of fresh lime and your favorite hot sauce (optional).
Expert Tips & Tricks
- Pork Selection: The type of pork you choose significantly impacts the final product. Pork belly offers a balance of meat and fat, resulting in a richer, more flavorful chicharrón. Pork skins produce a lighter, crispier version. Experiment to find your preferred cut.
- Even Cooking: Ensure even cooking by cutting the pork into uniform sizes. This will prevent some pieces from overcooking while others remain undercooked.
- Temperature Control: Mastering the heat is key to achieving the perfect crispness without burning. Start with medium-high heat to render the fat, then adjust as needed to maintain a steady frying temperature.
- Don’t overcrowd the pan: If you’re making a large batch, fry the chicharrón in batches to avoid overcrowding the pan. Overcrowding lowers the oil temperature and can result in soggy chicharrón.
- Crispness Check: To test for crispness, remove a piece and allow it to cool slightly. If it’s still pliable, it needs more time in the hot fat.
- Spice It Up: While the basic recipe is simple, feel free to experiment with additional seasonings. A pinch of smoked paprika, garlic powder, or onion powder can add depth of flavor.
Serving & Storage Suggestions
Dominican chicharrón is best enjoyed fresh and hot. Serve it as an appetizer, a snack, or as part of a larger Dominican feast alongside dishes like arroz con gandules (rice with pigeon peas) and tostones (fried plantains). Leftover chicharrón can be stored in an airtight container at room temperature for up to 2 days, or in the refrigerator for up to a week. To reheat, spread the chicharrón on a baking sheet and bake at 350°F (175°C) until crispy, or briefly reheat in a skillet over medium heat. Note that reheated chicharrón may not be as perfectly crispy as freshly fried.
Nutritional Information
Note: Nutritional information can vary depending on the specific cut of pork and cooking method. The following is an estimate.
| Nutrient | Amount per Serving | % Daily Value |
|---|---|---|
| Calories | 600 kcal | 30% |
| Total Fat | 50g | 77% |
| Saturated Fat | 20g | 100% |
| Cholesterol | 150mg | 50% |
| Sodium | 1500mg | 63% |
| Total Carbohydrate | 0g | 0% |
| Dietary Fiber | 0g | 0% |
| Sugars | 0g | 0% |
| Protein | 35g | 70% |
Variations & Substitutions
- Spicy Chicharrón: Add a pinch of red pepper flakes or a dash of cayenne pepper to the pork during the initial cooking stage for a spicy kick.
- Garlic Chicharrón: Mince several cloves of garlic and add them to the pan during the frying stage for a flavorful twist.
- Citrus Infusion: Experiment with different citrus juices, such as orange or grapefruit, instead of lime for a unique flavor profile.
- Herb Variations: Try using different herbs like thyme, rosemary, or cilantro in addition to or instead of oregano.
FAQs (Frequently Asked Questions)
Q: Can I use an air fryer to make chicharrón?
A: Yes, you can! Air frying can be a healthier alternative. Cook at 400°F (200°C) for approximately 20-25 minutes, flipping halfway through, until crispy. Be sure to drain any excess fat that accumulates in the air fryer basket.
Q: How do I prevent the chicharrón from burning?
A: Control the heat carefully and stir frequently. If the chicharrón starts to brown too quickly, reduce the heat immediately.
Q: What if I don’t have oregano?
A: While oregano is traditional, you can substitute it with other dried herbs like marjoram or an Italian herb blend.
Q: Can I make chicharrón in advance?
A: While best enjoyed fresh, you can make chicharrón a few hours ahead of time. Store it in a warm oven (around 200°F or 95°C) to maintain its crispness.
Q: The chicharrón is too salty. What can I do?
A: Unfortunately, it’s difficult to remove salt once it’s been added. Next time, start with a smaller amount of salt and adjust to taste. You can serve the chicharrón with something that complements the saltiness, like avocado.
Final Thoughts
Making Dominican chicharrón is a journey of culinary exploration – a chance to connect with tradition, experiment with flavors, and create something truly special. Don’t be intimidated by the process; embrace the sizzle, the aroma, and the satisfying crunch. I encourage you to try this recipe and make it your own. Share your creations with friends and family, and let the flavors of the Dominican Republic transport you to a sunny roadside colmado. Buen provecho!