
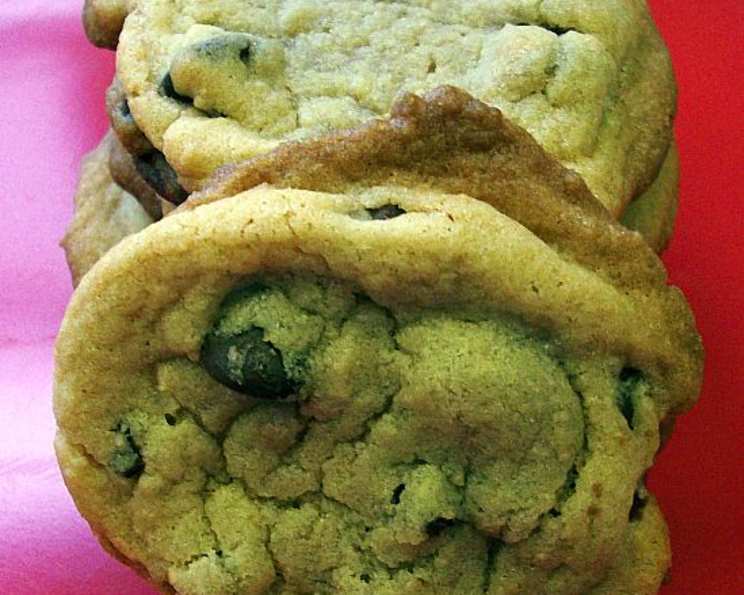
Double Chocolate Chip Cookies: A Baker’s Delight
The scent of freshly baked chocolate chip cookies – it’s a time machine in olfactory form. One whiff, and I’m transported back to my grandmother’s kitchen, a warm and inviting haven where every crisis could be solved with a plate of her homemade cookies. Her secret? A double dose of chocolate, of course! The memory of those soft, intensely chocolatey cookies, still warm from the oven, is what inspired this recipe. This is my attempt to capture that magic, to recreate those cherished moments of pure, unadulterated joy, one delicious bite at a time.
Recipe Overview
- Prep Time: 15 minutes
- Cook Time: 12-14 minutes
- Total Time: Approximately 30 minutes
- Yields: About 36 Cookies
- Dietary Type: Not specified
Ingredients
- 3 1/4 cups all-purpose flour
- 1 teaspoon baking soda
- 1 teaspoon kosher salt
- 1 cup sugar
- 1 cup dark brown sugar, packed
- 2/3 cup unsalted butter, softened
- 2/3 cup vegetable shortening
- 2 large eggs
- 2 teaspoons vanilla
- 2 cups semi-sweet chocolate chips
- 1/2 cup milk chocolate chips
Equipment Needed
- Mixing Bowls
- Measuring Cups and Spoons
- Hand Mixer
- Cookie Scoop (2 tbs per scoop)
- Baking Sheets
- Wire Rack
Instructions
-
Begin by preheating your oven to 350°F (175°C). This ensures even baking and prevents the cookies from spreading too thin.
-
In a medium-sized mixing bowl, whisk together the all-purpose flour, baking soda, and kosher salt. This combines the dry ingredients, ensuring even distribution throughout the batter. Set this bowl aside for later.
-
In a large mixing bowl, combine the softened unsalted butter, vegetable shortening, sugar, and packed dark brown sugar.
-
Using a hand mixer on a low speed, initially combine the wet ingredients. Once they start to incorporate, increase the speed to high and beat until the mixture is fluffy and the color lightens. This process, called creaming, is crucial for creating a tender and light cookie. It incorporates air into the batter, which contributes to a softer texture.
-
Add the eggs one at a time, mixing well after each addition, followed by the vanilla extract.
-
Gradually stir the dry flour mixture into the creamed mixture until just combined and no flour is visible. Be careful not to overmix. Overmixing develops the gluten in the flour, resulting in a tough cookie.
-
Now, gently stir in the semi-sweet chocolate chips and milk chocolate chips. Distribute them evenly throughout the dough.
-
Use a cookie scoop (approximately 2 tablespoons per scoop) to measure and drop the dough onto an ungreased baking sheet, spacing the cookies about 2 inches apart. This allows for even spreading during baking.
-
Bake on the center rack of the preheated oven for 12-14 minutes, or until the cookies are lightly browned and the edges are set. Keep a close eye on them to prevent burning. The baking time may vary depending on your oven, so start checking for doneness around the 12-minute mark.
-
Remove the baking sheet from the oven and leave the cookies on the sheet for 2 minutes to firm up slightly. This prevents them from breaking when transferring.
-
Carefully transfer the cookies to a wire rack to cool completely. This allows air to circulate, preventing the cookies from becoming soggy.
-
If you are reusing the warm baking sheet, reduce the baking time slightly for the subsequent batches to avoid over-baking.
Expert Tips & Tricks
- Room Temperature Ingredients: Ensure that your butter and eggs are at room temperature. This helps them incorporate more easily into the batter, resulting in a smoother and more consistent dough.
- Chill the Dough: For a slightly chewier cookie, chill the dough in the refrigerator for at least 30 minutes before baking. This allows the gluten to relax and prevents excessive spreading.
- Salt Enhancement: A pinch of flaky sea salt sprinkled on top of the cookies immediately after baking enhances the sweetness and chocolate flavor.
- Baking Sheet Prep: Consider lining your baking sheets with parchment paper or silicone baking mats. This prevents sticking and makes cleanup a breeze.
- Don’t Overbake: These cookies are best when they are slightly underbaked. They will continue to firm up as they cool.
- Nut Addition: For an extra layer of flavor and texture, consider adding 1/2 cup of chopped nuts (walnuts, pecans, or macadamia nuts) to the dough along with the chocolate chips.
Serving & Storage Suggestions
These Double Chocolate Chip Cookies are best enjoyed warm, straight from the oven. Serve them with a cold glass of milk, a scoop of vanilla ice cream, or a warm cup of coffee.
To store, place cooled cookies in an airtight container at room temperature. They will stay fresh for up to 3-4 days. For longer storage, you can freeze the cookies for up to 2 months. Thaw at room temperature before serving. You can also freeze the cookie dough. Scoop individual cookies onto a baking sheet and freeze until solid, then transfer to a freezer bag. Bake directly from frozen, adding a few minutes to the baking time.
Nutritional Information
(Note: These values are estimates and can vary based on specific ingredients used.)
| Nutrient | Amount per Serving | % Daily Value |
|---|---|---|
| Calories | 211.5 kcal | N/A |
| Calories from Fat | 99 g | 47% |
| Total Fat | 11.1 g | 17% |
| Saturated Fat | 5.5 g | 27% |
| Cholesterol | 19.9 mg | 6% |
| Sodium | 108.8 mg | 4% |
| Total Carbohydrate | 27.6 g | 9% |
| Dietary Fiber | 0.9 g | 3% |
| Sugars | 17.8 g | 71% |
| Protein | 2.1 g | 4% |
Variations & Substitutions
- Gluten-Free: Substitute the all-purpose flour with a gluten-free blend. You may need to add a binder, such as xanthan gum, to help with the texture.
- Vegan: Replace the butter with a vegan butter alternative and the eggs with flax eggs (1 tablespoon of ground flaxseed mixed with 3 tablespoons of water per egg). Ensure the chocolate chips are also vegan.
- Different Chocolate: Experiment with different types of chocolate chips, such as dark chocolate, white chocolate, or even peanut butter chips.
- Spice it Up: Add a pinch of cinnamon, nutmeg, or chili powder to the dough for a warm and spicy twist.
- Extract Experiment: Replace the vanilla extract with almond extract, peppermint extract, or orange extract for a different flavor profile.
- Oatmeal Addition: Add 1/2 cup of rolled oats to the dough for a chewier and more wholesome cookie.
FAQs (Frequently Asked Questions)
Q: Why are my cookies flat?
A: Flat cookies can be caused by using melted butter instead of softened butter, not measuring flour correctly, or the oven temperature being too low. Make sure your butter is softened but not melted, accurately measure your flour, and ensure your oven is properly preheated.
Q: Can I use salted butter instead of unsalted butter?
A: Yes, you can, but reduce the amount of kosher salt in the recipe to 1/2 teaspoon to avoid overly salty cookies.
Q: Can I make the dough ahead of time?
A: Absolutely! The cookie dough can be made ahead of time and stored in the refrigerator for up to 2 days or frozen for up to 2 months.
Q: How do I keep my cookies soft?
A: To keep your cookies soft, store them in an airtight container with a slice of bread. The bread will absorb moisture and keep the cookies from drying out.
Q: What is vegetable shortening and can I substitute it?
A: Vegetable shortening is a type of solid fat often used in baking to create a tender and moist texture. You can substitute it with more softened butter, but the texture of the cookie may be slightly different.
Final Thoughts
These Double Chocolate Chip Cookies are more than just a treat; they’re a reminder of simpler times, of warmth, and of shared moments. I encourage you to try this recipe, experiment with different variations, and make it your own. Baking is an art, and every batch is a new opportunity to create something special. So, gather your ingredients, preheat your oven, and let the sweet aroma of chocolate fill your kitchen. Don’t forget to share your creations with loved ones and spread the joy of homemade cookies! And if you have any questions or suggestions, feel free to leave a comment below. Happy baking!