
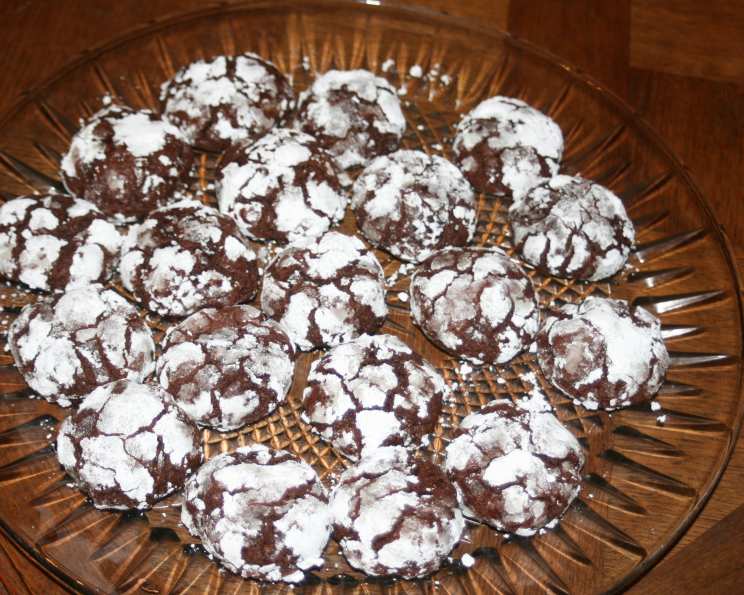
Double Chocolate Snowquakes: A Winter Wonderland in Every Bite
The first time I tasted these cookies, it was a blustery December evening. Snow was swirling outside, blurring the streetlights into hazy halos. My grandmother, a woman whose kitchen was always a source of warmth and magic, pulled a tray of these beauties from the oven. The aroma alone – a symphony of rich cocoa and sweet vanilla – was enough to chase away the winter chill. But then came the taste: a soft, almost fudgy center, a delicate crackled exterior dusted with powdered sugar, and a burst of melted chocolate chips. They looked like miniature snow-covered landscapes, hence the name: Double Chocolate Snowquakes. I knew then and there that these were more than just cookies; they were edible memories waiting to be made.
Recipe Overview
- Prep Time: 20 minutes
- Cook Time: 10 minutes
- Total Time: 30 minutes
- Servings: About 36 cookies
- Yield: 3 dozen cookies
- Dietary Type: Not specified
Ingredients
- 1 ½ cups flour
- ¾ cup cocoa
- 2 teaspoons baking powder
- ¾ teaspoon salt
- ½ cup unsalted butter, softened
- ¾ cup packed brown sugar
- ¼ cup white sugar
- 2 large eggs
- 1 teaspoon vanilla extract
- 1 ¼ cups milk chocolate chips
- Powdered sugar, for rolling
Equipment Needed
- Mixing bowls
- Electric mixer (handheld or stand mixer)
- Measuring cups and spoons
- Cookie sheets
- Parchment paper
- Cooling rack
Instructions
-
First, prepare the dry ingredients. In a medium-sized mixing bowl, whisk together the flour, cocoa, baking powder, and salt. This ensures that the baking powder and salt are evenly distributed throughout the flour mixture, which is crucial for a consistent texture and rise.
-
In a separate, larger bowl, cream the softened butter until it is light and fluffy. This step is key for creating a tender cookie. Using an electric mixer, beat the butter on medium speed for about 2-3 minutes until it looks pale and airy. Make sure your butter is truly softened but not melted; otherwise, your cookies may spread too thin.
-
Gradually add the brown sugar and white sugar to the creamed butter. Continue beating until the mixture is well combined and fluffy. The sugars should be fully incorporated into the butter, creating a smooth and homogenous mixture. This step helps to dissolve the sugar granules, which contributes to the overall texture of the cookie.
-
Beat in the eggs one at a time, followed by the vanilla extract. Mix until everything is thoroughly combined. It’s important to scrape down the sides of the bowl after each addition to ensure that all the ingredients are evenly incorporated. This prevents pockets of unmixed ingredients and ensures a consistent batter.
-
Gradually add the flour mixture to the butter mixture, beating on low speed until just combined. Be careful not to overmix the dough, as this can develop the gluten in the flour and result in tough cookies. Mix until the flour is just incorporated, and then stop mixing.
-
Stir in the milk chocolate chips. Distribute them evenly throughout the dough. This is best done by hand to prevent the chocolate chips from breaking.
-
Cover the bowl with plastic wrap and chill the dough in the refrigerator for at least 1 hour. Chilling the dough is crucial for preventing the cookies from spreading too thin during baking. It also allows the flavors to meld together, resulting in a richer and more flavorful cookie.
-
Preheat your oven to 350°F (175°C). Line your cookie sheets with parchment paper. Parchment paper prevents the cookies from sticking to the baking sheets and makes cleanup easier.
-
Shape the dough into 1 tablespoon-sized balls. Roll each ball in powdered sugar, coating it generously. The powdered sugar will create the signature crackled appearance on the cookies.
-
Place the powdered sugar-coated dough balls onto the prepared cookie sheets, leaving about 2 inches of space between each cookie to allow for spreading.
-
Bake the cookies for 10 minutes, or until the edges are set and the tops are lightly cracked. Keep a close eye on the cookies while they are baking, as baking times may vary depending on your oven.
-
Remove the cookies from the oven and transfer them to a wire rack to cool completely. The cookies will continue to set as they cool.
Expert Tips & Tricks
- Soft Butter is Key: Make sure your butter is softened but not melted. Melted butter will cause the cookies to spread too thin.
- Don’t Overmix: Overmixing the dough will develop the gluten in the flour, resulting in tough cookies. Mix until the flour is just incorporated.
- Chill Out: Chilling the dough is crucial for preventing the cookies from spreading too thin and for enhancing the flavor. Don’t skip this step!
- Powdered Sugar Power: Don’t be shy with the powdered sugar. A generous coating will create the best crackled effect.
- Variations: Try using different types of chocolate chips, such as dark chocolate or white chocolate, to customize the flavor.
Serving & Storage Suggestions
Serve these Double Chocolate Snowquakes warm or at room temperature with a glass of cold milk or a cup of hot cocoa. They are also delicious with a scoop of vanilla ice cream. Store the cooled cookies in an airtight container at room temperature for up to 3 days. For longer storage, you can freeze the cookies for up to 2 months. Thaw them at room temperature before serving. You can also freeze the unbaked dough balls. When ready to bake, simply thaw them slightly and bake as directed, adding a minute or two to the baking time.
Nutritional Information
| Nutrient | Amount per Serving | % Daily Value |
|---|---|---|
| Calories | 110 kcal | 6% |
| Total Fat | 5g | 6% |
| Saturated Fat | 3g | 15% |
| Cholesterol | 15mg | 5% |
| Sodium | 70mg | 3% |
| Total Carbohydrate | 15g | 5% |
| Dietary Fiber | 1g | 4% |
| Sugars | 9g | |
| Protein | 1g | 2% |
Note: Nutritional information is an estimate and may vary based on specific ingredients and portion sizes.
Variations & Substitutions
- Gluten-Free: Use a gluten-free flour blend instead of regular flour. Be sure to choose a blend that is formulated for baking.
- Dairy-Free: Substitute the unsalted butter with a dairy-free butter alternative. Use dairy-free chocolate chips.
- Nutty Snowquakes: Add ½ cup of chopped nuts, such as walnuts or pecans, to the dough for added flavor and texture.
- Peppermint Twist: Add ¼ teaspoon of peppermint extract to the dough for a festive holiday flavor.
FAQs (Frequently Asked Questions)
Q: Why are my cookies spreading too thin?
A: This is usually caused by using butter that is too soft or not chilling the dough long enough. Make sure your butter is softened but not melted and chill the dough for at least an hour.
Q: Can I use dark chocolate chips instead of milk chocolate chips?
A: Absolutely! Dark chocolate chips will give the cookies a richer, more intense chocolate flavor.
Q: How do I store these cookies to keep them fresh?
A: Store the cooled cookies in an airtight container at room temperature for up to 3 days or freeze them for longer storage.
Q: Can I make the dough ahead of time?
A: Yes, the dough can be made up to 2 days in advance and stored in the refrigerator. You may need to let it sit at room temperature for a few minutes before rolling.
Q: What if I don’t have parchment paper?
A: You can grease the cookie sheets with butter or cooking spray instead of using parchment paper, but parchment paper is recommended for easy cleanup and to prevent sticking.
Final Thoughts
These Double Chocolate Snowquakes are more than just a cookie; they’re a delightful experience, perfect for sharing with loved ones during the holidays or any time you need a little comfort. The combination of rich chocolate, soft texture, and crackled powdered sugar topping makes them irresistible. So, gather your ingredients, preheat your oven, and get ready to create some edible winter magic. Don’t hesitate to experiment with different variations and share your creations with friends and family. And most importantly, enjoy the process of baking and savoring these delicious treats!